

Whether a blog or website captivates readers often hinges heavily on rich visual storytelling. Furthermore, because one of our editorial founders is a patent engineer, we place immense importance on the intellectual property rights of every line of text, picture, and photo. Beyond using images licensed under CC (Creative Commons) for commercial use, the vast majority of photos are original works shot by our team.
Confession first: Since this site is run by a bunch of slackers, posting text without pictures is practically our standard operating procedure.
Taking photos in the moment is pure joy, but organizing them afterward is a daunting undertaking. In addition to basic digital darkroom processing, manually embedding copyright notices (such as creator details, graphic watermarks, etc.) onto every single uploaded image consumes an enormous amount of time.
If it’s just one or two photos, that’s manageable; but when an article features dozens or even hundreds of images, it’s enough to make you throw your hands up and crack open a beer instead.
When purely sharing photographic work, I usually embed an unobtrusive watermark containing my personal info and website details during the post-processing phase.
Later on, I discovered a practical solution: when writing posts in Microsoft’s Windows Live Writer (WLW) offline blog editor, you can take advantage of the built-in watermarking feature whenever you upload images. Embedding creator attribution directly into images through this automated workflow saves substantial amounts of precious time.
Although it currently supports only single-line copyright notices, it avoids cluttering or detracting from the overall visual composition.
Next, let me walk you through how to use this nifty feature in Microsoft’s powerful tool. In fact, all the watermarks on the images throughout this article were created using this exact feature.
Watermark Usage and Step-by-Step Tutorial
Figure 1: Windows Live Writer editing interface.
 Figure 1: Windows Live Writer editing interface.
Figure 2: The WLW Picture Tools toolbar, which appears automatically when an image is selected and remains hidden otherwise.
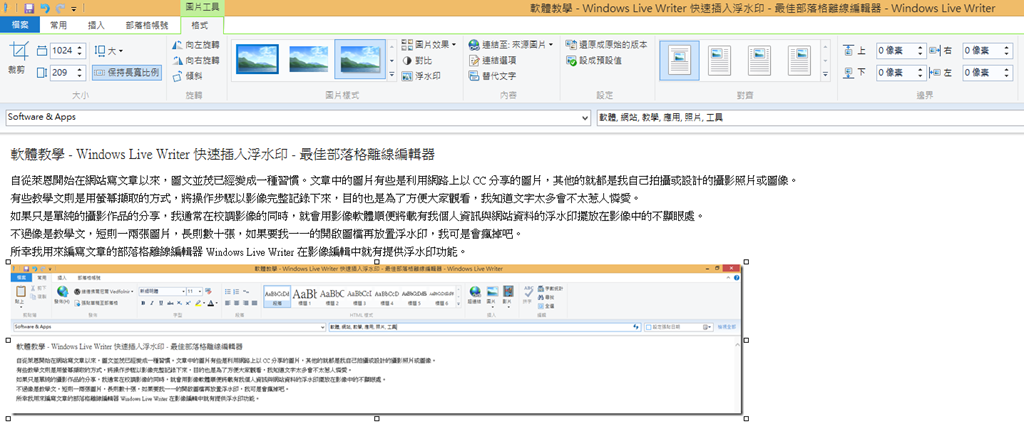 Figure 2: WLW Picture Tools toolbar.
Figure 3: The Watermark configuration button.
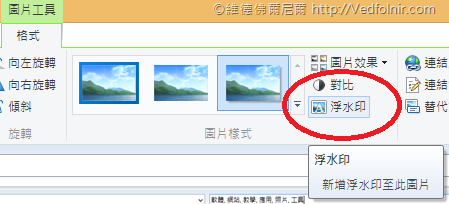 Figure 3: Watermark button.
Figure 4: The watermark options dialog that pops up after clicking the button.
In this options dialog, beyond adjusting Font and Size, you can place the watermark in five positions: “Top Left, Top Right, Bottom Left, Bottom Right, or Center.”
These settings can be fine-tuned according to the visual presentation of each image.
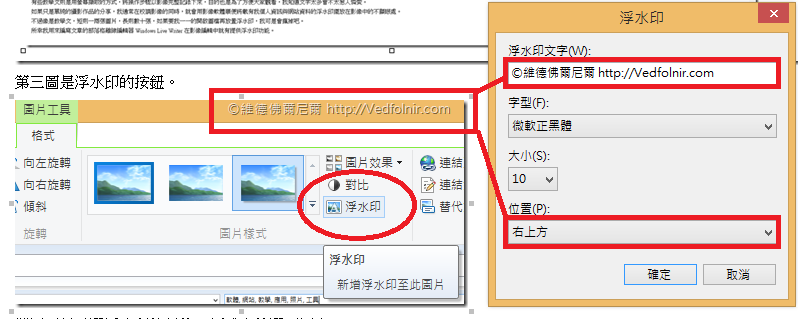 Figure 4: Watermark options dialog.
Advanced Tips
Once you finish adding a watermark to one image, you might find that adding a watermark to a second image forces you to configure everything all over again from scratch.
Someone once remarked that laziness is the true engine of human progress, and I certainly have no desire to tediously repeat watermark settings for every individual photo.
Fortunately, Windows Live Writer already anticipated this need.
Figure 5 shows a feature within the WLW Picture Tools: “Set as default.”
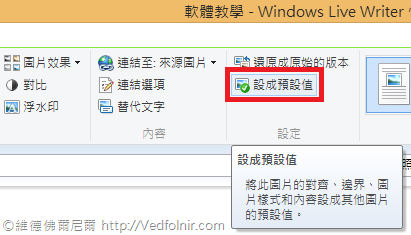 Figure 5: Set as default.
Figure 6 illustrates the workflow.
After completing the watermark configuration described earlier, simply click the “Set as default” button.
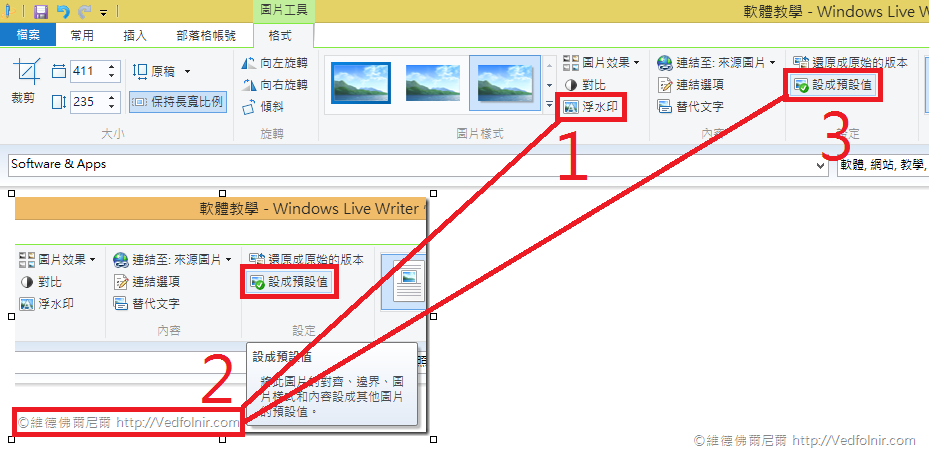 Figure 6: Configuration workflow.
Figure 7 demonstrates how WLW can automatically apply watermarks according to your default settings upon inserting new images. The watermark content matches your previous settings and is saved for all subsequent uploads.
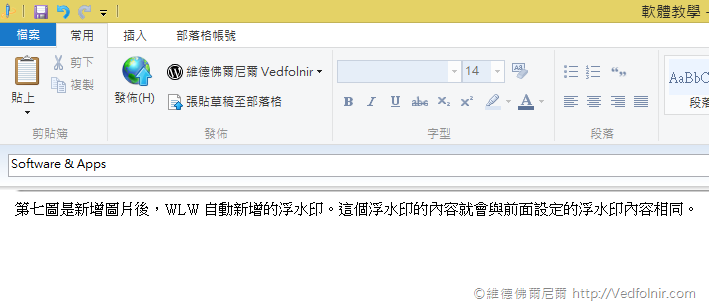 Figure 7: Automatic watermarking workflow.
Once watermarks are applied, if you ever wish to tweak the text, simply select the watermarked image and click the watermark button again. The dialog will load your current settings, allowing you to modify them easily.
For instance, the watermark placement in Figure 7 differs from Figure 5 because I adjusted it to fit the background composition of that specific image.
Helpful tip: Content-scraping scraper sites are increasingly common on the web. They build scrapers to harvest articles en masse from popular blogs, republish them on their own domains, and even audaciously claim copyright ownership. Applying subtle watermarks using this trick serves as a helpful deterrent against such scrapers.
Further Reading:
- While I make every effort to respect and protect creators’ attribution rights, the nature of web media means oversights occasionally happen. Yet far worse than difficult-to-trace creative works is the deplorable behavior of individuals who deliberately scrub creator credits using image editing software, or worse, slap their own advertising banners onto other people’s photos. Such piracy has become all too frequent across the internet. A foreign photographer once told me that plastering text or logos across photos ruins the aesthetic appeal without truly deterring thieves; if someone actually infringes, simply taking them to court is the way to go. (That fellow made a fortune doing so, but that was in a foreign legal jurisdiction!) Thinking it over, whether or not to stamp personal details onto images might not be worth stressing over after all.
- Introduction and Tutorial on Windows Live Writer 2012 Offline Blog Editor for WordPress (Also Works for Blogger).
- WordPress App: Dedicated Offline Mobile and Tablet Blog Editor for iOS and Android.
Support Independent Perspectives & In-Depth Insights
Every thoughtful analysis and candid critique comes from our dedication to truth and quality. We choose not to follow sensational algorithms or clickbait headlines.
Sustaining independent research requires reader support. Make a one-time or monthly contribution, securely processed by Google.
Payments secured by Google · Manage or cancel anytime in your Google Account


Comments