

If you keep the great habit of publishing blog posts and articles online, Microsoft’s Windows Essentials Live Writer 2012 blog editing software is one of the absolute best desktop tools (and seemingly one of the very few) to craft posts and express your thoughts.
Beyond serving as a WYSIWYG text editor, the standout feature of Windows Live Writer (WLW) is its ability to seamlessly insert images and upload them directly to your blogging engine, such as WordPress or Blogger. This completely bypasses the frustration of drafting online and having to upload and position photos one by one. WLW even includes an automatic image watermarking feature[2], making it effortless to protect your intellectual property.
Windows Live Writer 2012 (WLW 2012) supports Google’s Blogger / Blogspot, self-hosted WordPress, and numerous other standard blogging APIs. For serious bloggers, Windows Live Writer has long been an indispensable document authoring tool, even surpassing Microsoft Office in everyday utility.
Windows Live Writer 2012 Installation Guide
Obtaining the installer: You can obtain the official installer from Microsoft’s Windows Essentials portal shown in Figure 1 (refer to related reading[1] at the end of this article for links). The downloaded setup file is Wlsetup-Web.exe, measuring a mere 1.2 MB. It is essentially an installation stub / web downloader. Many major software vendors (such as Adobe) utilize stub downloaders to optimize bandwidth; however, if your network connection is unstable, their poor resume capabilities can test your patience.
 Figure 1: Microsoft Windows Essentials official website.
As shown in Figure 2, launching the downloaded setup file opens the component selection menu. I personally recommend “only” installing our target application: Writer. (Mysterious voice: Seeing Windows Live Messenger always brings a twinge of nostalgia.)
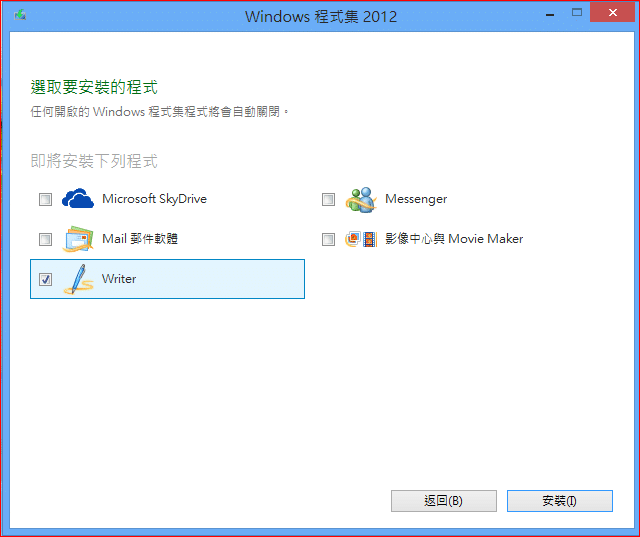 Figure 2: Component installation selection.
Important notice! If your Windows machine does not have Microsoft .NET Framework 3.0 pre-installed, you will encounter the prompt window shown in Figure 3 during setup. You must download and enable .NET first. The latest release in the 3.x series is Microsoft .NET Framework 3.5 Service Pack 1.
For a detailed step-by-step walkthrough on installing Microsoft .NET Framework 3.x, check out my companion article: “【Windows 8.x】Practical Microsoft .NET Framework 3.0/3.5 Installation Guide (Online OS Activation)”[4]. It explains how to enable the correct .NET runtime smoothly and painlessly.
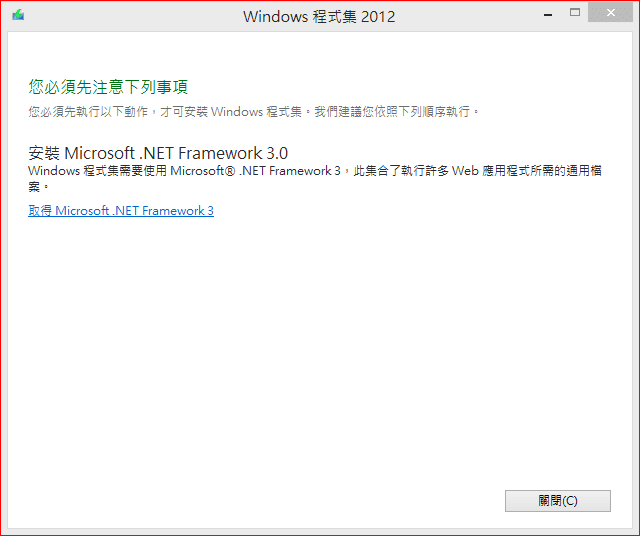 Figure 3: Microsoft .NET Framework 3.0 installation prompt.
Once the prerequisite .NET Framework is active, relaunch the previously downloaded Wlsetup-Web.exe file and follow the on-screen prompts. This time, installation will complete successfully, as shown in Figure 4.
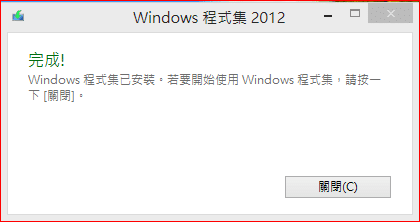 Figure 4: Windows Essentials installation completed.
Launching and Operating Windows Live Writer 2012
I will not dwell excessively on basic word processing features here. In keeping with Microsoft’s classic design ethos, the interface is clean, intuitive, and easy to pick up—barely more difficult than WordPad.
 Figure 5: Windows Live Writer 2012 welcome screen.
Figure 6 illustrates the primary workspace window of Windows Live Writer 2012, which follows a familiar Office-style ribbon layout. It is divided into four main sections: the top menu ribbon, the upper-middle categories, tags, and publishing date controls, the central authoring canvas, and the bottom view mode switcher (Edit, Preview, and Source Code) along with the status bar.
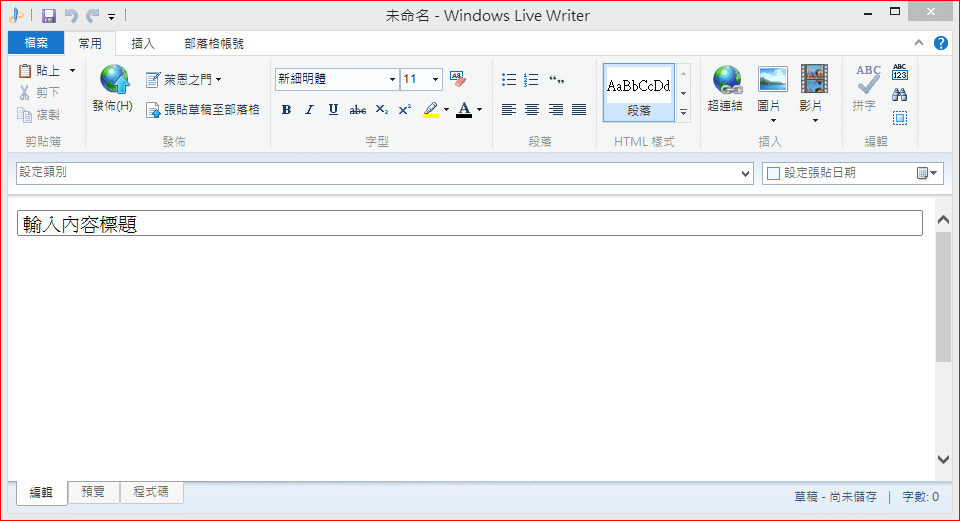 Figure 6: Primary workspace window.
File Menu: As shown in Figure 7, this view handles creating new posts, opening recent drafts, saving local copies, and publishing. While it provides numerous options, once initial setup is complete, you rarely need to tinker here.
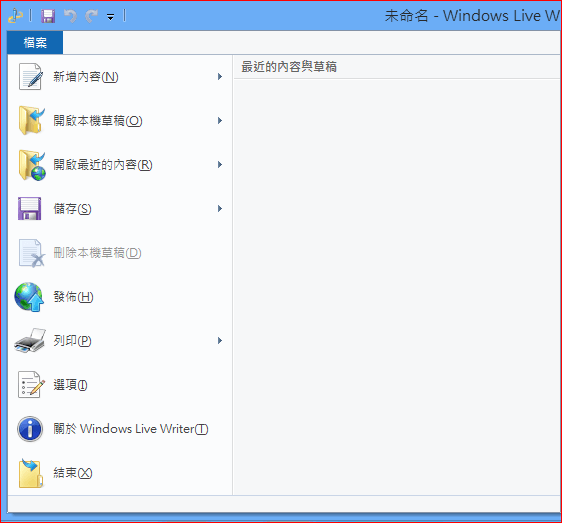 Figure 7: File menu.
Home Ribbon: This is the primary formatting toolbar, similar to Microsoft Word. It includes the Add Blog Account option, where you input your blog URL, username, and application password.
 Figure 8: Home ribbon menu.
Insert Ribbon: Provides tools for inserting hyperlinks, tables, images, video embeds, and third-party plugins. (I experimented with plugins in older releases, but the 2012 version includes robust native capabilities right out of the box.)
 Figure 9: Insert menu.
Blog Account Ribbon: One of the most useful menus. The “Blog Options” section lets you fine-tune remote publishing settings and API behaviors.
A quick tip: if after adding your blog, WLW’s workspace adopts your theme’s exact styling and looks cluttered or visually jarring, it is because WLW attempts to download your live blog theme stylesheet. To preserve a clean editing canvas, you can disable the “Blog Theme” toggle in this ribbon to restore a crisp, clean white page.
 Figure 10: Blog account ribbon.
WLW also features contextual formatting tools that appear only when specific elements (like images or video clips) are selected:
Figure 11 shows Example 1: Picture Tools, covering cropping, sizing, rotation, border styles, drop shadows, alignment, and margins.
 Figure 11: Picture tools.
Figure 12 shows Example 2: Video Tools, including online previews, dimensions, aspect ratio controls, margins, and alignment.
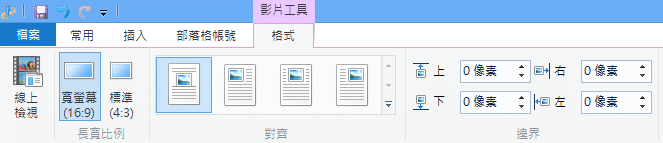 Figure 12: Video tools.
Related Reading & Appendix
- Microsoft Windows Live Writer 2009 & 2012 Download (Link).
- 【Tutorial】Quickly Insert Image Watermarks in WordPress Editor Windows Live Writer (Blogger Compatible).
- 【WordPress App】Dedicated Mobile & Tablet Offline Blog Editor (Google Android / Apple iOS).
- 【Windows 8.x】Practical Microsoft .NET Framework 3.0/3.5 Installation Guide (Online OS Activation).
- Update on 2014.04.10: Windows Live Writer 2012 only supports Windows 7, 8, and 8.1. If you are still running Windows XP, the official download provides Live Writer 2009. For Windows Vista, official downloads for WLW 2011 have been discontinued.
Support Independent Perspectives & In-Depth Insights
Every thoughtful analysis and candid critique comes from our dedication to truth and quality. We choose not to follow sensational algorithms or clickbait headlines.
Sustaining independent research requires reader support. Make a one-time or monthly contribution, securely processed by Google.
Payments secured by Google · Manage or cancel anytime in your Google Account


Comments