

If you are a webmaster managing your own server, a system administrator, or a long-time enthusiast of BBS (Bulletin Board System) communities in Taiwan—such as PTT or Tamkang Roll BBS—you are undoubtedly familiar with Port 23 and the underlying Telnet protocol.
The Telnet (Telecommunication Network) protocol is a foundational protocol in the TCP/IP suite and historically served as the primary standard for remote terminal login across the early internet.
However, starting with Windows Vista and Windows 7, Microsoft turned off the built-in Telnet Client by default for security considerations (as Telnet transmits traffic in unencrypted plain text). When typing telnet in a fresh Command Prompt window, the operating system responds that "**'telnet' is not recognized as an internal or external command**".
This guide walks through enabling this built-in capability in Windows 7, Windows 8, and Windows 10, followed by practical examples connecting to PTT and university BBS servers.
Step 1: Enable the Built-in Windows Telnet Client
Enabling Telnet does not require downloading any third-party software; simply turn the feature on within Windows:
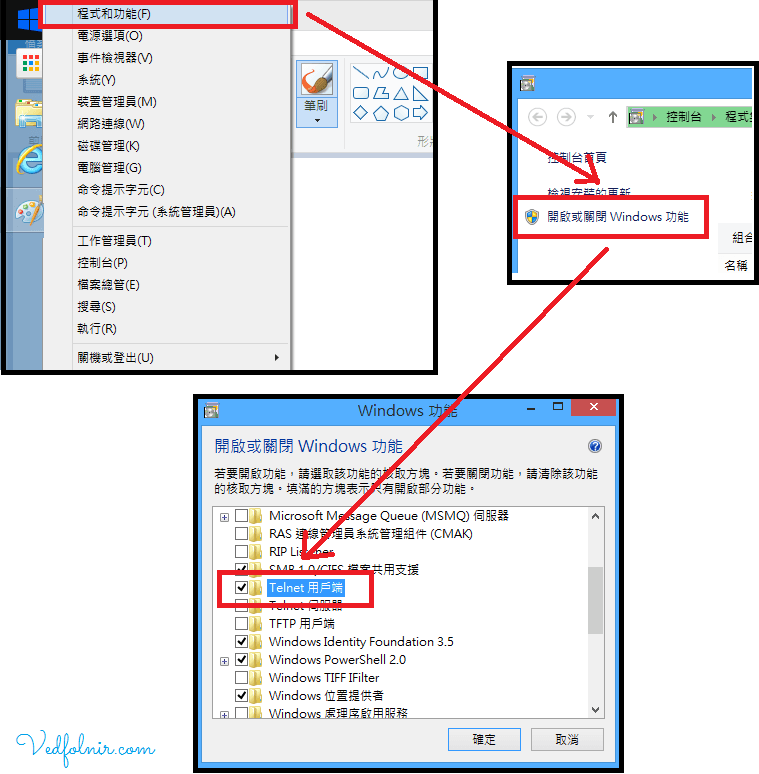
- Open Control Panel ➔ Click Programs (or “Programs and Features”).
- In the left sidebar, click Turn Windows features on or off.
- In the Windows Features dialog, scroll down and locate the Telnet Client entry.
- Check the box next to Telnet Client and click OK.
- Windows will take a few moments to install the necessary components. Once complete, click Close.
Step 2: Connection Testing and BBS Examples
Once Telnet is enabled, launch Command Prompt (CMD) to test remote connections.
1. Connecting to Tamkang University “Egg Roll” BBS
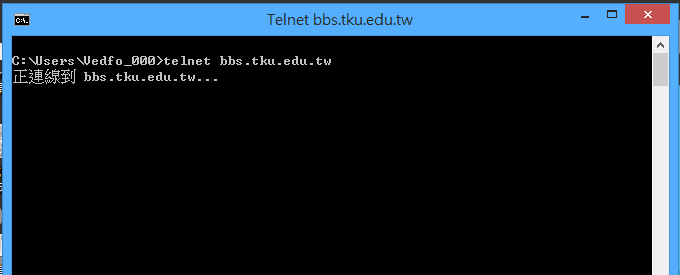
Press Win + R to open the Run dialog, type cmd, and press Enter. In the command prompt, enter:
telnet bbs.tku.edu.twPress Enter, and the system will establish a connection on Port 23, presenting the familiar BBS ASCII welcome screen.
2. Connecting to PTT Bulletin Board System
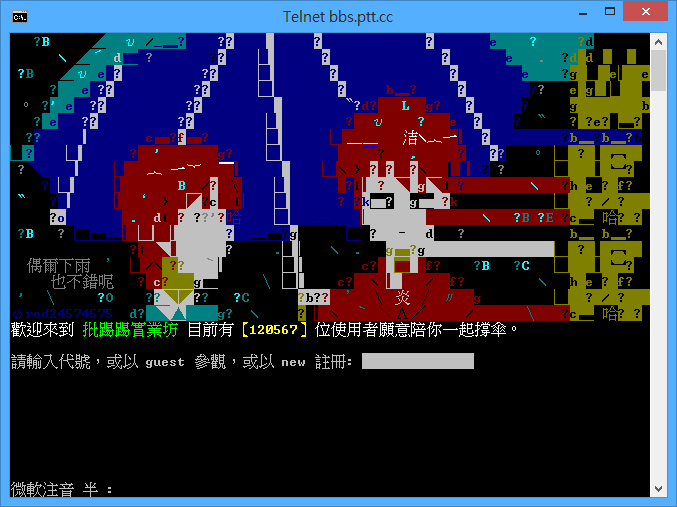
Similarly, to log in to PTT, the largest BBS board in Taiwan, simply type:
telnet ptt.ccUpon successful connection, the classic PTT login screen appears. Enter your account and password to begin browsing.
Telnet Security Reminders
While the Telnet client is handy for testing remote TCP port connectivity (such as verifying whether web ports 80 or 443 are reachable: telnet example.com 80) and accessing legacy BBS platforms, always remember: Telnet transmits credentials, passwords, and all session data in unencrypted cleartext.
On modern public networks, avoid entering sensitive administrative credentials over Telnet. For remote server management, always prioritize the encrypted SSH (Secure Shell) protocol to maintain security integrity.
Support Independent Perspectives & In-Depth Insights
Every thoughtful analysis and candid critique comes from our dedication to truth and quality. We choose not to follow sensational algorithms or clickbait headlines.
Sustaining independent research requires reader support. Make a one-time or monthly contribution, securely processed by Google.
Payments secured by Google · Manage or cancel anytime in your Google Account




Comments