
After installing the latest Microsoft Windows Pro operating system, I noticed my PC was noticeably sluggish. Checking my system configuration, I realized why: my primary system drive (C:) was completely choked in red, with almost zero free storage remaining (see Figure 1).
Investigating directory sizes on drive C:, I found that unless performing a clean, formatted reinstallation, Windows OS upgrades automatically migrate files from your prior installation into an archive folder named Windows.old.
This is genuinely a thoughtful precaution by Microsoft, preventing users from losing important files during an OS upgrade.
 Figure 1: Full hard drive with virtually no free space remaining.
However, an archive of an entire operating system consumes tens of gigabytes. Once you have verified that all essential personal files, photos, and documents have been safely backed up or migrated, removing the Windows.old folder will free up a massive amount of valuable disk space.
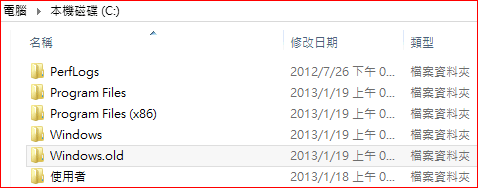 Figure 2: C: drive and the Windows.old directory.
Keep in mind, however, that Windows.old is not an ordinary folder. You cannot simply delete it using the standard Delete key or context menu.
As shown in Figure 3, attempting to delete it directly in File Explorer will trigger an access denied permission error.
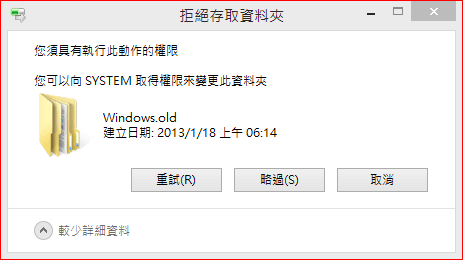 Figure 3: Access denied error when attempting to delete Windows.old directly.
To safely and completely remove the Windows.old folder, follow Microsoft’s official Disk Cleanup method below. It is fast, clean, and guaranteed to work without system corruption.
How to Safely Remove the Windows.old Backup Folder
Microsoft has integrated the removal of Windows.old directly into its traditional Disk Cleanup utility. However, for security and data safety reasons, the option is tucked behind administrative privileges, requiring a few specific steps to reveal.
Caution: This operation is irreversible. Files deleted from Windows.old bypass the Recycle Bin completely. Ensure that all your personal documents and critical files are fully backed up before proceeding.
Step 1: Open Disk Cleanup
On the desktop interface, press the Windows key  (or Command on a Mac keyboard) + R to bring up the Run dialog. Type
cleanmgr.exe into the input box and click OK.
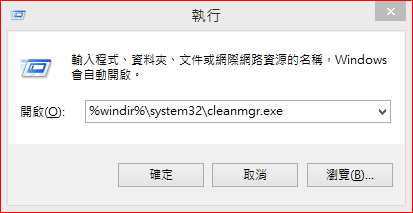 Figure 4: Windows Run dialog.
Step 2: Select the Drive
When the “Disk Cleanup: Drive Selection” dialog appears, select the drive containing your Windows.old folder (typically drive C:) from the drop-down menu, and click OK.
The utility will scan the drive and calculate space usage.
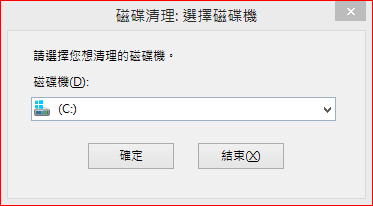 Figure 5: Disk Cleanup drive selection.
Step 3: Click “Clean up system files”
Once the initial scan completes, the primary Disk Cleanup window will appear.
Click the Clean up system files button located at the bottom left of the window.
If prompted by User Account Control (UAC), click Yes to grant administrative permissions.
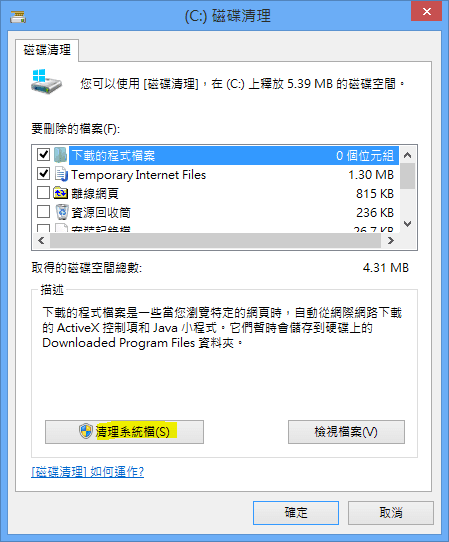 Figure 6: Disk Cleanup primary screen.
Step 4: Re-select the System Drive
After authorizing administrative access, the drive selection prompt will reappear. Select the drive containing Windows.old (drive C:) once more and click OK.
The application is now running with elevated administrator rights, allowing deep system maintenance.
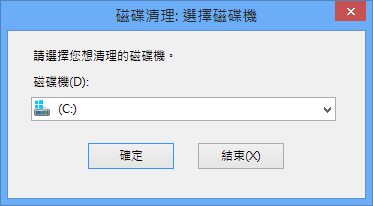 Figure 7: Disk Cleanup running with administrator privileges.
Step 5: Check “Previous Windows installation(s)”
With elevated permissions, the checklist will now reveal additional system categories. Notice that the “Clean up system files” button has disappeared, confirming you are in system cleanup mode.
Scroll down the list, check the box for Previous Windows installation(s), and click OK. The deletion process will begin automatically.
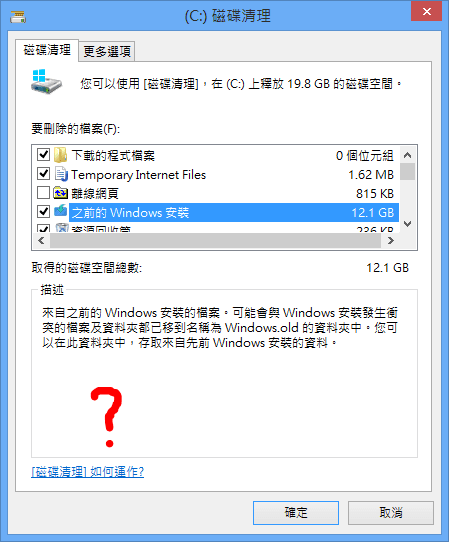 Figure 8: Selecting Previous Windows installation(s).
Finally, return to File Explorer to verify that Windows.old has been completely removed. Your primary drive will regain its healthy free space!
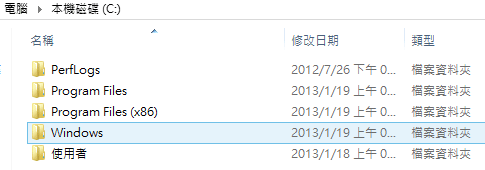 Figure 9: Verification of successful removal of the Windows.old folder.
Further Reading
- Microsoft Store.
- Windows 8 Release Preview Evaluation Copy Has Expired.
- Simple Method to Install Microsoft .NET Framework 3.0 / 3.5 in Windows 8.
Support Independent Perspectives & In-Depth Insights
Every thoughtful analysis and candid critique comes from our dedication to truth and quality. We choose not to follow sensational algorithms or clickbait headlines.
Sustaining independent research requires reader support. Make a one-time or monthly contribution, securely processed by Google.
Payments secured by Google · Manage or cancel anytime in your Google Account


Comments