
While WordPress is one of the most accessible and flexible Content Management Systems (CMS) available, certain features often fail due to hosting server restrictions. The most common issue is that default PHP mail() outbound email functionality is disabled on many Linux servers to prevent spam abuse.
While disabling server-level mail functions protects host IP reputations, it causes significant problems for site administrators: password reset emails, comment notifications, and visitor inquiries fail to reach inboxes, frequently disappearing into spam folders or blacklists.
The WordPress plugin Gmail SMTP provides an exceptional solution. By configuring the plugin with Google API OAuth 2.0 application credentials, your site routes transactional emails through Google’s trusted infrastructure, ensuring high delivery rates without storing raw email passwords in your database.
Step-by-Step Installation and Setup Guide
Step 1: In your WordPress dashboard, navigate to Plugins > Add New, search for “Gmail SMTP” (authored by naa986), and click Install Now and Activate.
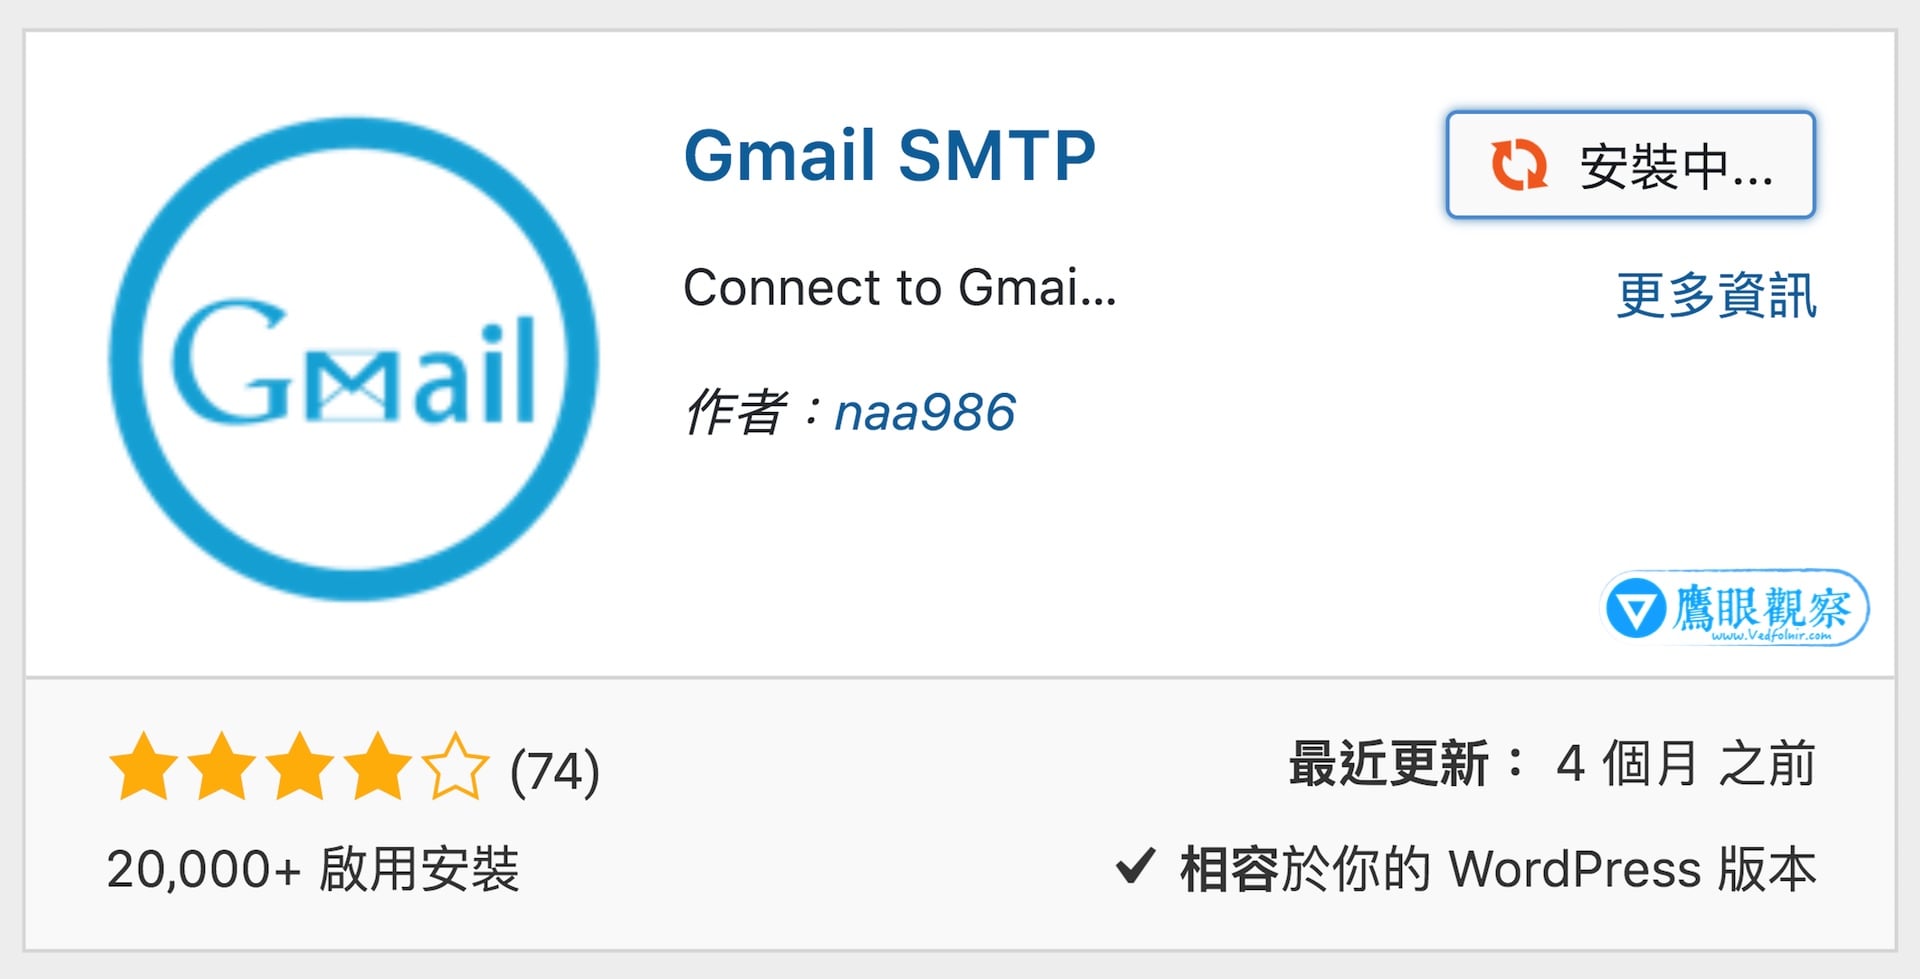 Figure 1: Installing the Gmail SMTP WordPress plugin.
Step 2: Open the plugin configuration page under Settings > Gmail SMTP in your WordPress dashboard, and copy the provided Authorized Redirect URI URL string.
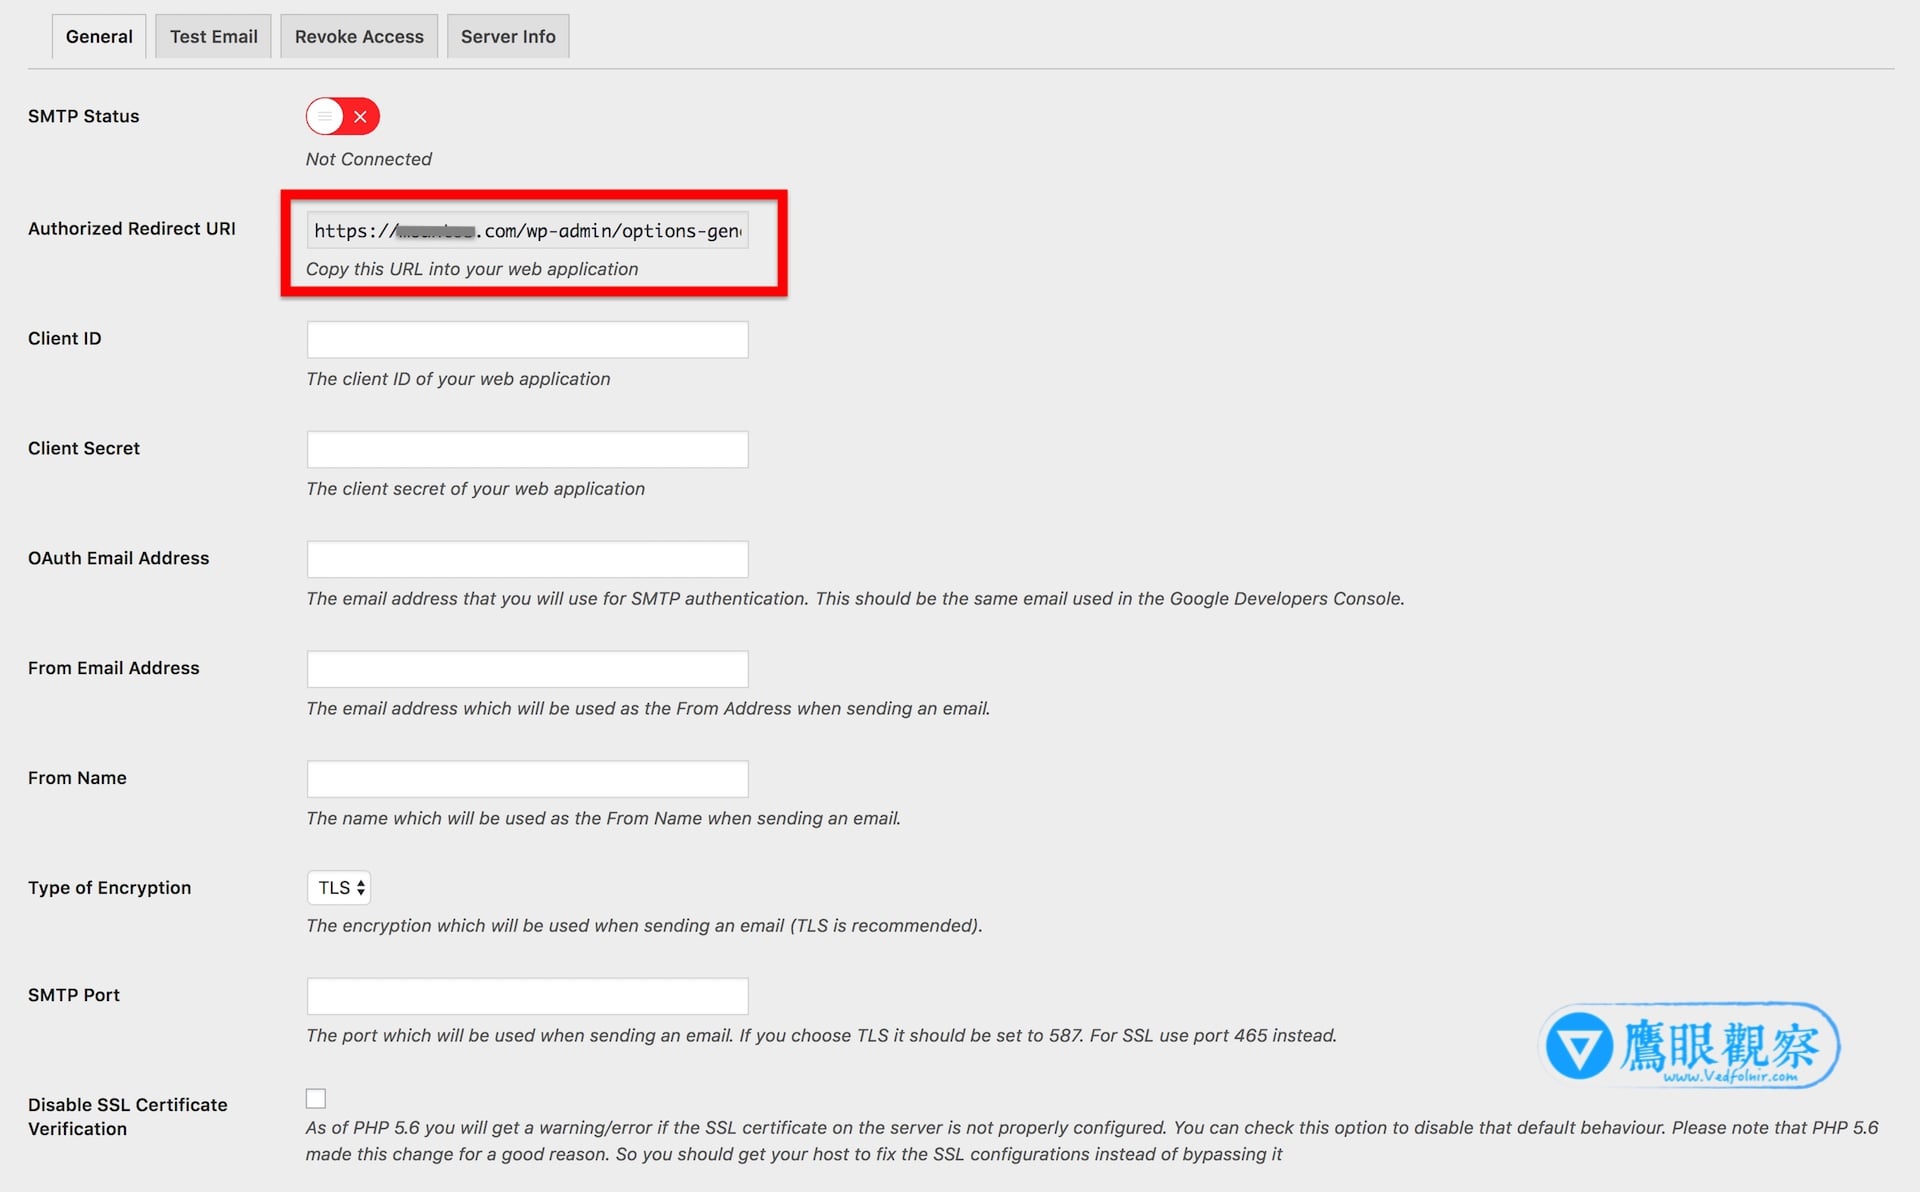 Figure 2: Gmail SMTP configuration dashboard displaying the redirect URI.
Step 3: Open the Google Cloud Developer Console, navigate to APIs & Services > Credentials, and select Create Credentials > OAuth client ID.
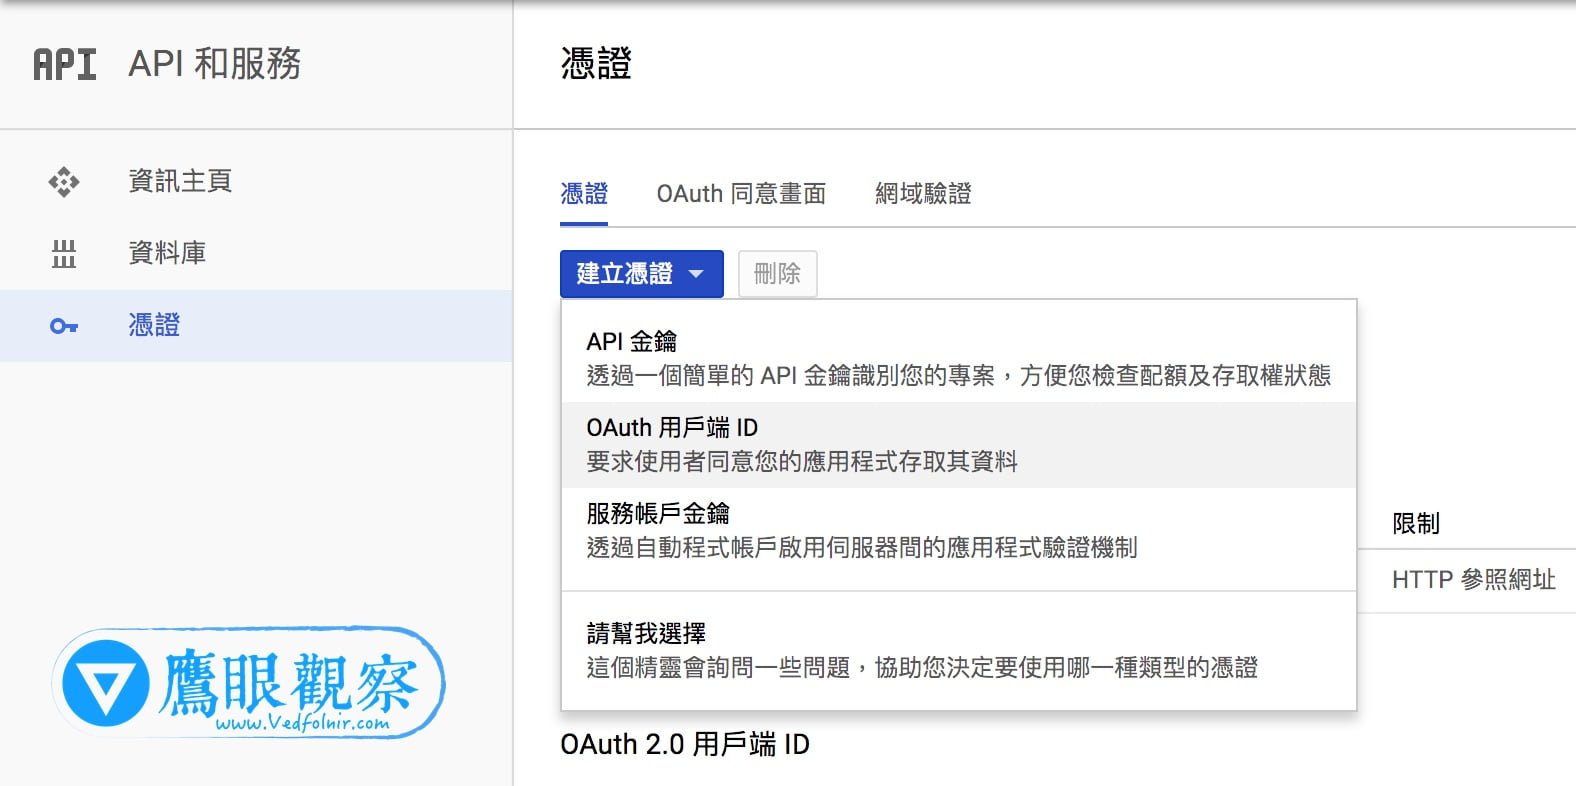 Figure 3: Generating OAuth credentials in the Google Cloud Console.
Step 4: On the client ID configuration screen:
- Select Web application under Application Type;
- Enter a descriptive name for your client credential;
- Add your full website URL (including
https://) under Authorized JavaScript origins; - Paste the URI copied in Step 2 into the Authorized redirect URIs box.
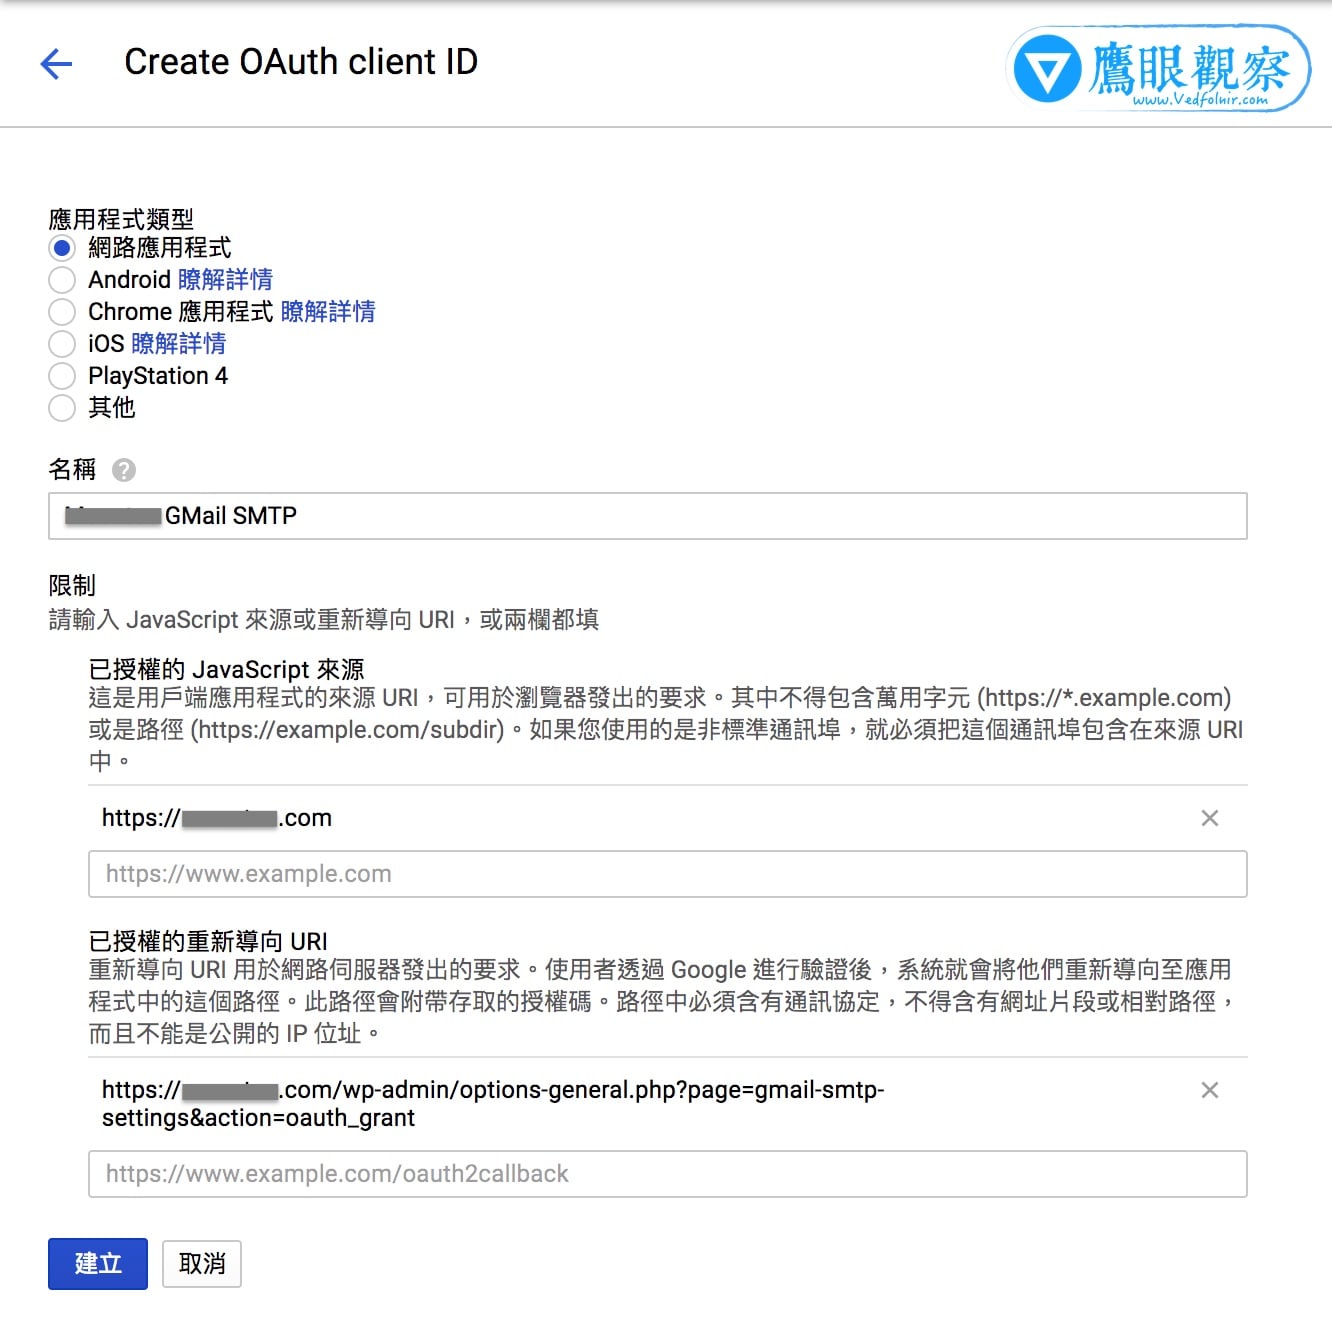 Figure 4: Selecting Web Application OAuth credentials.
Step 5: Once saved, the Google Cloud Console displays your Client ID and Client Secret.
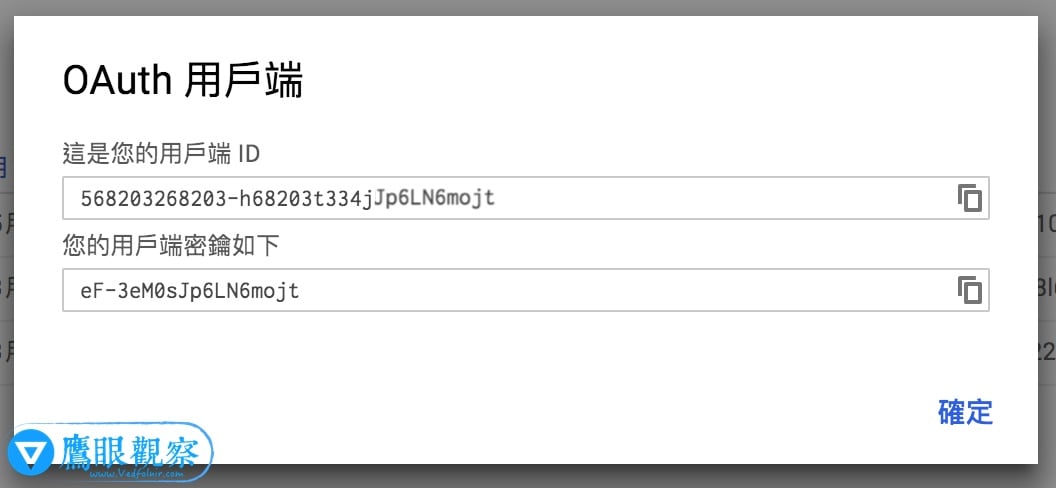 Figure 5: Google OAuth Client ID and Client Secret.
Step 6: Return to the WordPress Gmail SMTP settings page:
- Paste the Client ID into the Client ID field.
- Paste the Client Secret into the Client Secret field.
- Enter your Google account address into the OAuth Email Address field.
- Enter your desired public sender address into From Email Address and your sender title into From Name.
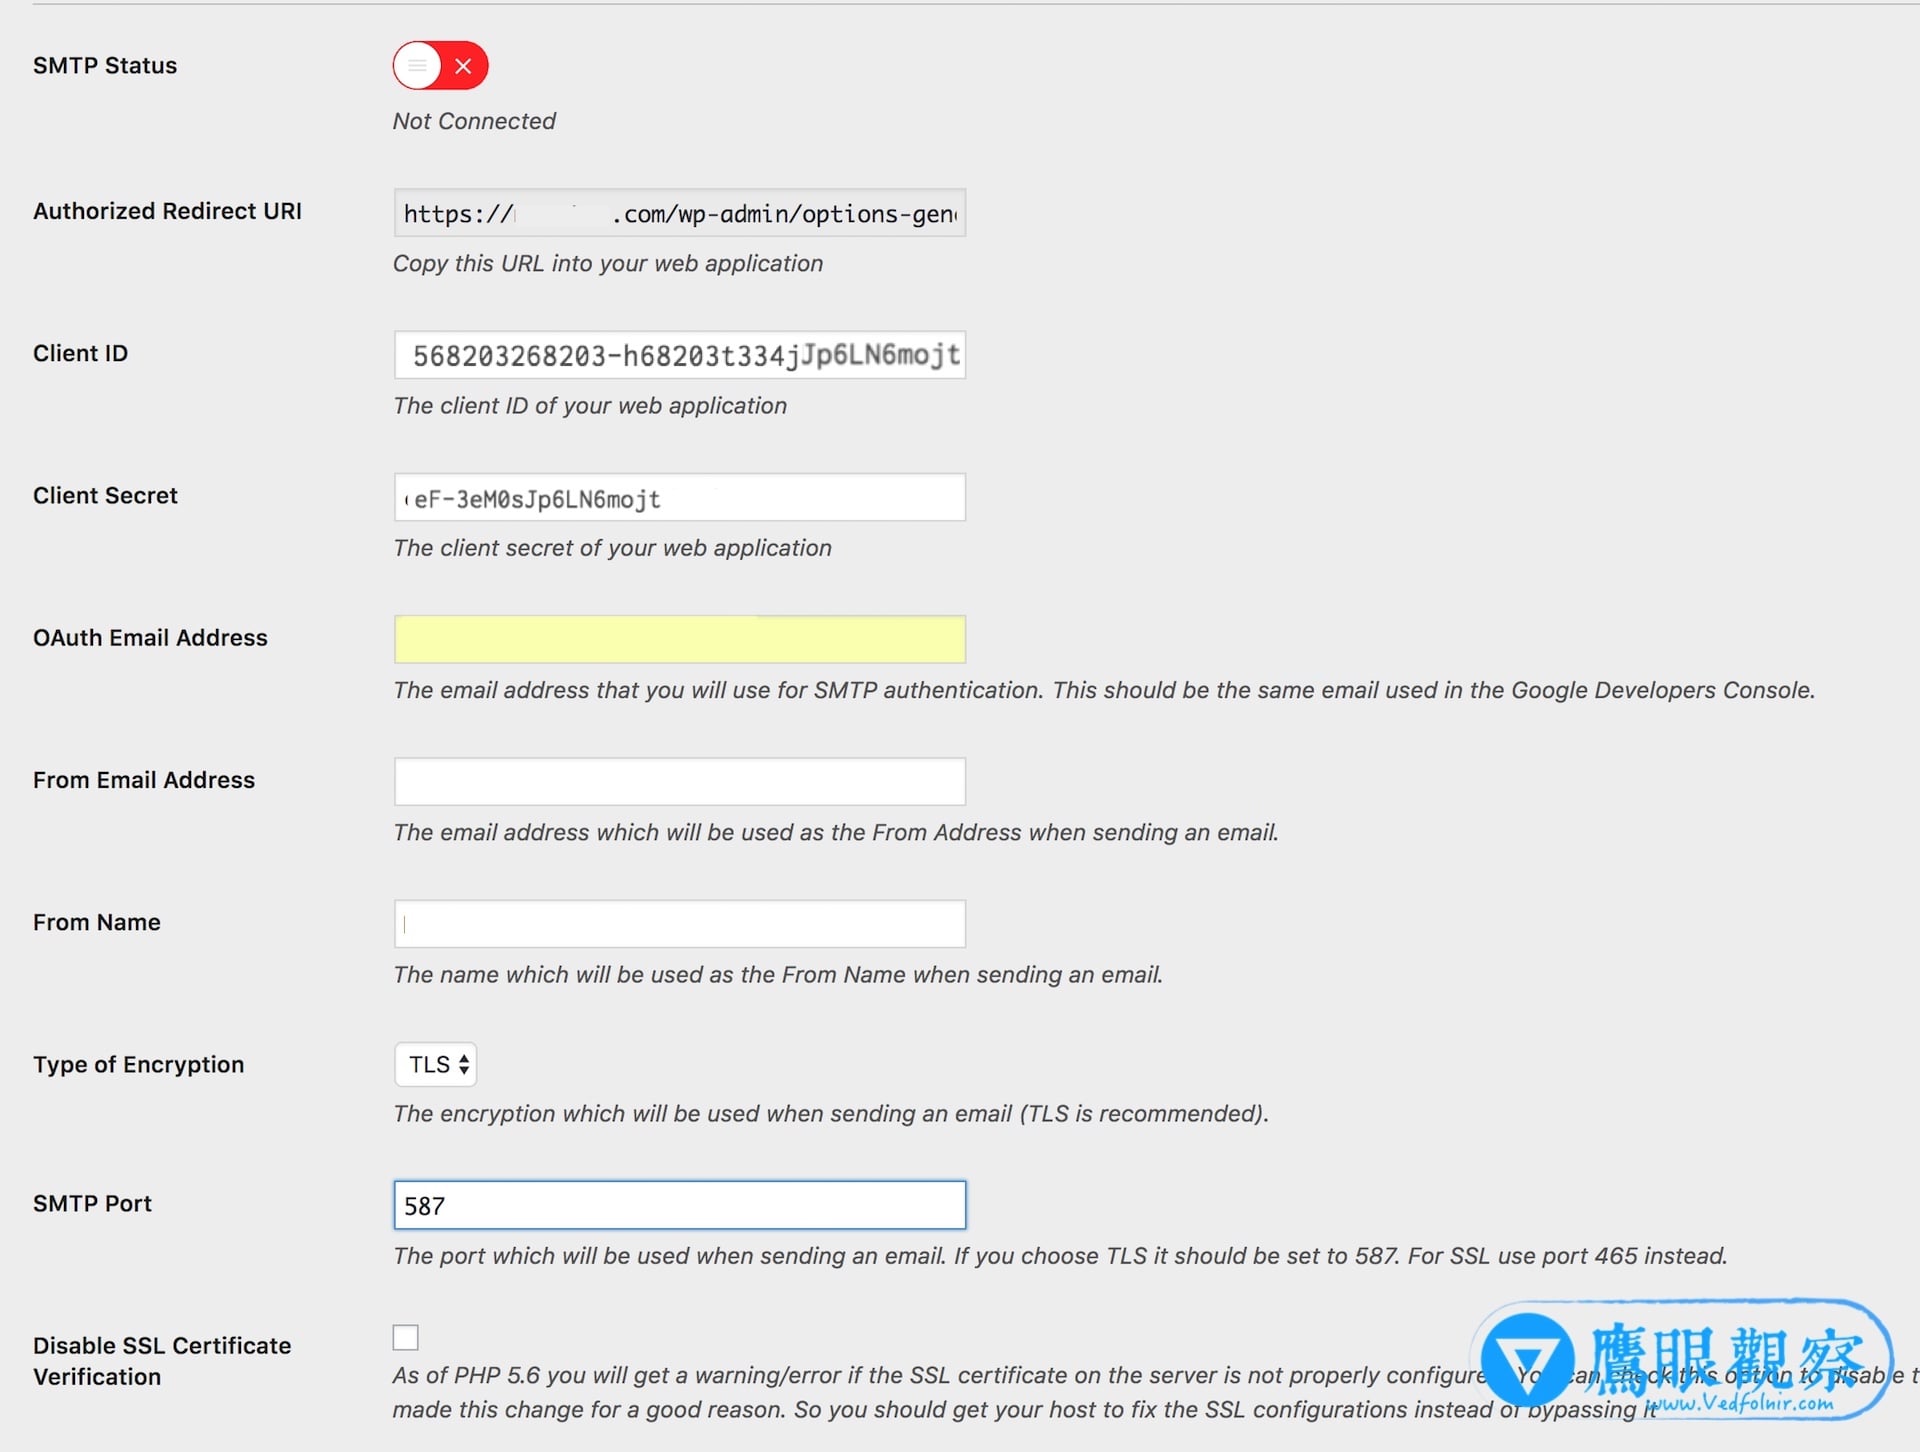 Figure 6: Entering credential keys and sender information.
Leave the default encryption setting as TLS on port 587, which functions reliably across almost all web hosts (or use SSL on port 465). The option “Disable SSL Certificate Verification” should generally remain unchecked unless testing on misconfigured local environments.
Step 7: Click Save Changes. After the page reloads, scroll to the bottom and click the Grant Permission button to authorize your WordPress site with your Google account.
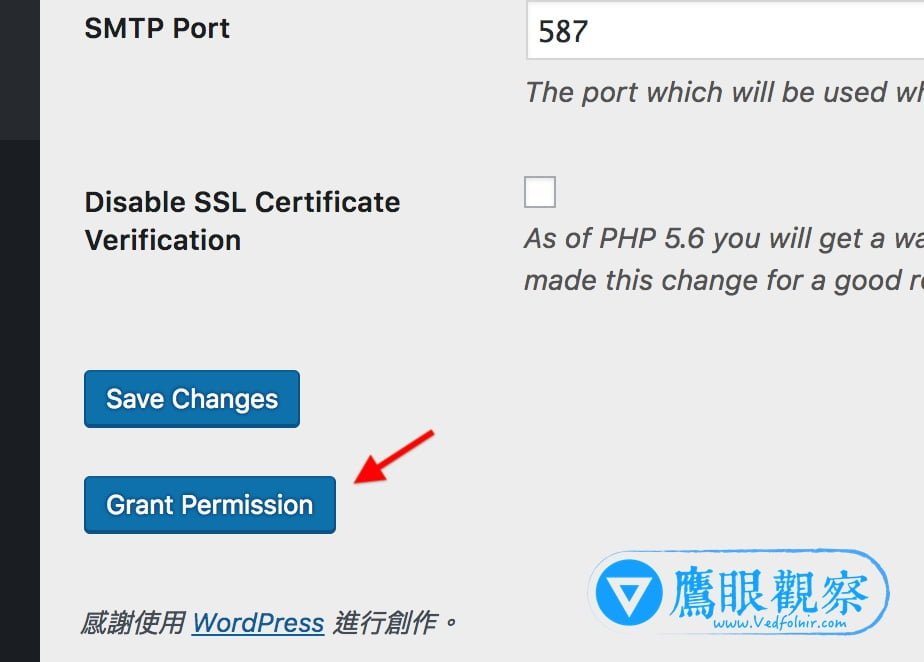 Figure 7: Granting OAuth permission to Google.
Step 8: Upon successful authorization, return to the Gmail SMTP settings tab. A bright green Connected badge in the “SMTP Status” box confirms your site is now sending emails via Gmail!
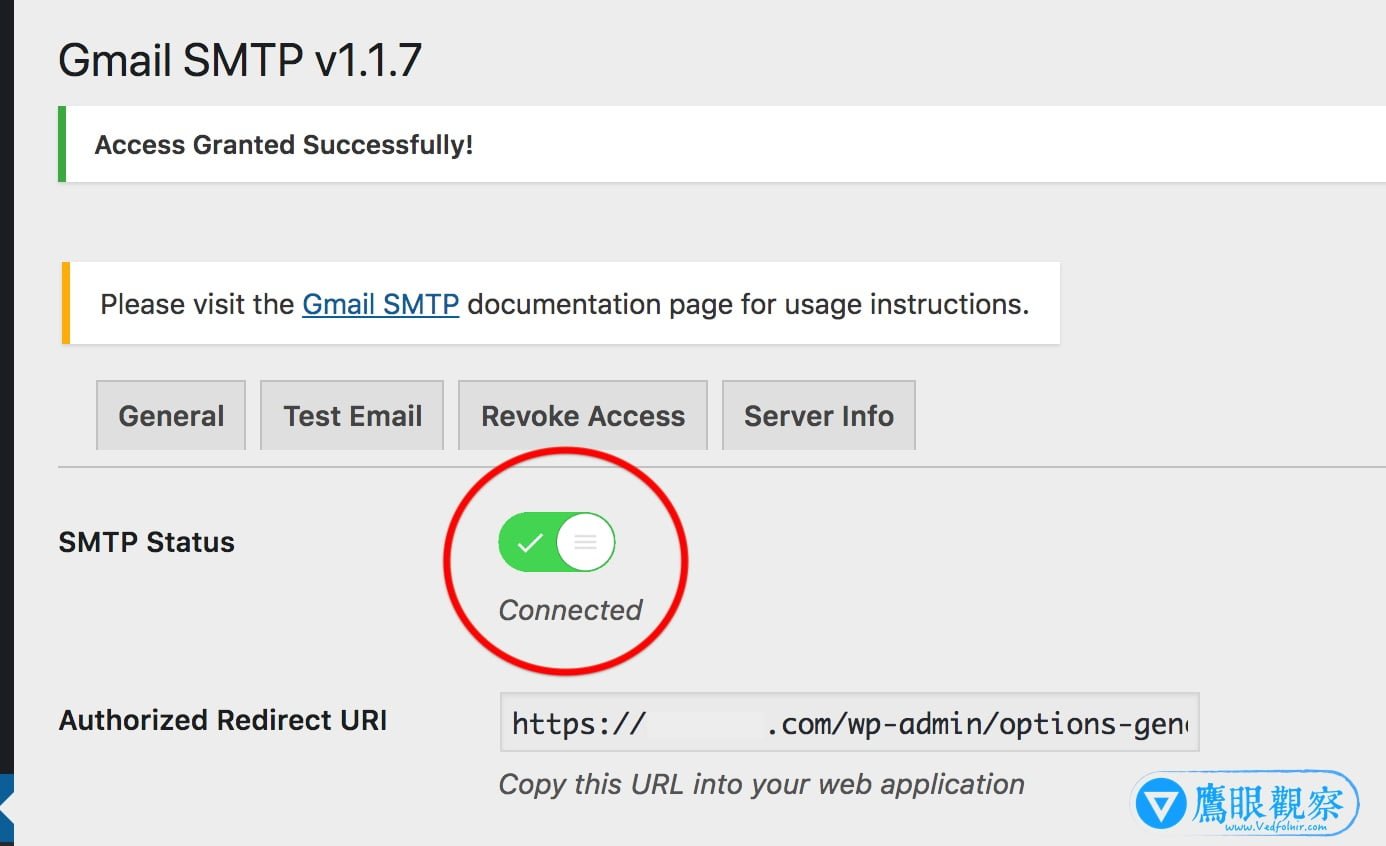 Figure 8: Successful Gmail SMTP connected status.
You can test the setup immediately by clicking the Test Email tab, entering a recipient email address, subject, and message, and verifying that the dispatch arrives cleanly in your inbox.
Support Independent Perspectives & In-Depth Insights
Every thoughtful analysis and candid critique comes from our dedication to truth and quality. We choose not to follow sensational algorithms or clickbait headlines.
Sustaining independent research requires reader support. Make a one-time or monthly contribution, securely processed by Google.
Payments secured by Google · Manage or cancel anytime in your Google Account



Comments