
Because my MacBook Pro bought last year only came with 128 GB of built-in storage, I initially figured I could manage by offloading data to external hard drives. However, 128 GB proved far from enough in practice (especially after picking up a high-end camera). The available drive space on this MBP now frequently drops to just 10–20 GB.
The most familiar way to quickly tidy up drive space is clicking “Empty Trash”. But today, I want to introduce a comprehensive, integrated way to clean up your drive using built-in macOS tools.
Step 1
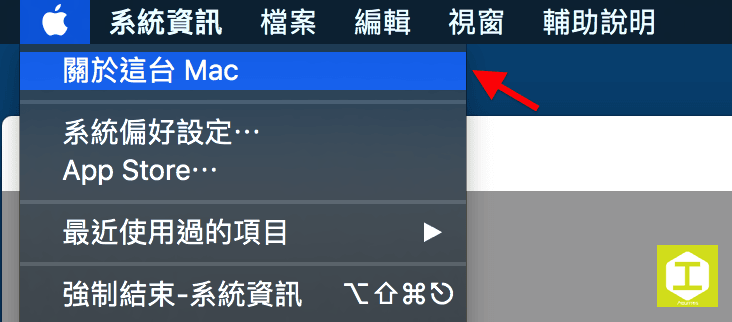
As shown in Figure 1, click the Apple logo in the menu bar and select “About This Mac”.
Step 2
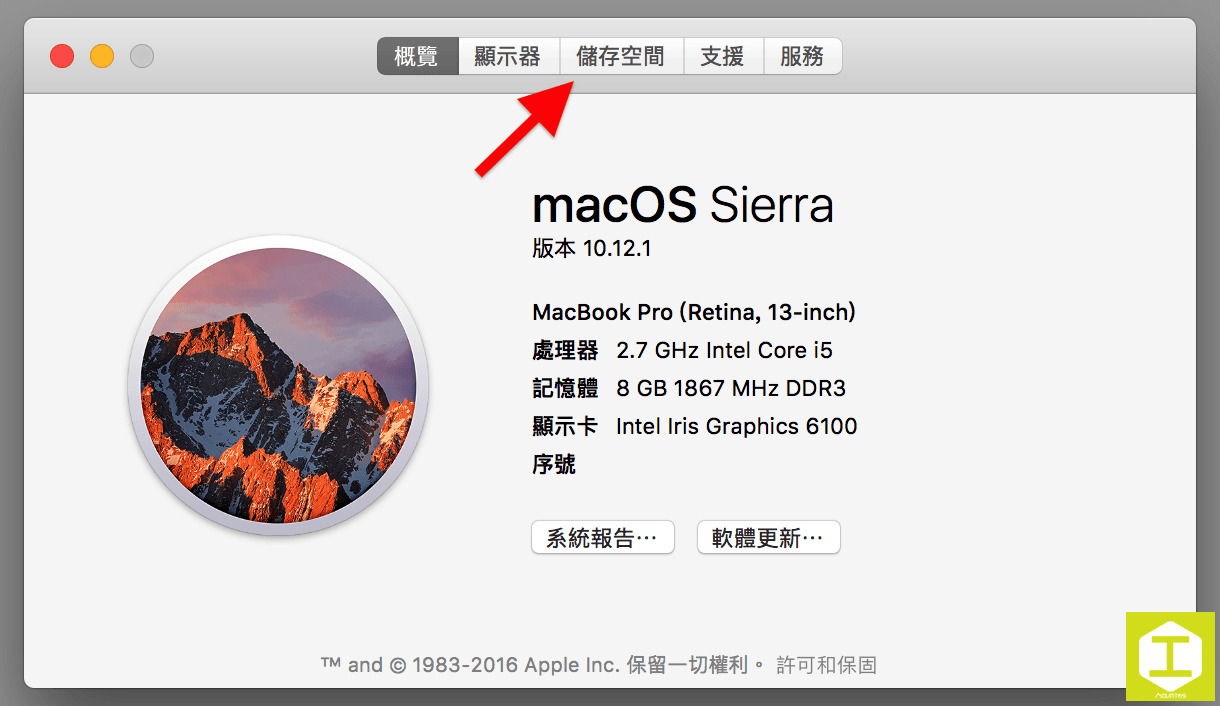
As shown in Figure 2, in the “About This Mac” window, click the “Storage” tab indicated by the red arrow.
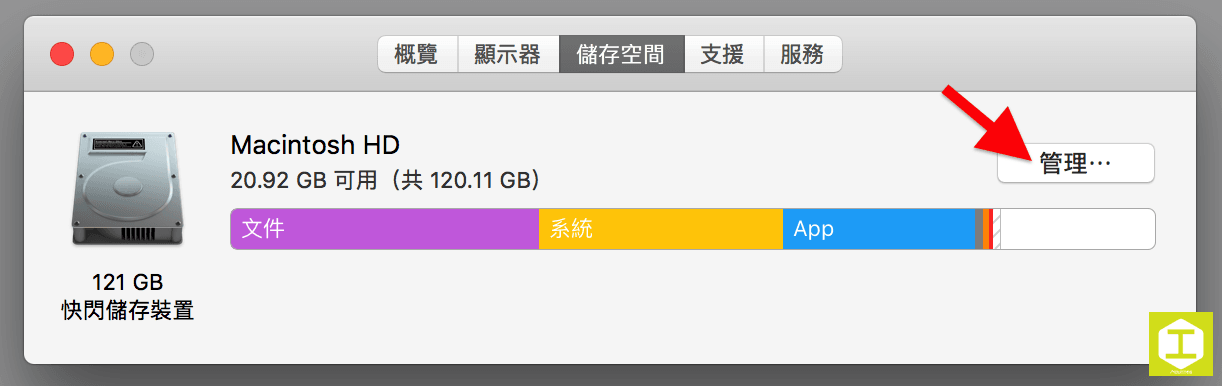
Referring to Figure 3, the Storage pane displays the breakdown of your drive’s capacity, showing the space consumed by Documents, System, and Apps, alongside information on “Purgeable” and “Available” space.
Step 3
Click the “Manage…” button inside the Storage overview pane.
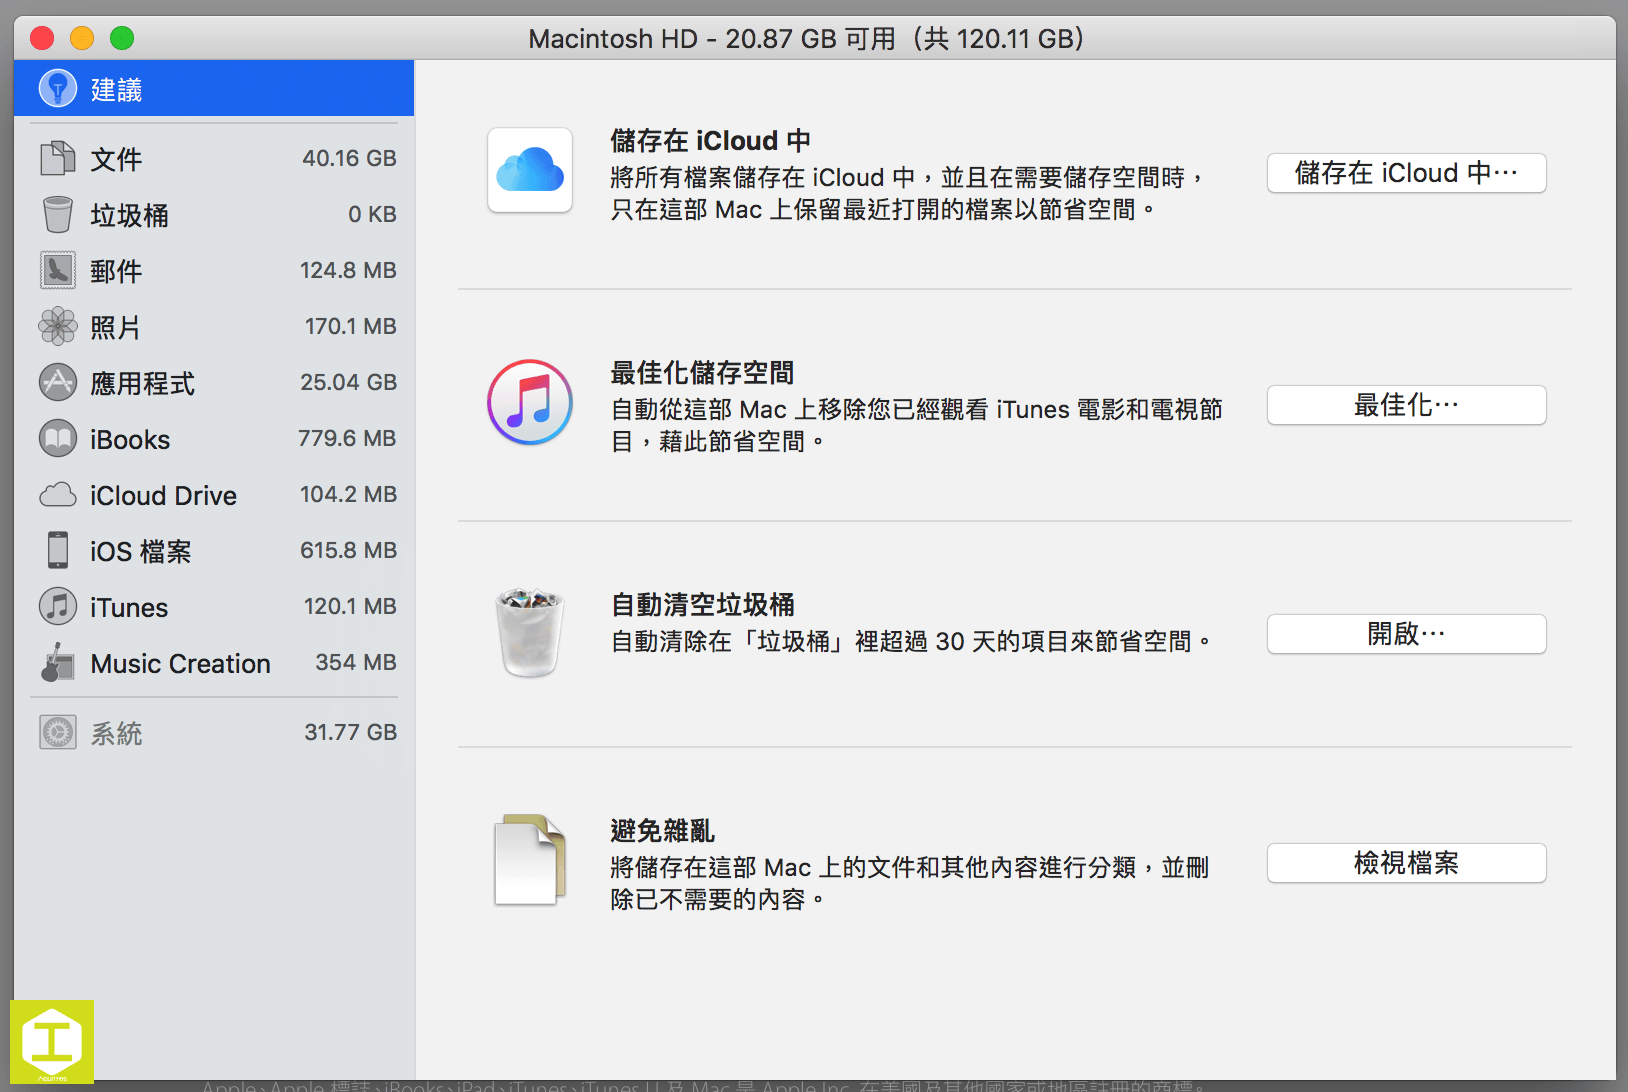
As shown in Figure 4, once inside the Storage Management utility, the left sidebar lists various categories such as Recommendations, Documents, Trash, Mail, Photos, and Applications. The right pane shows actionable options for each category. For instance, under Recommendations, macOS highlights four primary tools: “Store in iCloud”, “Optimize Storage”, “Empty Trash Automatically”, and “Reduce Clutter”.
Step 4
Explore the categories in the left sidebar to identify items that can be organized or safely removed.
For example, “Documents” catalogs large files across your drive, while “Trash” lists all files sitting in the trash bin, allowing you to empty them with a single click.
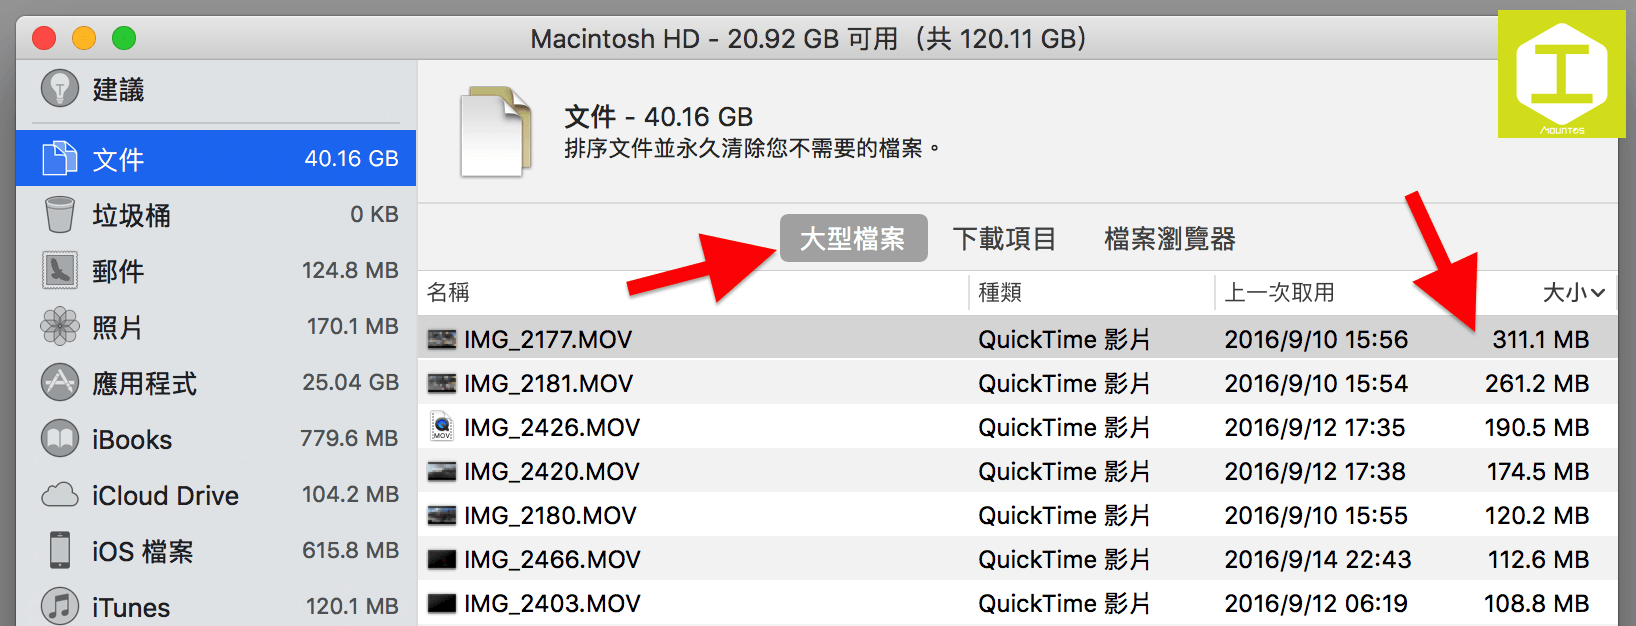
Refer to Figure 5: under the “Documents” category, you can filter files by “Large Files”, “Downloads”, and “File Browser”.
Step 5
Selecting “Large Files” under Documents immediately identifies the largest disk space hogs. For example, in Figure 5, the top entries are large .MOV video files. When you urgently need free storage, deleting or archiving these large files to an external drive is the quickest remedy.
Step 6
As shown in Figure 6, selecting the “Applications” category lists all apps installed on your Mac, helping you spot applications you haven’t opened in months.
Here is a handy tip: sort the list by “Kind”. This makes it very easy to detect duplicate entries or older versions of apps that are no longer needed, allowing you to uninstall them cleanly.

Finally, here is another practical example shown in Figure 7: clicking on “Music Creation” lets you inspect the library size used by Apple’s built-in GarageBand software.

If you don’t play musical instruments and rarely use GarageBand, yet don’t want to delete the app entirely, you can simply click “Remove GarageBand Sound Library” to instantly reclaim nearly 1 GB of precious disk space!
Support Independent Perspectives & In-Depth Insights
Every thoughtful analysis and candid critique comes from our dedication to truth and quality. We choose not to follow sensational algorithms or clickbait headlines.
Sustaining independent research requires reader support. Make a one-time or monthly contribution, securely processed by Google.
Payments secured by Google · Manage or cancel anytime in your Google Account


Comments