
A friend recently asked me how to delete "**Timeline Posts**" and "**Status Messages**" (signatures) in the LINE messaging app. So, following tradition, another quick tutorial was born.
In the guide below, we will walk through the step-by-step process of deleting status messages and timeline posts. Timeline posts refer to shared updates, photos, and stickers visible to friends on your LINE timeline, where friends can leave comments or reactions. Status messages, on the other hand, are the short bio introductions displayed right beside your display name in your friends list.
Having a deletion option allows you, much like my friend, a second chance after posting something silly or embarrassing. Still, figuring out where the delete option hides can be unintuitive for some users. Truth be told, when I first started using LINE, it took me a bit of digging to uncover these settings. (I’m not particularly fond of LINE, but was held hostage by peer momentum… choose your peer circles wisely when young.)
Deleting Status Messages (Signatures)
Step 1: Open the LINE app. You will start on the Friends list.
 LINE Friends List
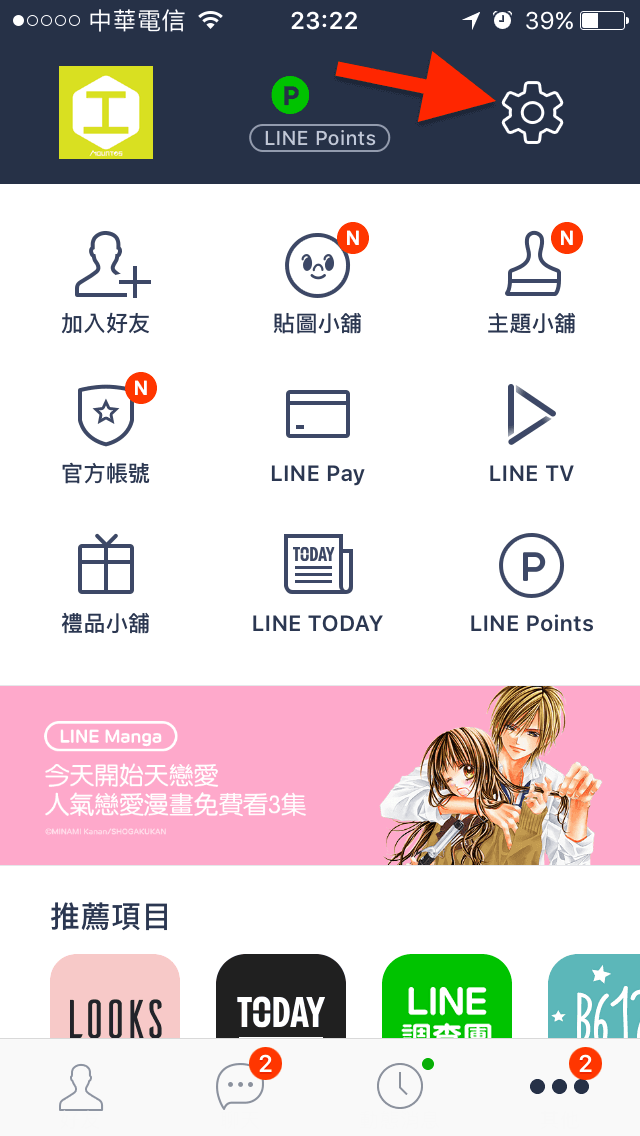
Step 2: Tap the “More” tab, where you will see the “Profile” option button.
 LINE More Tab
Step 3: Enter “Profile”. The window will display two feature options: “Home” and “Status Message”.
 LINE Profile Window
Step 4: Continuing from Step 3, opening “Status Message” brings you to the history window, listing previous signatures you’ve added chronologically. You’ll also see an “Edit” option in the top-left corner.
 LINE Status Message Window
Step 5: Continuing from Step 4, after tapping the Edit button, a red “Delete” button will appear next to each entry, as shown below.
 LINE Status Message Window Delete Button
Step 6: Continuing from Step 5, tapping the delete button next to the desired status message prompts a confirmation dialog.
 LINE Confirm Deleting Status Message
Step 7: Continuing from Step 6, tap confirm, and the old status message will be permanently removed.
 LINE Cleared Status Messages
Deleting Timeline Posts and Photos
Step 8: Refer to Steps 1, 2, and 3 above. This time in the Profile window, tap the “Home” button instead to open your post timeline area as shown below.
 LINE Home Page Posts and Photos Area
Step 9: Tap on any post or photo in the timeline window to open its detailed view. In the top-right corner of the screen, you will see a ”● ● ●” menu button.
 LINE Timeline Post Content Screen
Step 10: Following Step 9, tapping the ”● ● ●” button brings up the “Delete Post” prompt at the bottom of the screen.
 Delete Post Prompt Button
Step 11: Tapping the Delete Post prompt from Step 10 brings up a confirmation dialog asking if you really wish to delete this post or photo.
 LINE Confirm Deleting Post and Photo
Step 12: Tap “Delete” in Step 11, and the selected post or photo will be removed immediately.
Conclusion
The steps in this tutorial are straightforward, and anyone willing to explore app settings can quickly master them. But for my friend, spending time troubleshooting small UI quirks like this is guaranteed to cause mild panic, foot-stomping, and nail-biting (shrugs).
Support Independent Perspectives & In-Depth Insights
Every thoughtful analysis and candid critique comes from our dedication to truth and quality. We choose not to follow sensational algorithms or clickbait headlines.
Sustaining independent research requires reader support. Make a one-time or monthly contribution, securely processed by Google.
Payments secured by Google · Manage or cancel anytime in your Google Account


Comments