
A Wacom pen tablet (graphics tablet) is widely regarded as an indispensable peripheral for many digital creators—and for most, it is the undisputed industry standard. Featuring refined, real-time pressure sensitivity and versatile pen-tip designs, it enables artists to draw lines with natural nuance, a tactile responsiveness that general-purpose tablets (such as the Apple iPad) once could only envy.
2018 Update: The Apple iPad Pro has now caught up significantly in responsiveness and precision—technology advances fast!
Recently, my Logitech trackball mouse developed that familiar double-clicking malfunction, so I decided it was the perfect excuse to pick up a graphics tablet. I naturally chose Wacom (TYO: 6727), the reigning industry leader whose name is practically synonymous with digital tablets.
One of the great advantages of purchasing Wacom products is their driver support. Beyond broad OS compatibility, their legacy support lifecycle is exceptional, with older models frequently enjoying reliable drivers long after release. Below is a comprehensive guide to installing and configuring Wacom drivers, divided into four sections:
- Wacom Driver Download Location
- Installing the Wacom Driver
- Wacom System Preferences Setup
- Wacom Supported Applications
Wacom Driver Download Location
Wacom Drivers: Official Download.
Current drivers cater to both new and legacy hardware, supporting Windows XP, Vista, 7, 8, and 10, as well as the Apple Mac OS X ecosystem across iMac, Mac Pro, Mac mini, MacBook, MacBook Air, and MacBook Pro.
Installing the Wacom Driver
After downloading the driver matching your operating system (around 100 MB) from Wacom’s official website, I will demonstrate the setup process using a MacBook Pro (the workflow is very similar on Windows).
Because Mac OS X does not use EXE installer executables like Windows, the download comes as a DMG disk image file.
Double-click the downloaded DMG image to mount it as a virtual drive in the system (as shown in Figure 1 below).
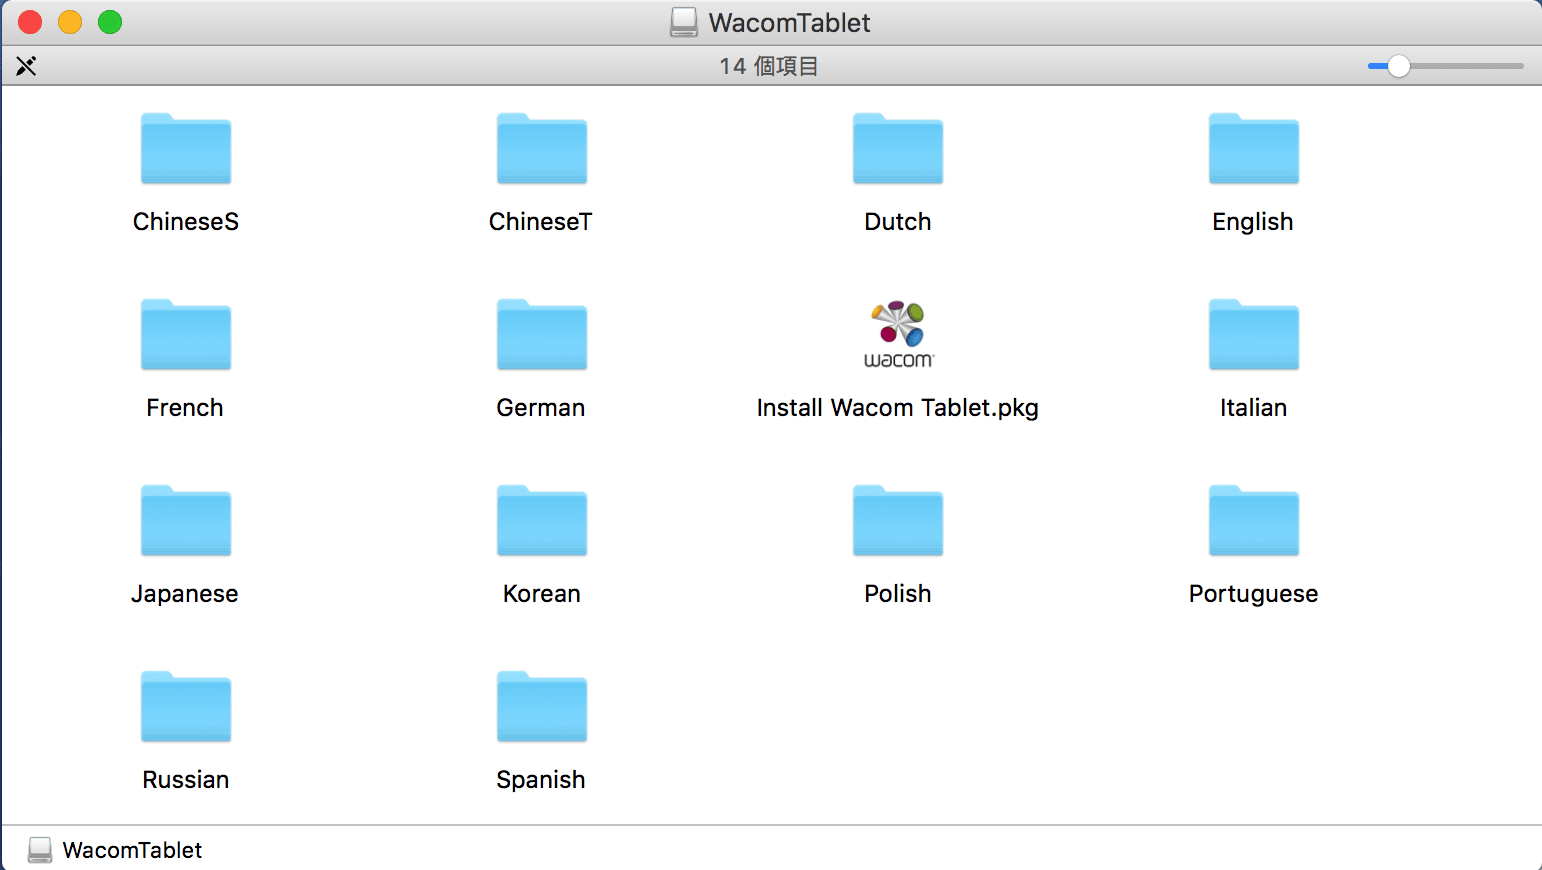 Figure 1: Wacom driver installer files.
Next, double-click the “Install Wacom Tablet.pkg” package file shown in Figure 1 to launch the installation wizard.
As illustrated in Figure 2, the installer guides you step-by-step through setting up the tablet driver. There are no complicated custom toggles, so you can simply click “Continue” through the steps.
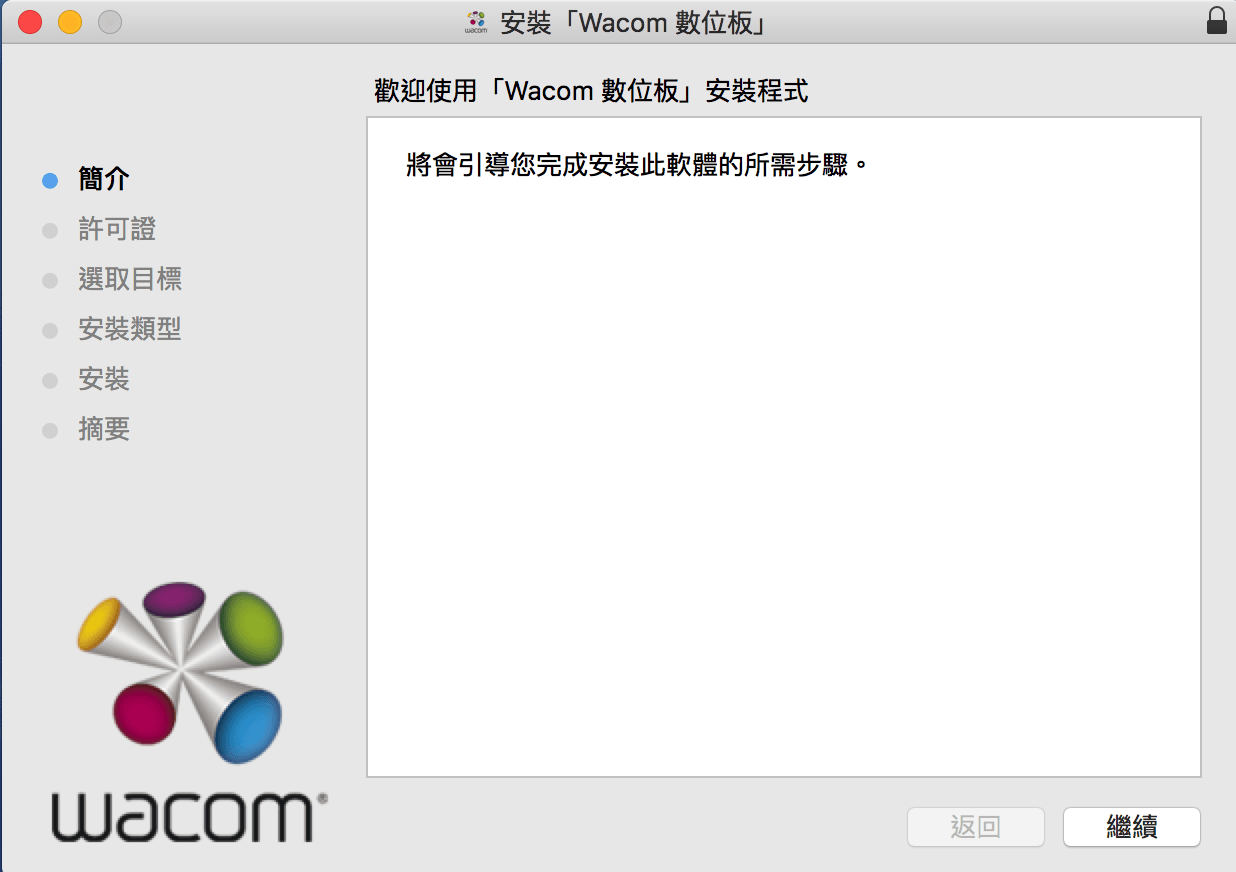 Figure 2: Installing the tablet driver.
Once the installation finishes, a system restart is required (as shown in Figure 3).
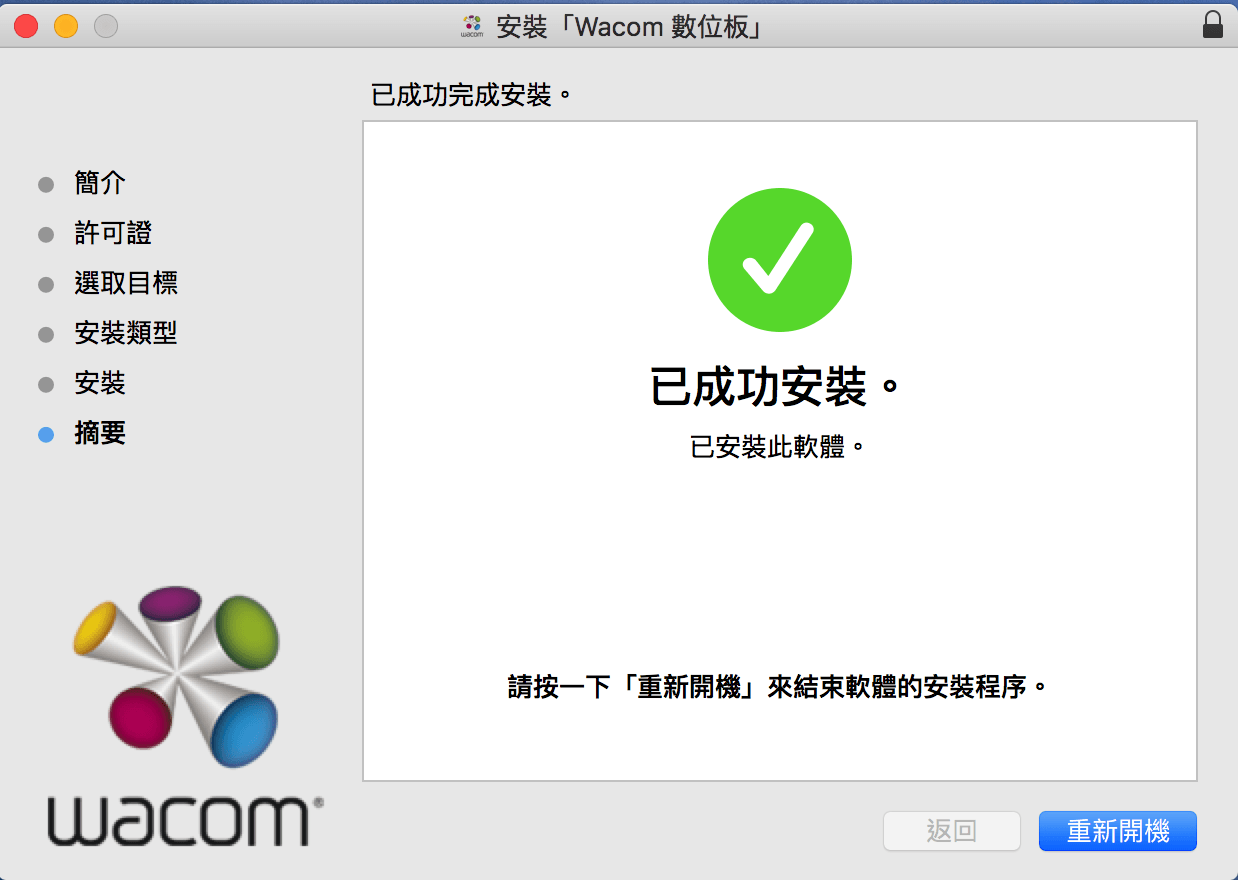 Figure 3: Restarting the system.
After rebooting, the newly installed “Wacom Desktop Center” application will launch automatically (as shown in Figure 4). However, the Desktop Center rarely requires immediate attention, so you can close it directly.
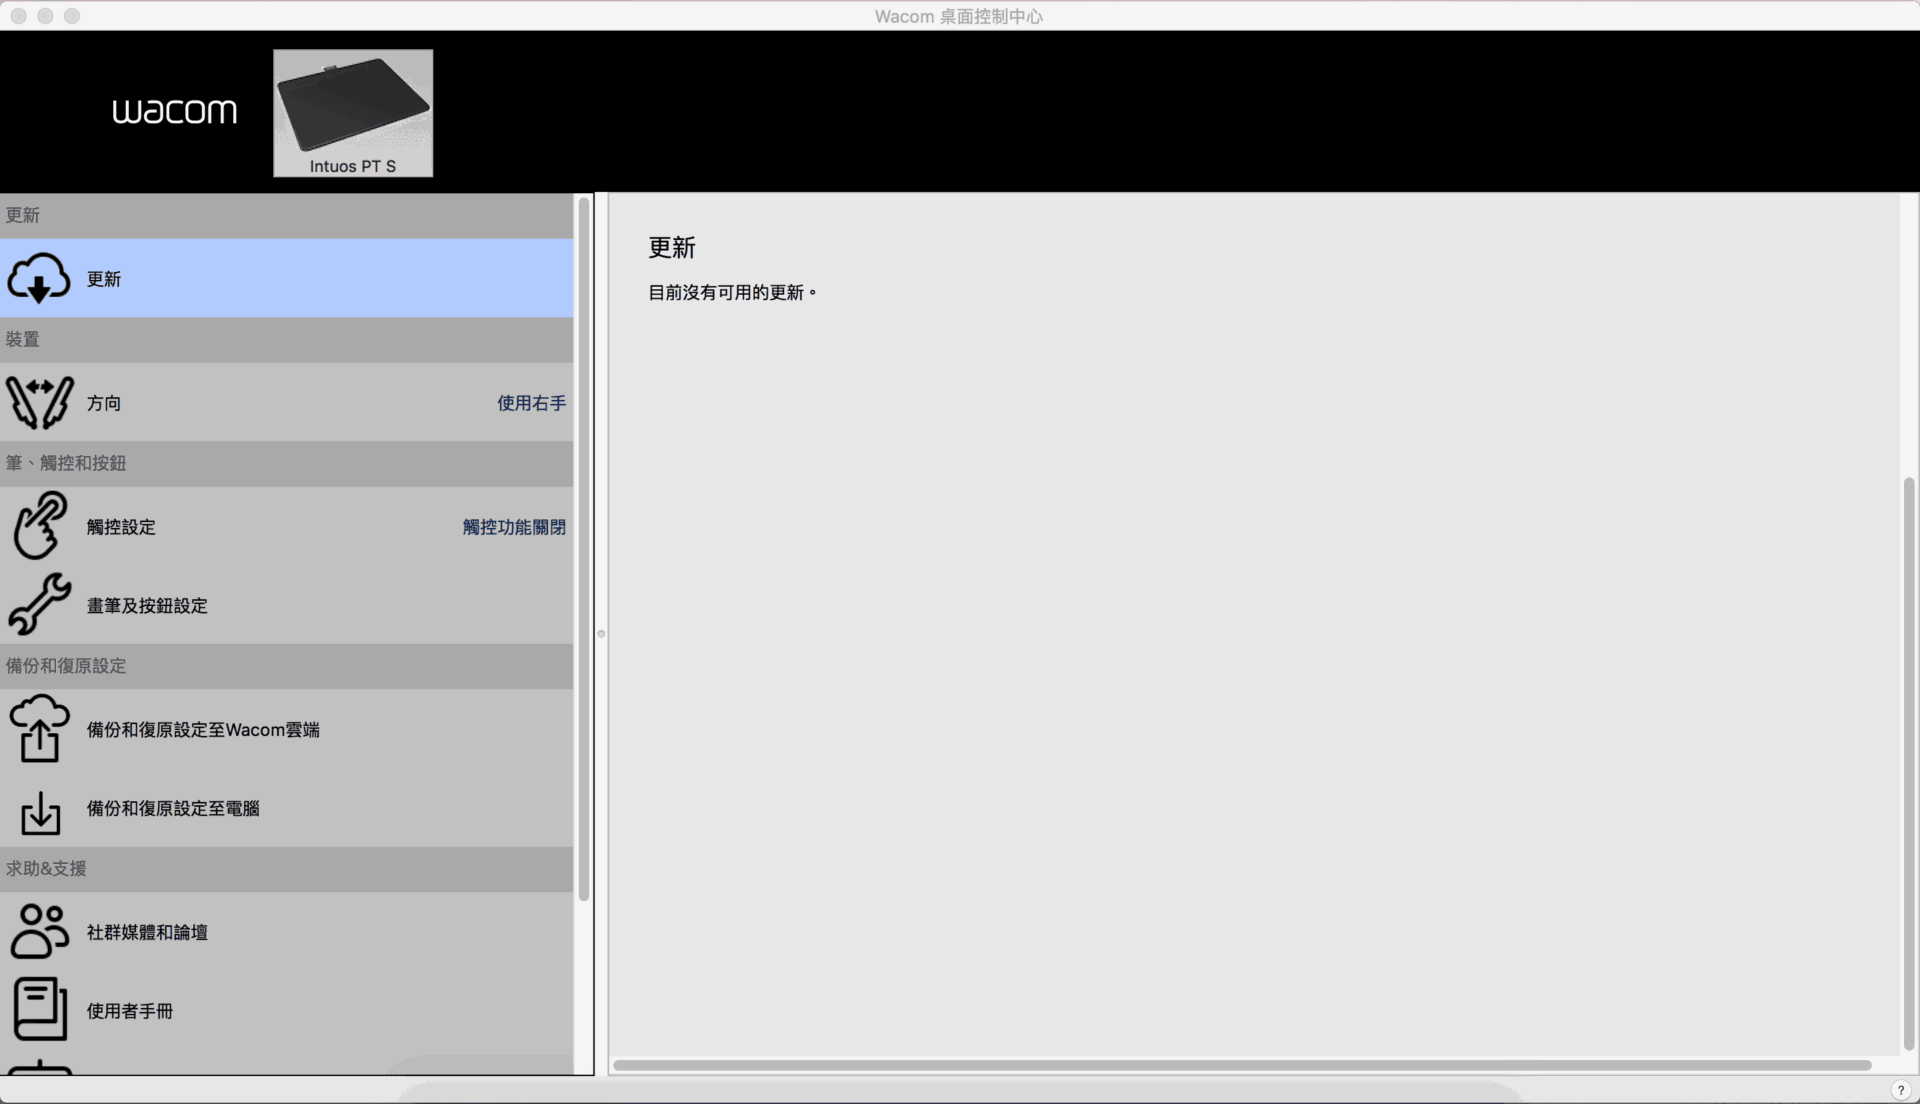 Figure 4: Wacom Desktop Center.
As shown in Figure 5, the installer creates entries in Launchpad for “Wacom Display Settings,” “Wacom Desktop Center,” “Wacom Tablet Preference File Utility,” and “Android File Transfer” (though what the latter has to do with a tablet remains a mystery).
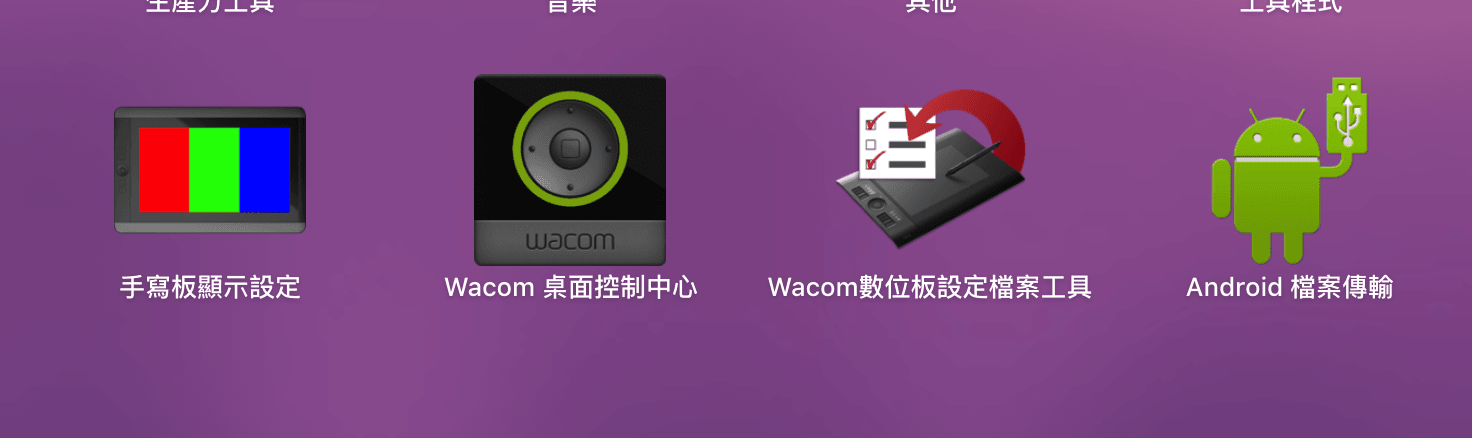 Figure 5: Launchpad application icons.
Next, let’s explore the core configuration options for Wacom tablets.
Wacom System Preferences
After driver installation, a new “Wacom Tablet” icon appears in Mac OS X System Preferences (as shown in Figure 6).
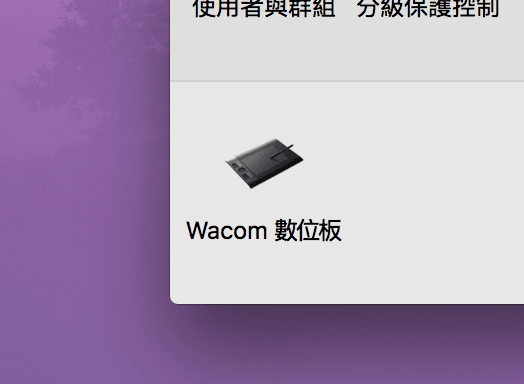 Figure 6: System Preferences panel.
Note: If you click the Wacom preference pane while the tablet is not connected to your computer, an unexpected error or a warning dialog will appear, as shown in Figure 7.
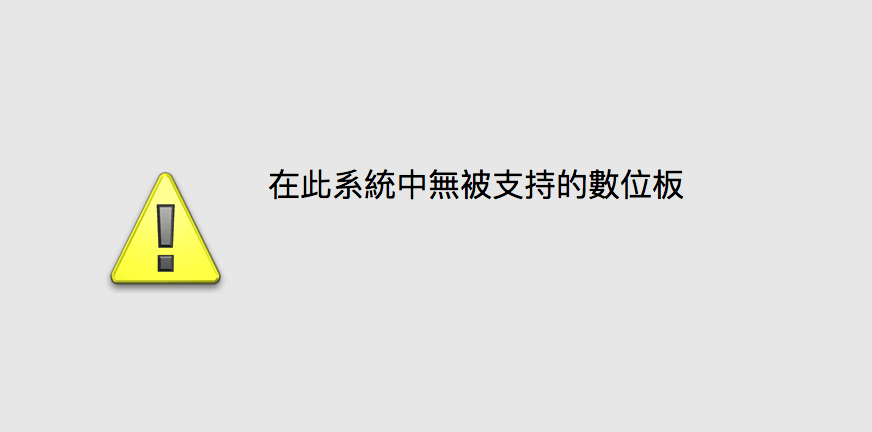 Figure 7: Warning indicating no supported tablet was detected.
System Preferences: Wacom Tablet Settings
In Mac OS X System Preferences, click the Wacom icon to enter the tablet configuration interface. This panel offers six major categories that can be tailored to your personal habits, making the tablet fit your unique creative flow: “Tablet,” “Pen,” “Mapping,” “Touch Options,” “Standard Gestures,” and “On-Screen Controls.” Among these, the custom ExpressKeys under the Tablet section are the most commonly used.
Tablet
As shown in Figure 8 below, the first tab, “Tablet,” allows you to configure the functions of the four ExpressKeys. By default, they mimic the Shift, Option (Opt), Command (Cmd), and Control (Ctrl) keys on the keyboard.
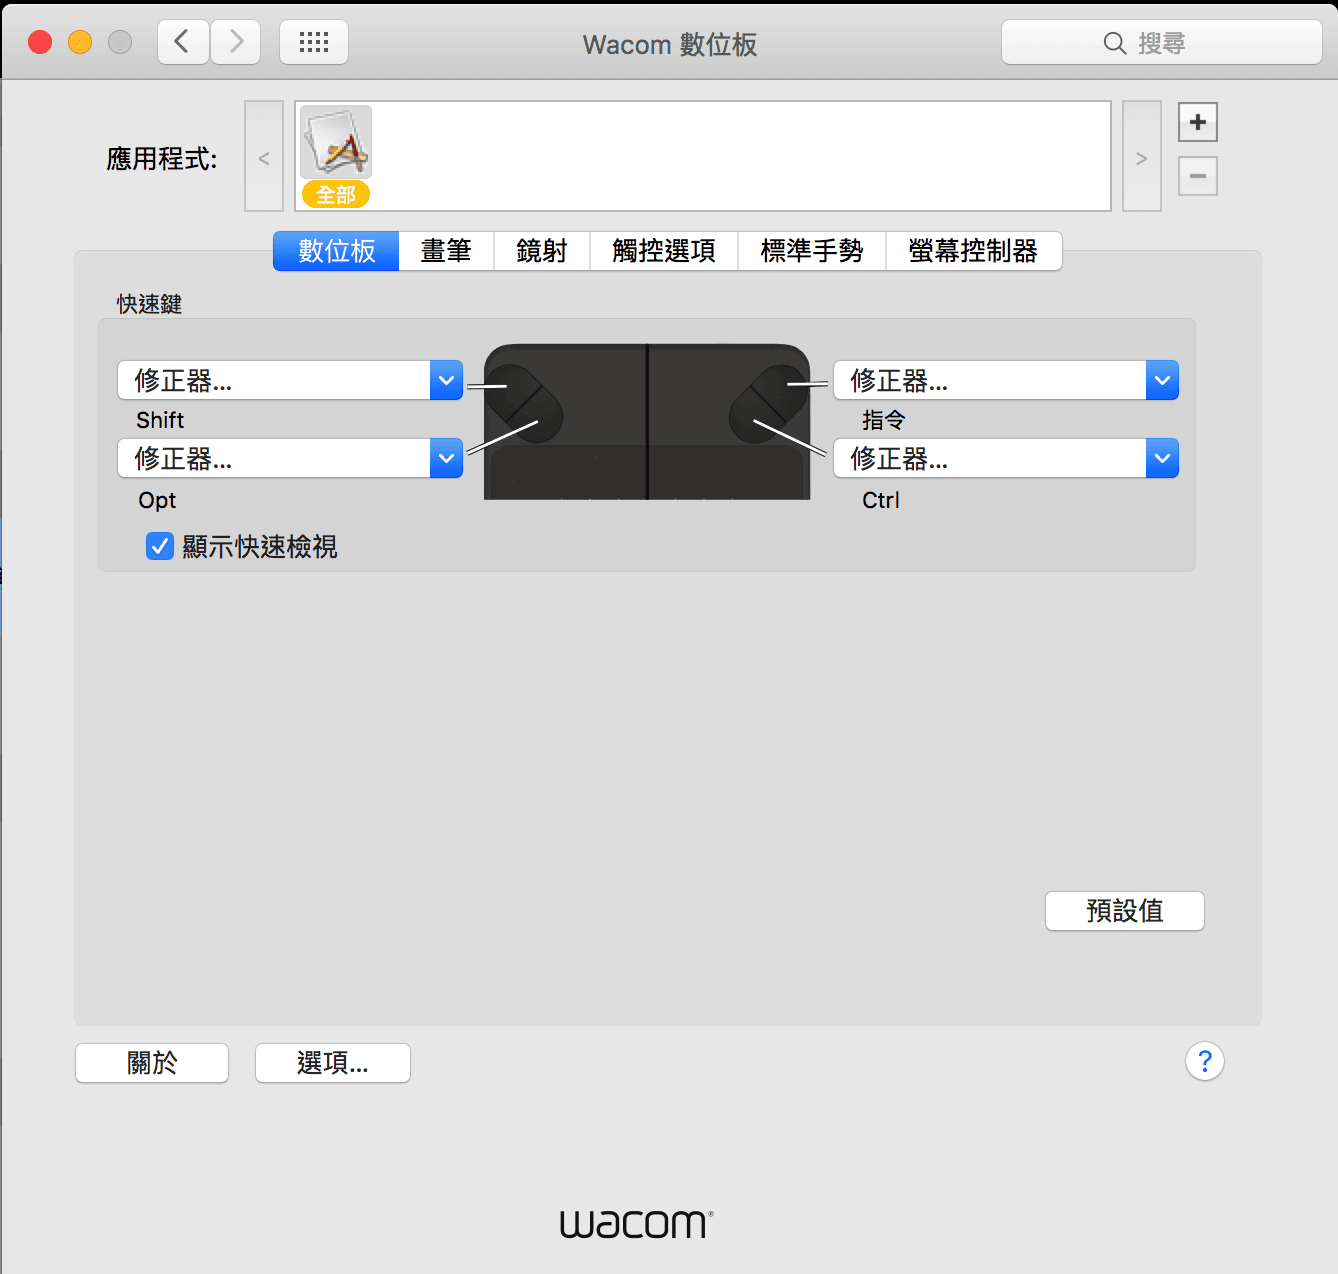 Figure 8: System Preferences: Tablet.
When you press an ExpressKey on the tablet, an on-screen HUD displays a virtual overlay with the assigned key function, ensuring you always know which shortcut is triggered (as shown in Figure 9).
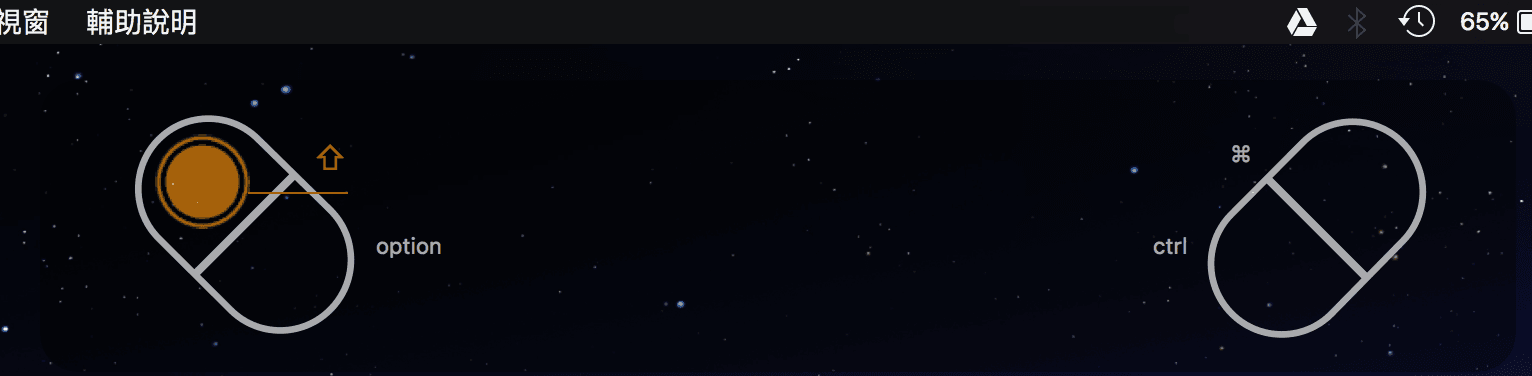 Figure 9: On-screen ExpressKey prompt overlay.
Pen
As shown in Figure 10, the second tab, “Pen,” configures stylus responsiveness parameters. These include tip feel (from soft to firm), double-click distance, and the function assignments for the upper and lower rocker buttons on the pen barrel.
Under typical circumstances, default settings work well unless excessive or delicate hand pressure affects your stroke feel, at which point you can fine-tune the pressure curve.
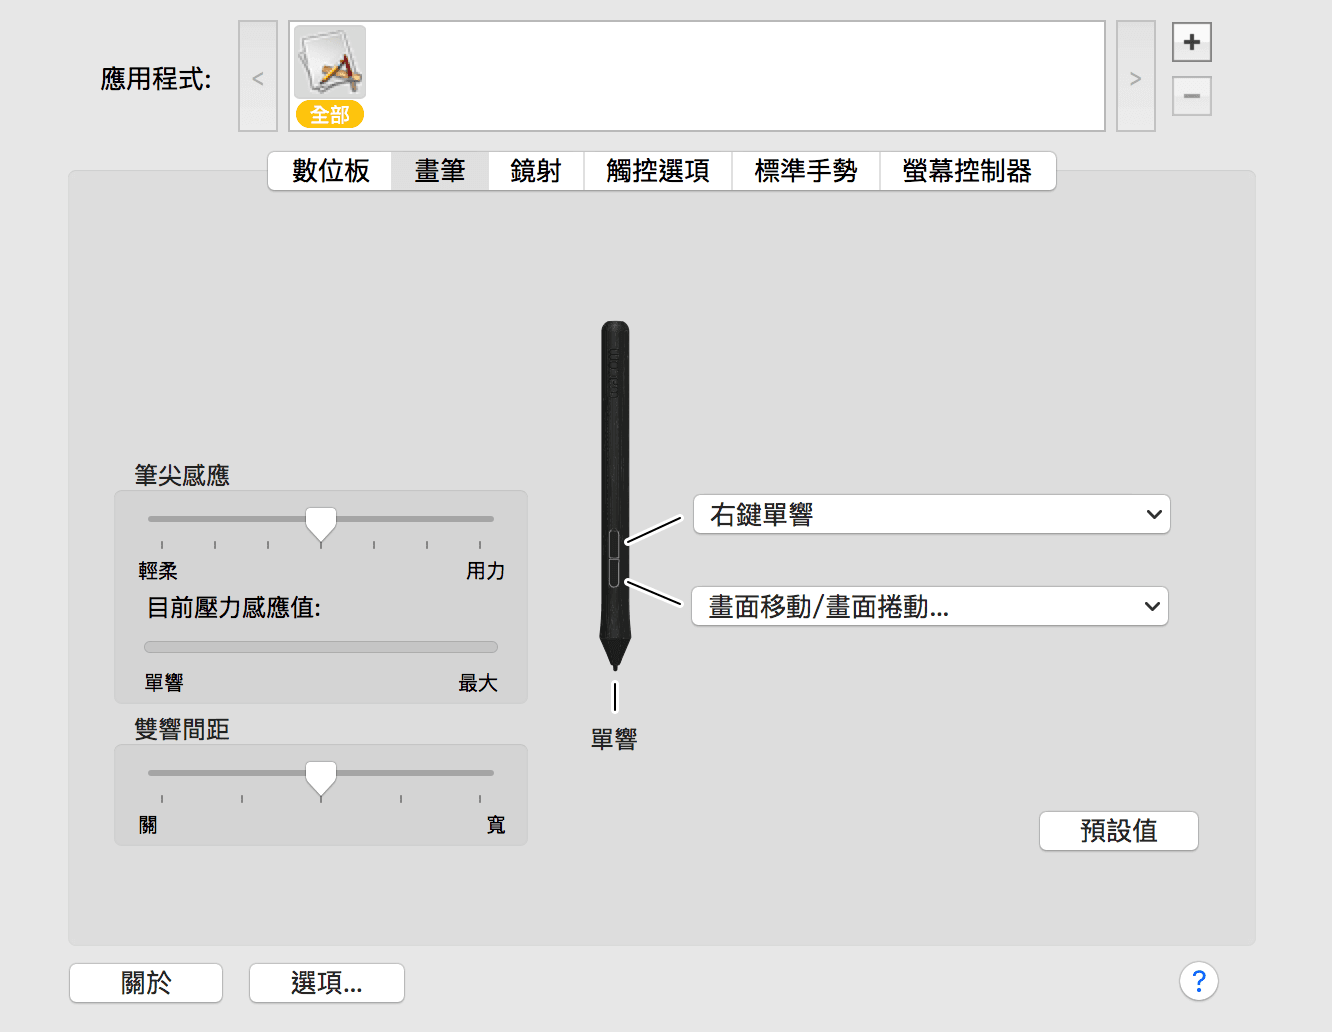 Figure 10: System Preferences: Pen.
Mapping
Refer to Figure 11. In the third tab, “Mapping,” you can toggle between Pen Mode and Mouse Mode.
Pen Mode lets you map the active tablet area to specific monitor areas. Mouse Mode lets you move the cursor using a “pick up and slide” tracking motion similar to a trackpad or mouse.
Because Mouse Mode simulates relative mouse coordinates, it lacks the absolute positioning precision of Pen Mode. For illustration work, sticking to default Pen Mode settings is strongly recommended.
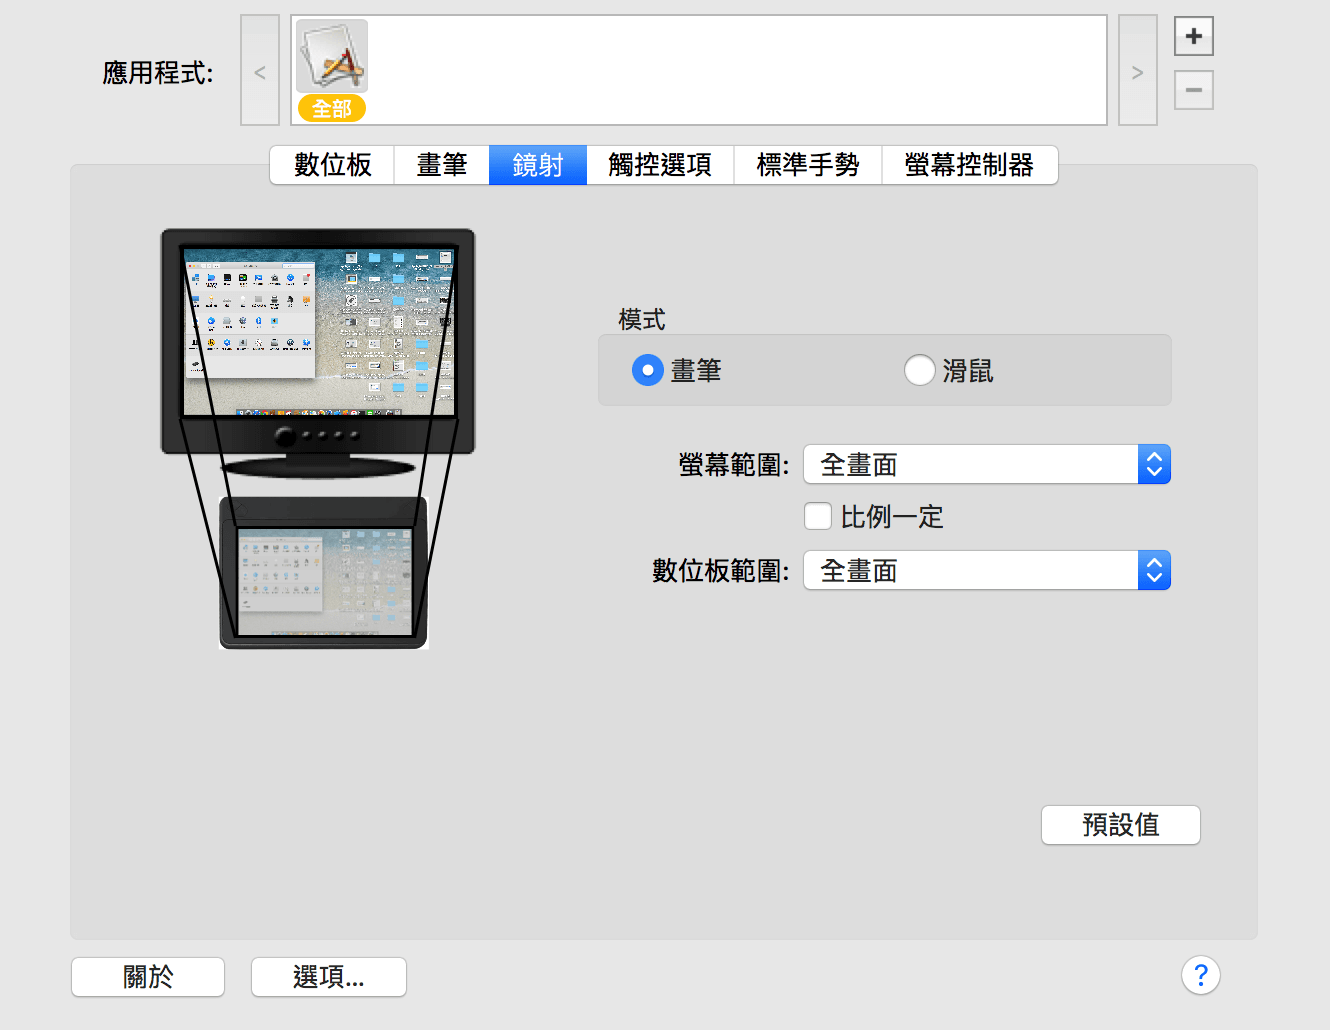 Figure 11: System Preferences: Mapping.
Touch Options
Refer to Figure 12. In the fourth tab, “Touch Options,” you can configure gesture parameters for tablets equipped with touch functionality. These include pointer speed, double-tap time, scroll speed, and pointer acceleration.
Wacom includes finger multi-touch tracking on select mid-to-high-end models, functioning like a laptop trackpad or slate tablet so you can replace both mouse and trackpad.
However, because the tablet surface is textured matte plastic designed for pen tooth, finger dragging can feel abrasive. Unless strictly necessary, keeping touch toggled off via the physical hardware switch on the side of the unit is often preferable.
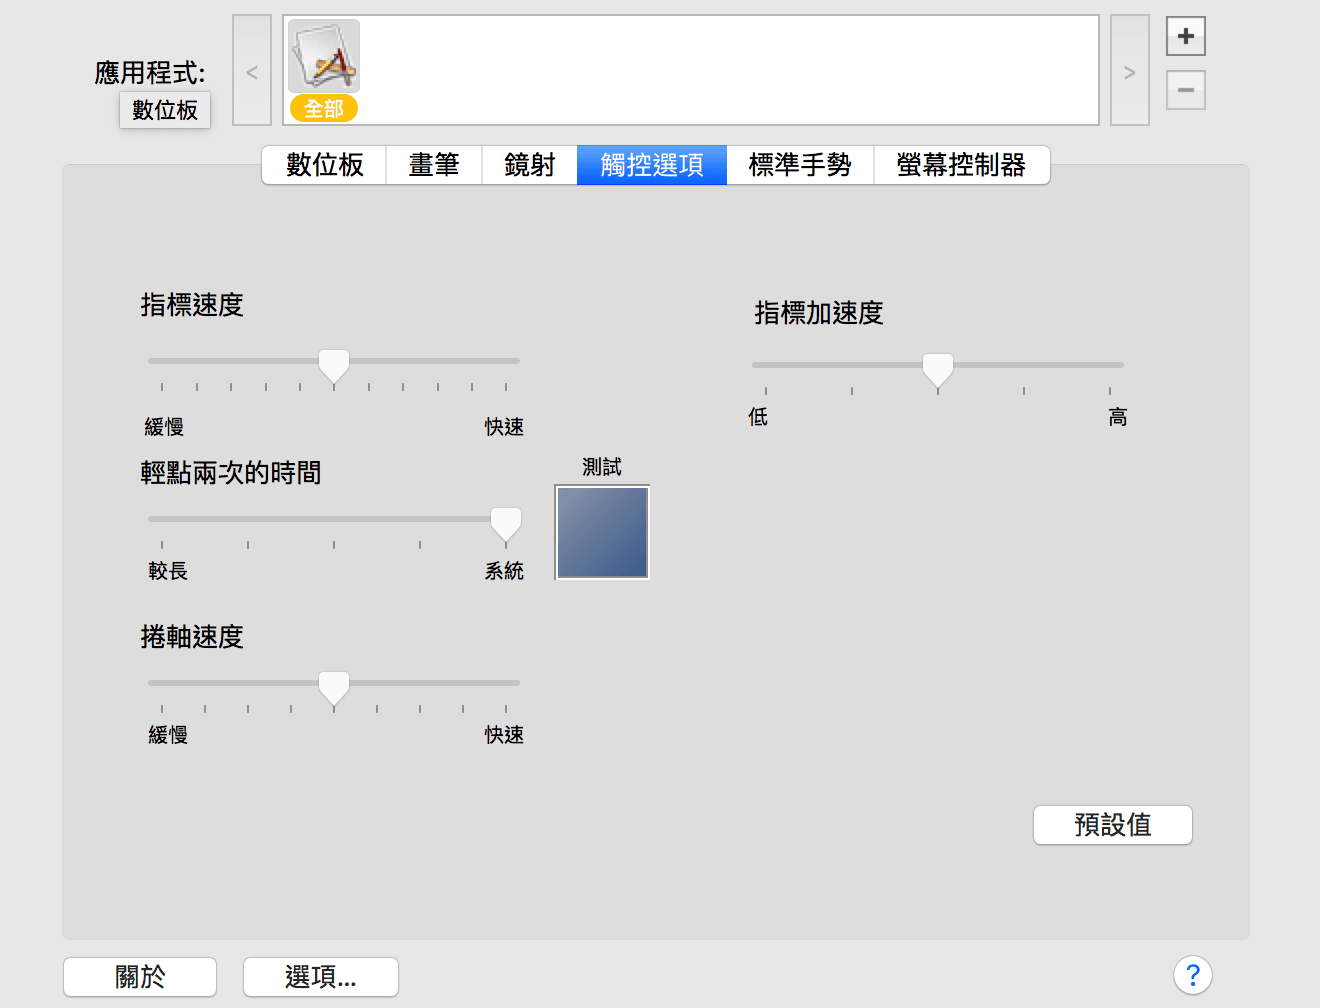 Figure 12: System Preferences: Touch Options.
Standard Gestures
Refer to Figure 13. In the fifth tab, “Standard Gestures,” you can customize actions for one-finger, two-finger, three-finger, and four-finger gestures. This tab is configurable only when the hardware touch toggle is active.
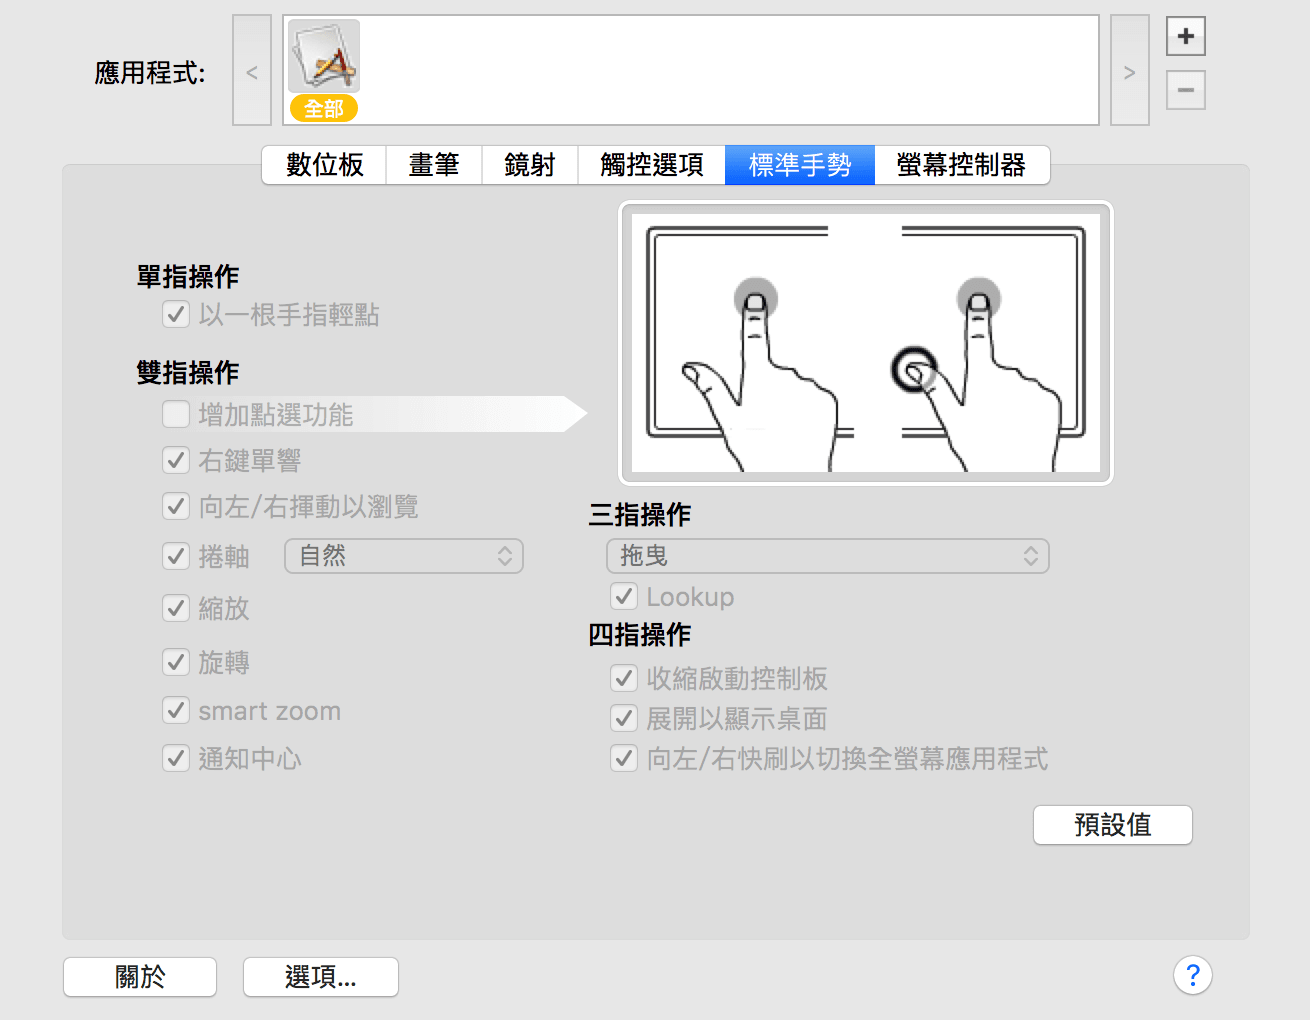 Figure 13: System Preferences: Standard Gestures.
On-Screen Controls
Refer to Figure 14. In the sixth tab, “On-Screen Controls,” you can configure virtual key panels, each supporting up to eight assigned shortcut combinations.
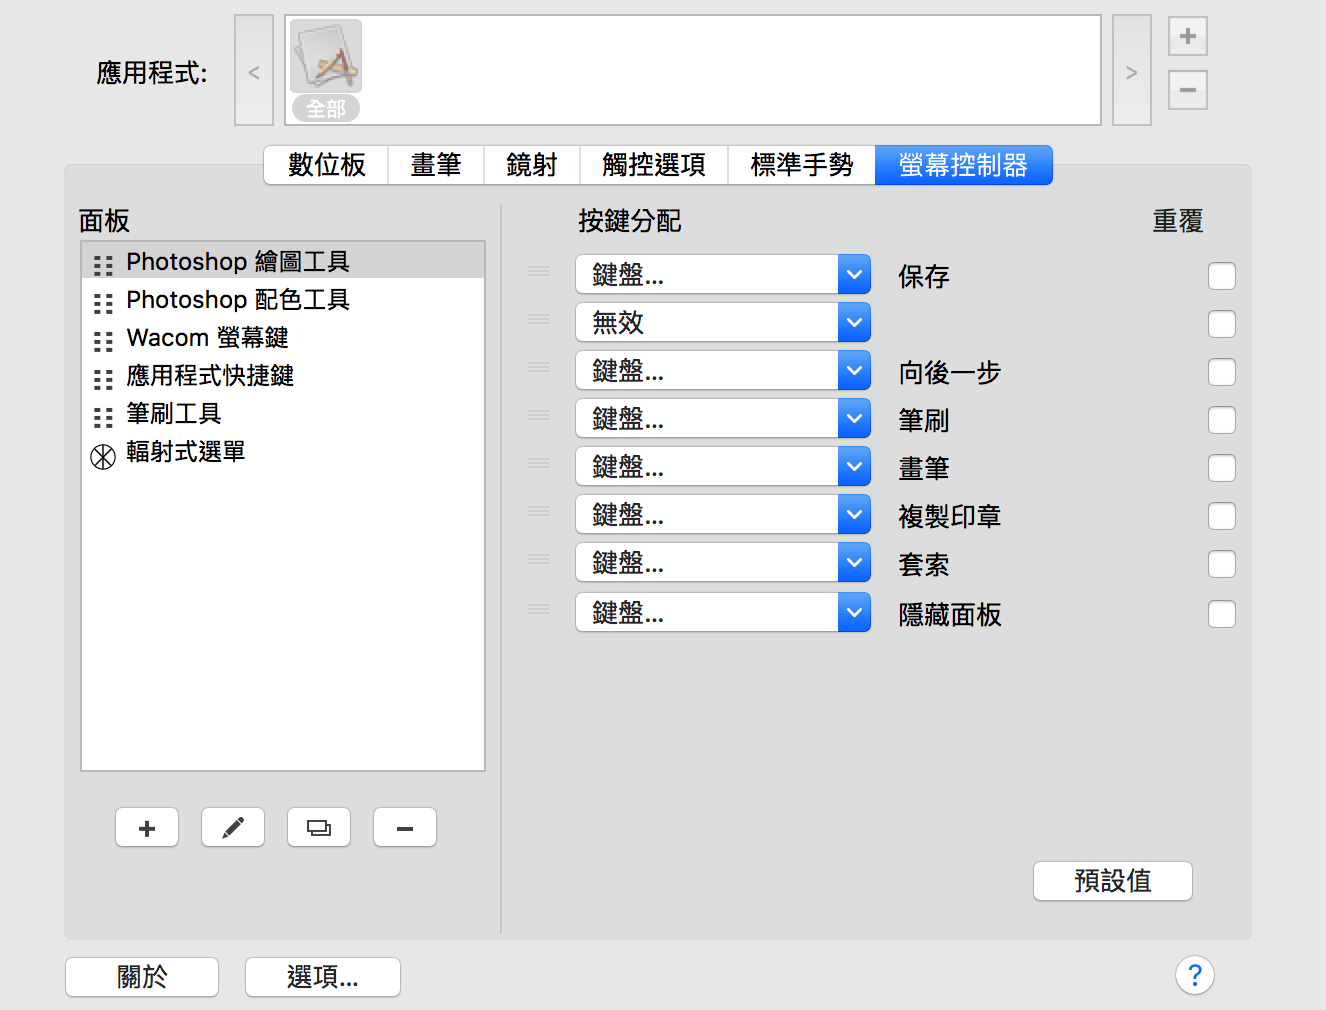 Figure 14: System Preferences: On-Screen Controls.
Refer to Figure 15. Returning to the first tab, “Tablet,” you can assign any ExpressKey to invoke an On-Screen Control panel.
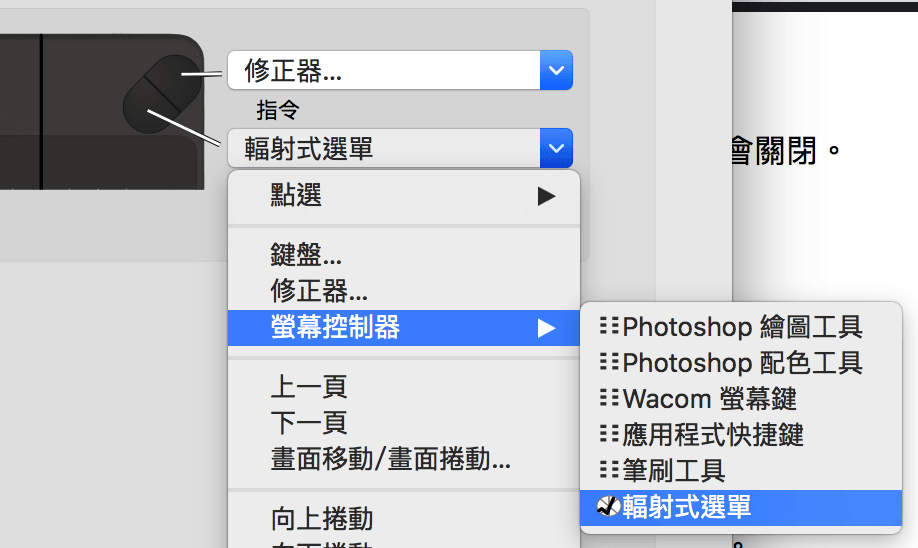 Figure 15: Assigning ExpressKeys to trigger On-Screen Controls.
Pressing the mapped ExpressKey summons a virtual radial pie menu on screen, as shown in Figure 16. You can then click your desired tool or macro using the mouse, trackpad, or pen tip. This expands your available shortcuts dramatically, boosting production efficiency when configured thoughtfully.
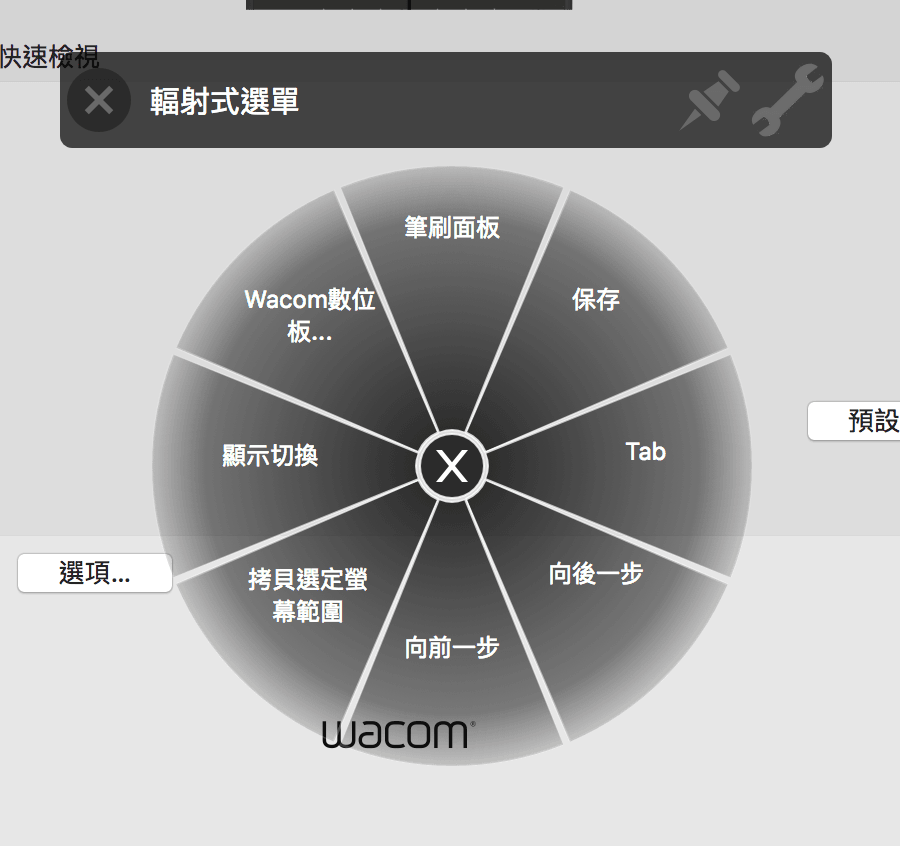 Figure 16: On-Screen Controls: Invoking the radial menu.
Wacom Application Support and Custom Shortcut Profiles
Once you install software compatible with Wacom tablets, you can set tailored shortcut profiles on an application-by-application basis within System Preferences.
Taking Corel Painter—the powerhouse raster illustration suite from vector giant Corel—as an example, Figure 17 shows how Corel Painter 2016 appears in the application header row after installation. From there, each tool tab underneath can be customized with distinct shortcut behaviors specifically adapted to that application.
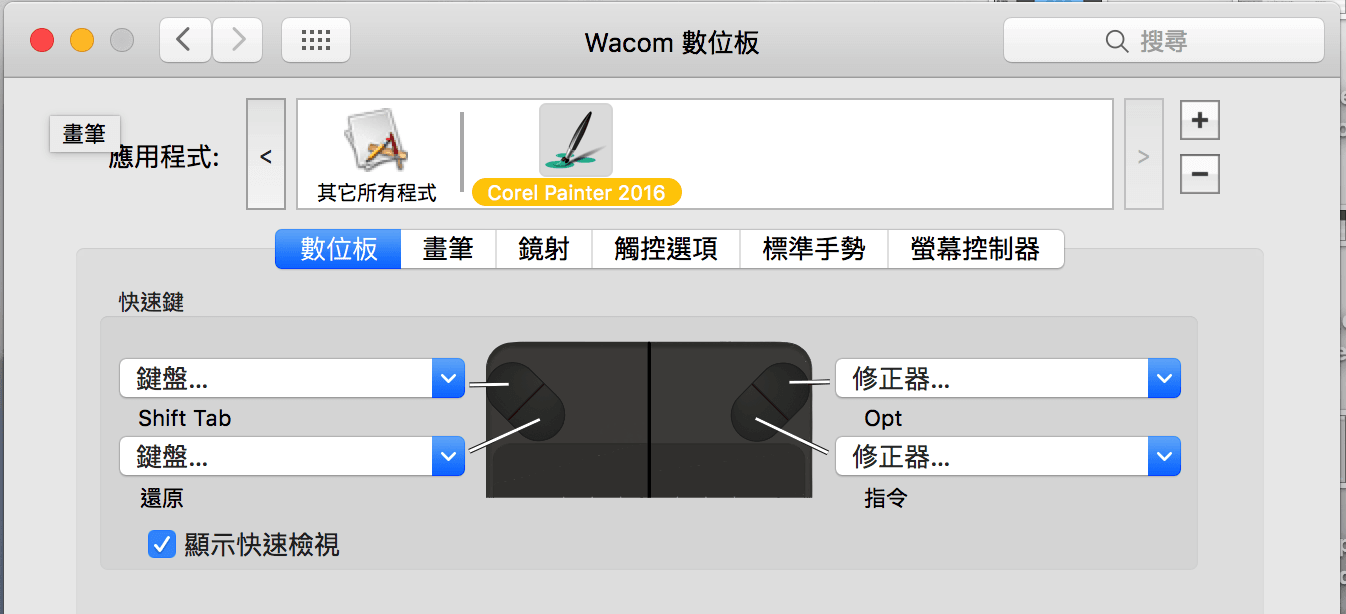 Figure 17: System Preferences: Application-specific profiles.
Support Independent Perspectives & In-Depth Insights
Every thoughtful analysis and candid critique comes from our dedication to truth and quality. We choose not to follow sensational algorithms or clickbait headlines.
Sustaining independent research requires reader support. Make a one-time or monthly contribution, securely processed by Google.
Payments secured by Google · Manage or cancel anytime in your Google Account



Comments