
Thanks to Schneider Electric, who provided the APC Back-UPS Pro 1000 to Vedfolnir for product testing, this article will walk you through our hands-on review and setup guide for this uninterruptible power supply (UPS) unit.
If you are looking to understand the fundamentals of uninterruptible power supplies and need buying recommendations, we have covered that separately in our guide UPS Uninterruptible Power Supply: Fundamentals and Buying Guide (see Further Reading).
For details regarding APC’s PowerChute power management software, check out our companion piece APC UPS Power Management Software: Complete Feature Guide and Tutorial for PowerChute, which dives deep into software features and configuration.
Let’s start with my overall impressions of this unit.
APC Back-UPS Pro 1000: Impressions and Hands-on Experience
Compared to other UPS units I have used in the past, this APC model immediately struck me as remarkably professional. My initial impression was that it looks sleek, tall, and upscale. Unlike typical squat, bulky UPS boxes, its clean, slim profile slides effortlessly into tight spaces alongside a PC tower. A slender footprint offers practical benefits too: less surface area for dust to collect, making it much easier to keep clean (I have never understood rounded chassis designs that cannot even support a coffee cup).
The APC Back-UPS Pro 1000 is a line-interactive UPS. Connecting it to a PC via the included USB cable unlocks complete power monitoring and environmental controls via APC’s PowerChute software. Beyond software control, the unit features a crisp, white-backlit monochrome LCD. Through front-panel menu buttons, you can configure operating parameters directly on the device, including enabling energy-saving master/controlled outlets, cycling through telemetry readouts, and adjusting power-saving sensitivity thresholds. The depth of data presented on this display gives users full mastery over their power setup.
Excessive noise is often the biggest complaint with uninterruptible power supplies. In a previous lab, we had a UPS whose cooling fan and relay switches produced jarring clicks, accompanied by a persistent high-frequency whine. To maintain my sanity, I always kept that machine as far away as possible. By contrast, this APC UPS has remained whisper-quiet since being plugged in, proving the quality of its internal electrical engineering. The fanless design also underscores APC’s confidence in its thermal dissipation. When I deliberately simulated an outage by pulling the wall plug, the relay cutover was far quieter than expected. Even placed right in a bedroom or home office, its presence goes unnoticed (a disc drive opening is noticeably louder).
My workstation and monitor draw between 110W and 160W combined. This UPS sustained that load for approximately 30 minutes during a blackout, proving the internal battery capacity is more than adequate. Internally, the unit houses two series-connected 12V/7Ah lead-acid batteries (Kung Long WP7.2-12 OEM cells, APC replacement cartridge APCRBC123). The battery module is user-replaceable and typically lasts 3 to 6 years under normal conditions.
APC designed this unit with deliberate eco-consciousness and energy efficiency in mind, which is reflected in the sophisticated rear outlet layout. The UPS features one “Master” outlet and three “Controlled” outlets. As the name implies, the Master outlet powers your primary computer. When the computer powers down or enters sleep mode, the UPS detects the drop in wattage and automatically cuts power to the peripheral devices plugged into the Controlled outlets (such as monitors and external desktop hard drives). This eliminates parasitic standby phantom draw, saving significant energy and money over time.
We will explain each outlet’s specific role in detail below. Because the socket arrangement has specific functional roles, we strongly encourage reading through that section carefully.
Did I encounter any shortcomings during testing? In terms of core reliability, none whatsoever; it performs rock-solidly. However, regarding industrial design refinement, there is always room for minor enhancements.
Regarding hardware finishing, completeness in details matters. The rear panel features two protruding gold coaxial connectors and 11 socket receptacles. Providing peel-away protective stickers, silicone caps for the coaxial jacks, or snap-in safety socket covers straight from the factory would prevent children from accidentally touching live contacts and soften the industrial look. Furthermore, in a subtropical environment like Taiwan (Republic of China), protecting exposed metal surfaces directly retards environmental oxidation.
On a side note: ever since upgrading my workstation to Windows 8.0/8.1, system Sleep Mode had mysteriously broken down! After every workday, I had to close every application and perform a full shutdown, which disrupted my daily workflow. Remarkably, once connected through this UPS, sleep mode began functioning flawlessly again. Whether this was thanks to cleaner AC power delivery or an unannounced Windows patch, it solved a persistent daily headache.
Understanding the Rear Panel Outlets
To maximize the benefits of the APC Back-UPS Pro 1000, you need to understand how the rear outlets are categorized.
We divide the rear panel layout into five distinct zones:
- Gigabit Ethernet & Coaxial Surge Protection: Features one RJ-45 in/out pair and one coaxial in/out pair. Running external networking lines or antenna cables through the input and output ports shields your computer equipment from dangerous line surges.
- USB Port: Connects to your PC via the bundled proprietary cable to enable OS-level power management and software monitoring.
- Ground Screw & Wiring Fault Indicator: The ground screw provides an external earthing point for secondary surge devices, while the wiring fault LED alerts you if building wall receptacles are incorrectly wired or improperly grounded.
- Battery Backup + Surge Protection Outlets: These four outlets receive utility power under normal conditions and automatically switch to battery inverter power during an outage. Arranged vertically on the left side of the rear panel:
- Master Outlet: Connects your primary desktop tower. It acts as the command anchor, dictating power delivery to the controlled outlets based on whether the PC is active or off.
- Controlled Outlet (A): Typically connects your primary monitor. When the PC shuts down, the monitor powers off automatically.
- Battery Outlets (A): Ideal for external backup storage or network switches, ensuring they remain online on battery power during an outage so you can wrap up active transfers or wrap up communications.
- Surge-Only Outlets: These four outlets on the right side provide surge suppression only and do not supply battery power during an outage:
- Controlled Outlets (B): Governed by the Master outlet’s state, but receive no battery backup during power cuts. Ideal for non-critical peripherals like scanners or desktop lamps.
- Standard Surge Outlets (B): Behave like standard wall outlets with added surge suppression, ideal for phone chargers or telephone bases.
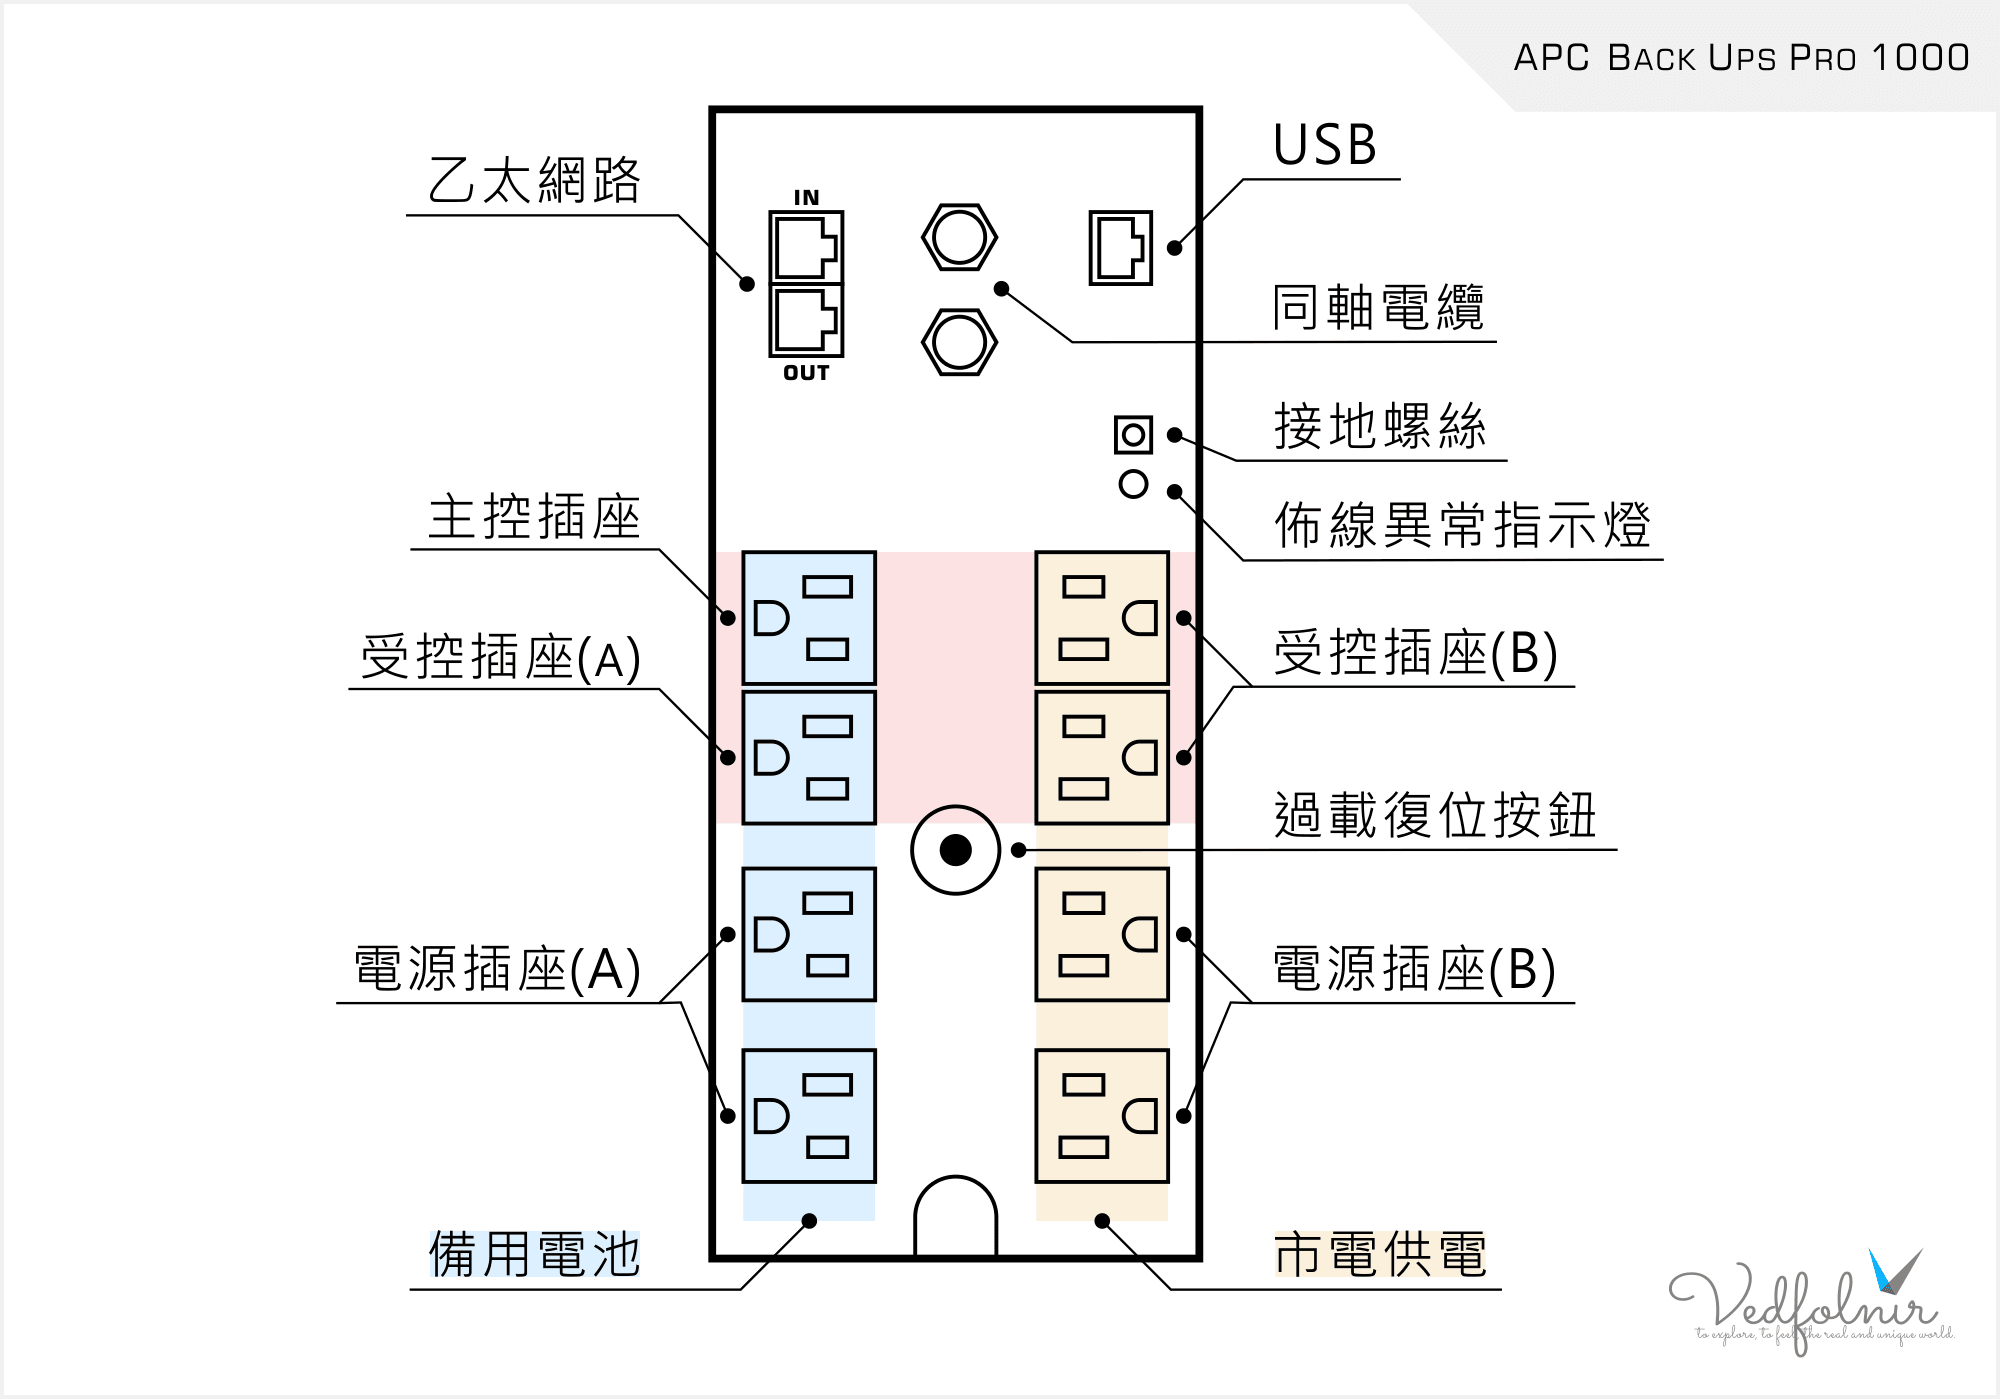
APC UPS rear panel layout
Key Features of APC Back-UPS Pro 1000
- Comprehensive LCD Display: Status indicators displaying over 20 unique power, battery, and diagnostic states.
- Automatic Voltage Regulation (AVR): Boosts low voltage and trims high voltage instantly, stabilizing power without depleting battery reserves.
- Flexible Outlets: 4 battery backup + surge outlets and 4 surge-only outlets.
- Data-Line Surge Suppression: Gigabit Ethernet and coaxial cable spike protection.
- Push-Button Circuit Breaker: Quick overload recovery without replacing fuses.
- Periodic Self-Testing: Automatic battery diagnostics ensure readiness before power failures occur.
Unboxing the APC Back-UPS Pro 1000
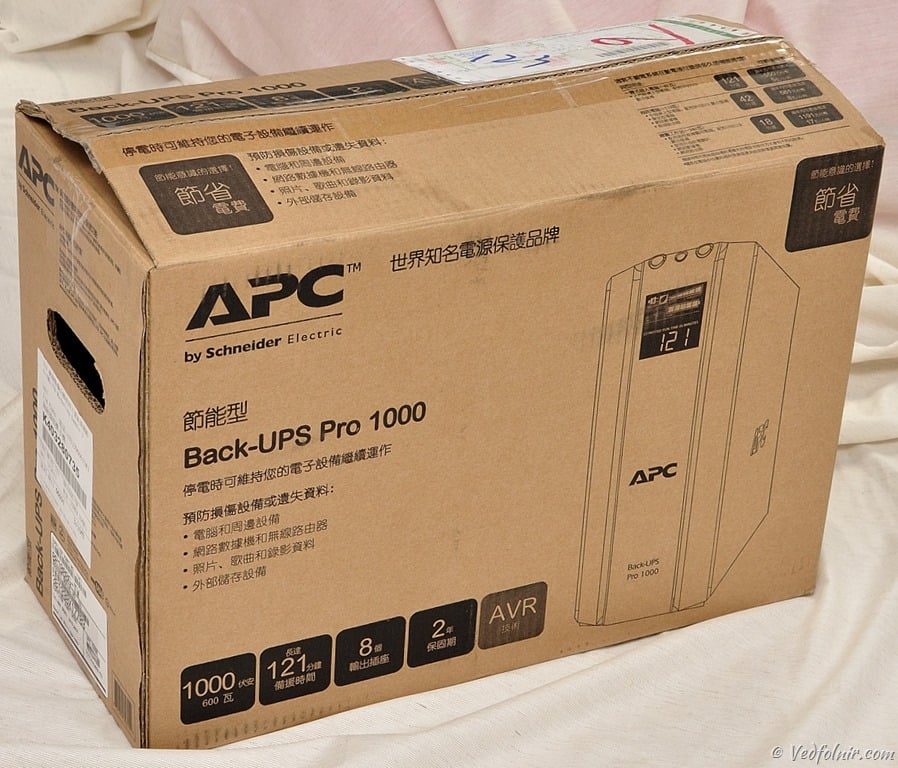
Outer packaging
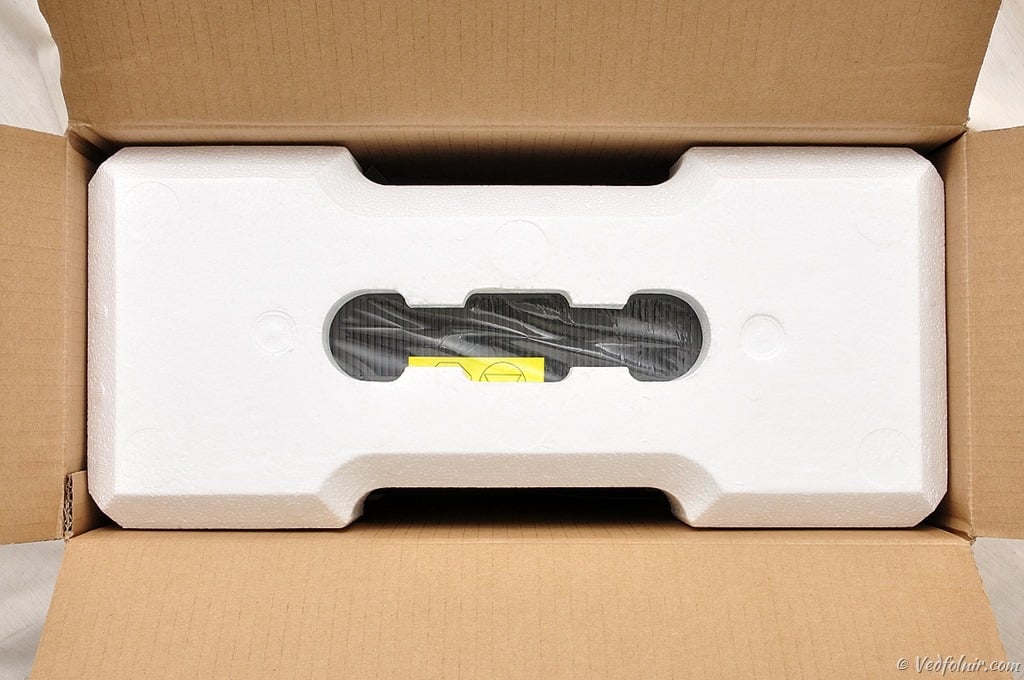
Opening the retail carton
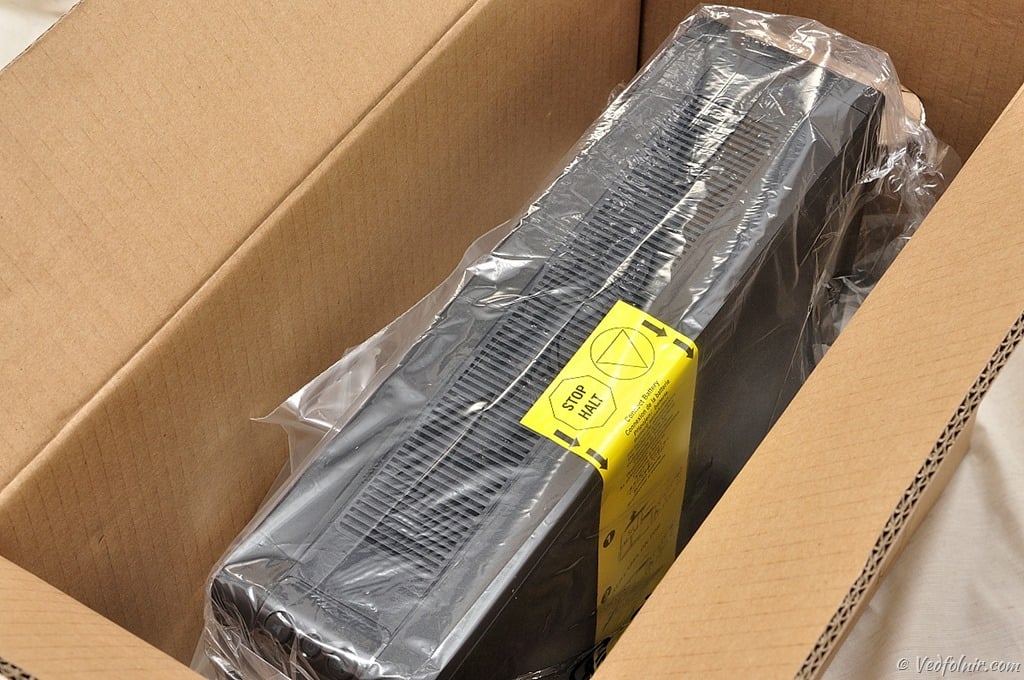
The UPS unit after lifting the top foam cover
Notice the specialized USB cable visible in the top left: one end is standard USB Type-A, while the other is a 10-pin RJ50 (10P10C) connector. Take care not to misplace this proprietary cable!
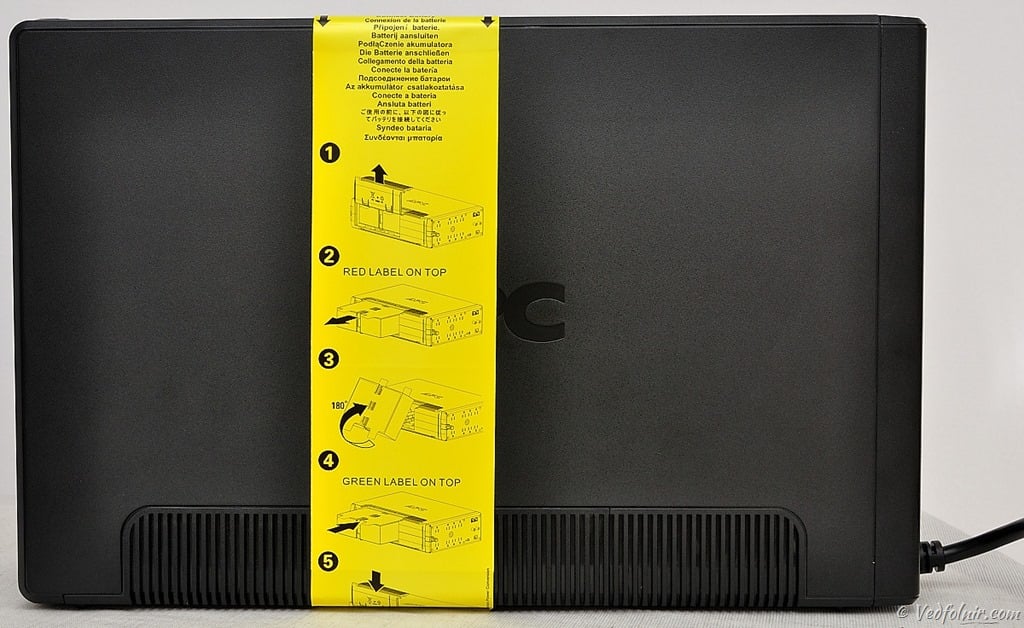
A yellow sticker on the chassis details the battery connection procedure.
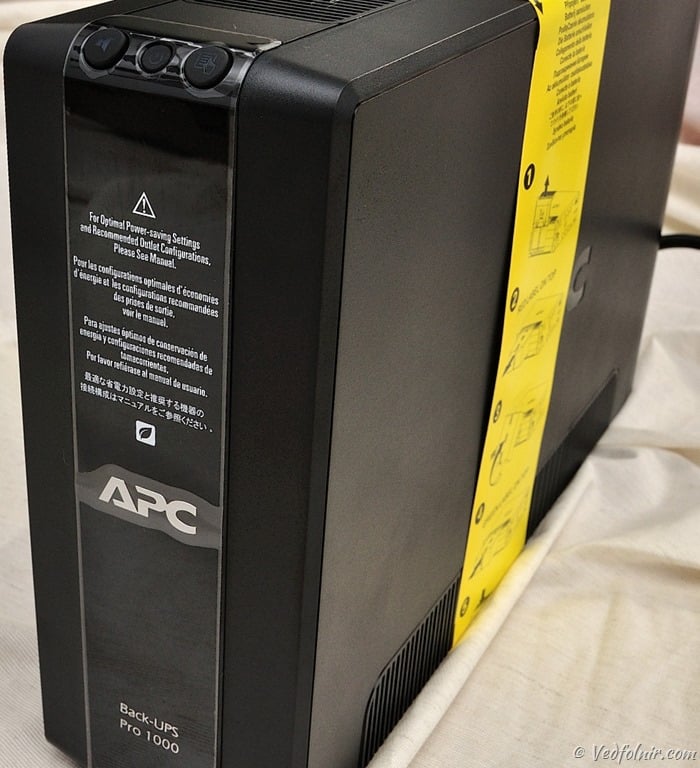
Front profile: clean, slim form factor with ventilation grilles where needed.
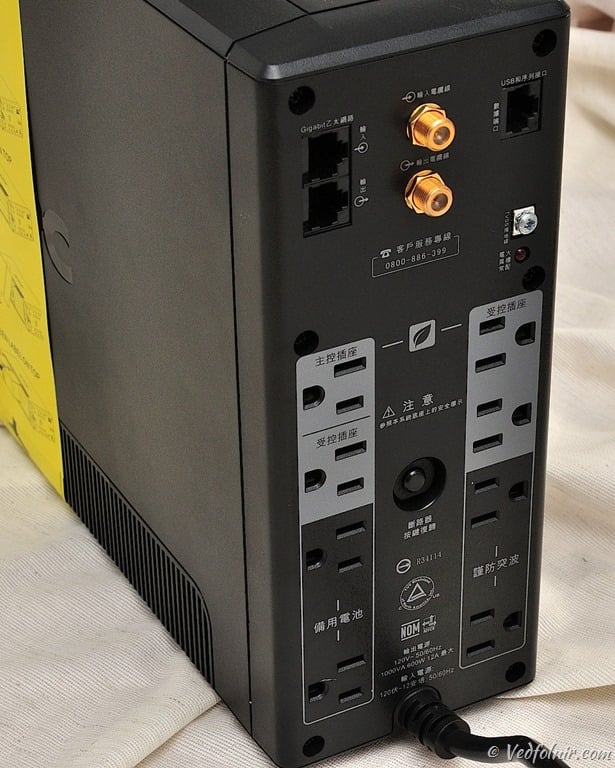
Rear panel overview; the outlets marked against the lighter background represent the Master/Controlled energy-saving group.
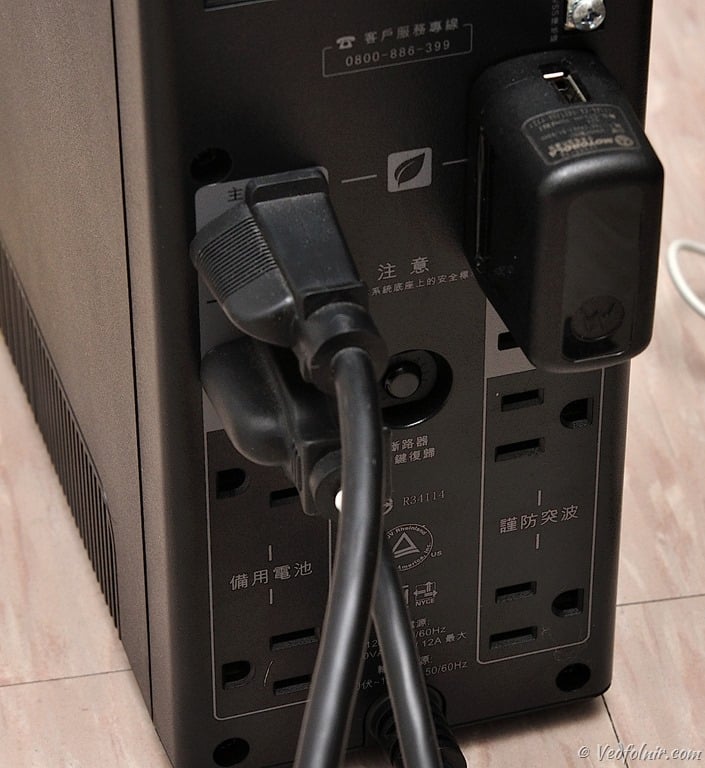
Example setup of connected Master and Controlled devices
Included In the Box
The package includes the proprietary USB data cable, coaxial cable, PowerChute software CD, dual-language manuals, and warranty documentation:
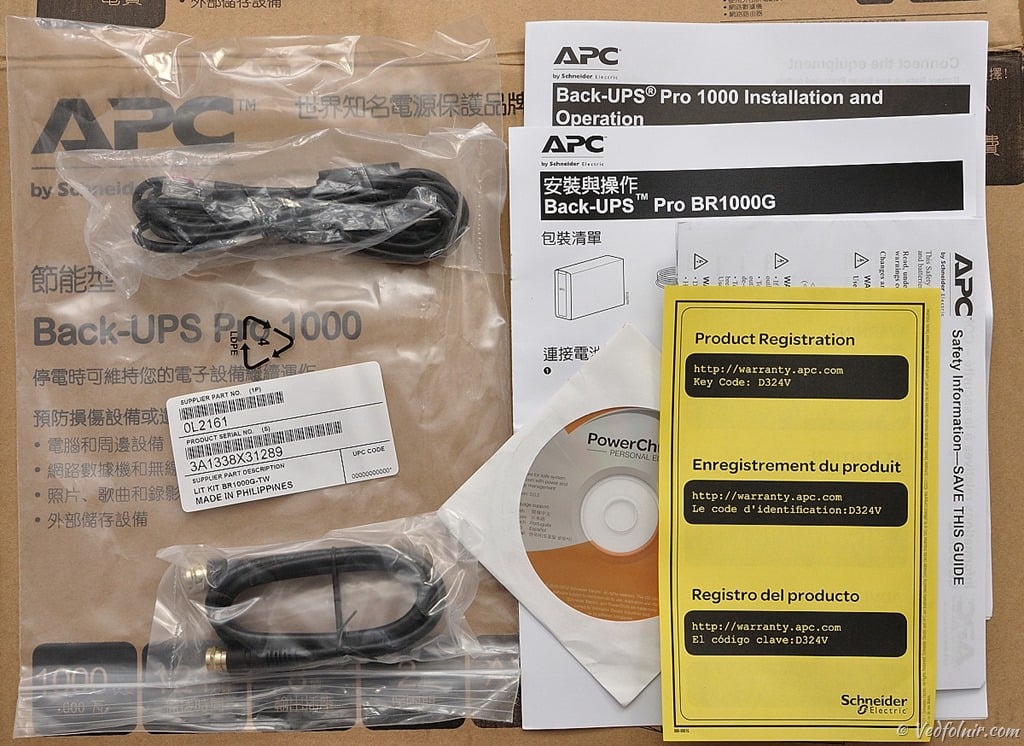
Complete accessories package
Preparing the Battery Module
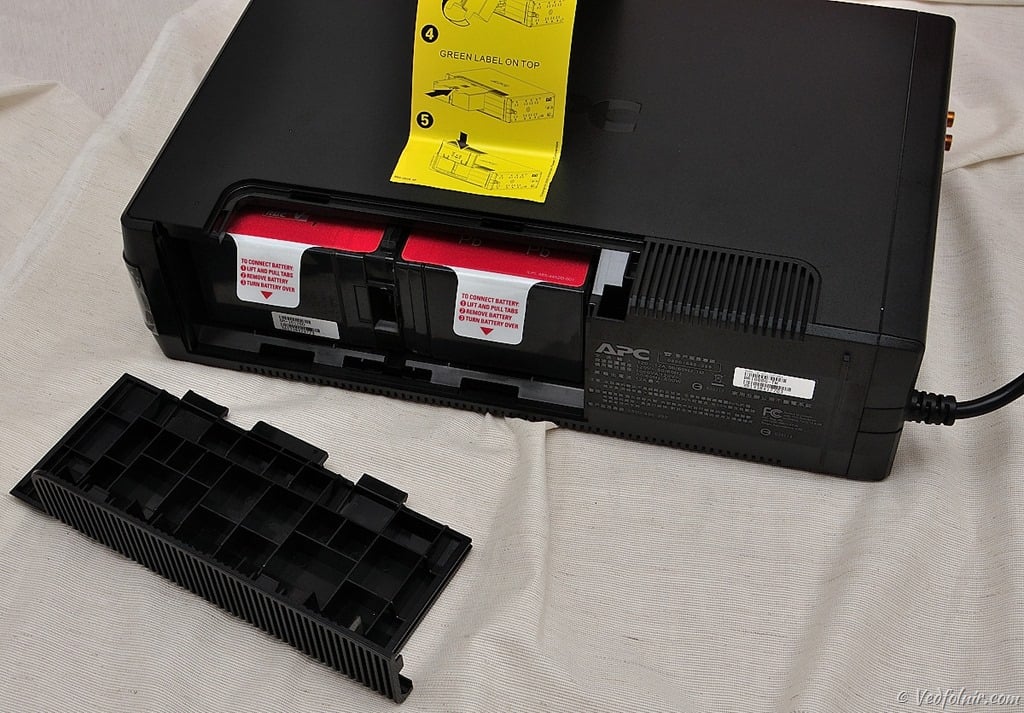
Slide open the bottom battery cover as shown on the instruction sticker. The red tag indicates the battery is currently disconnected for shipping.
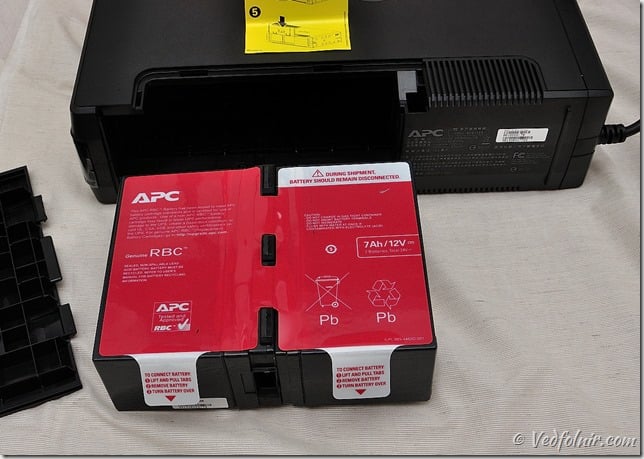
The battery slides out smoothly from the compartment.
Once removed, flipping the battery reveals a green sticker on the reverse side. Reinserting the battery with the green label facing inward connects the internal terminals.
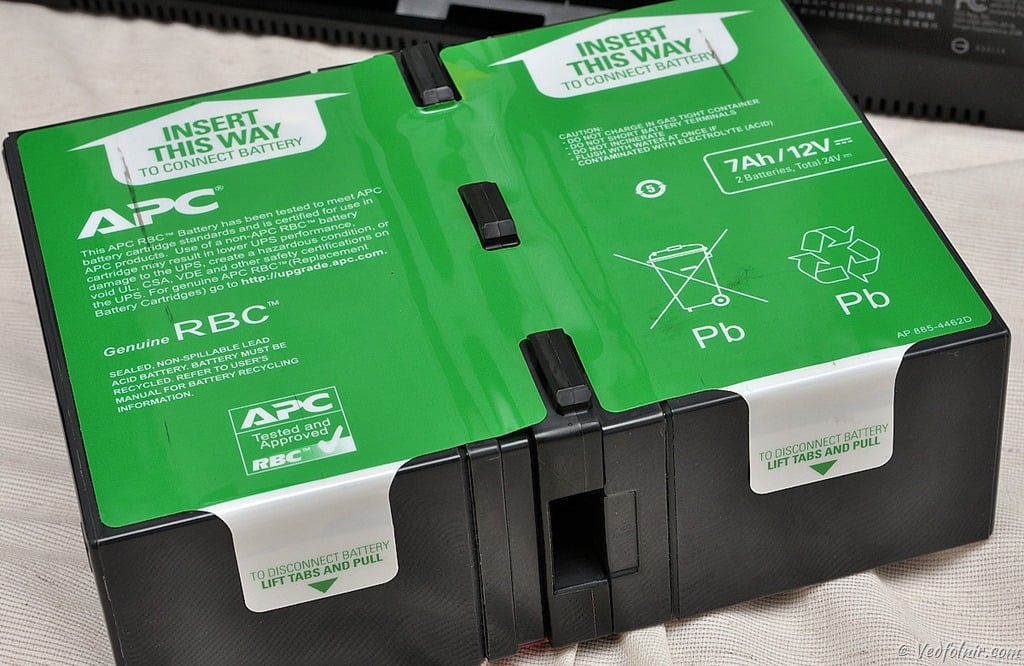
The clever flip-around design: green side means connected and ready for use.
Tip: If you plan to move homes or store the unit for an extended period, reverse the process so the red side faces in, preventing parasitic discharge and preserving battery health.
Looking closely at the red and green ends, only one side houses metal contact plates in its groove, enabling this simple reversal mechanism.
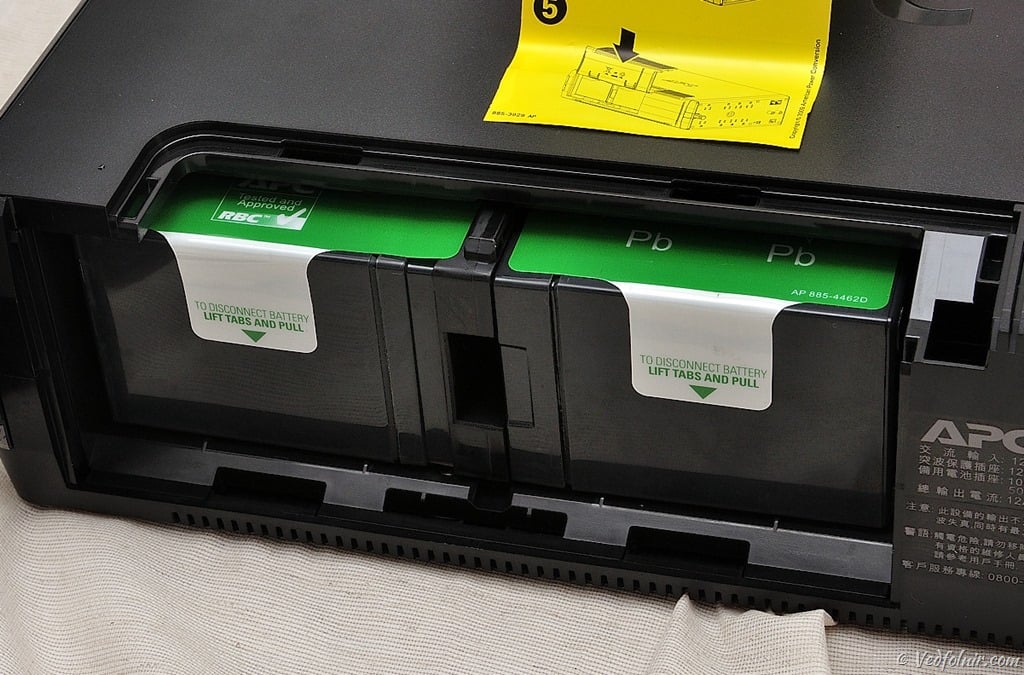
Reinserting the connected battery back into the chassis
Front-Panel LCD Information Display
The upper front panel houses three pushbuttons (from left to right: Mute, Power, and Display) alongside the informative LCD screen.
The screen displays key real-time indicators: Battery Mode (On Batt), audible alarm status, zero load bar (since no gear is connected yet), battery charge level, and estimated runtime in minutes based on current load:
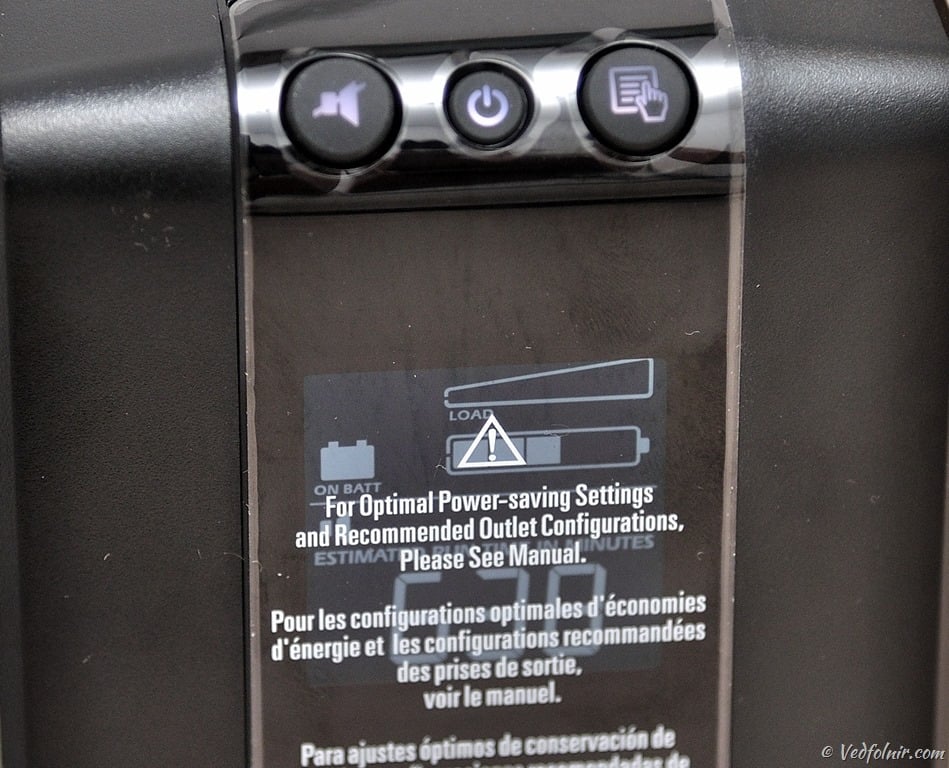
Front status LCD
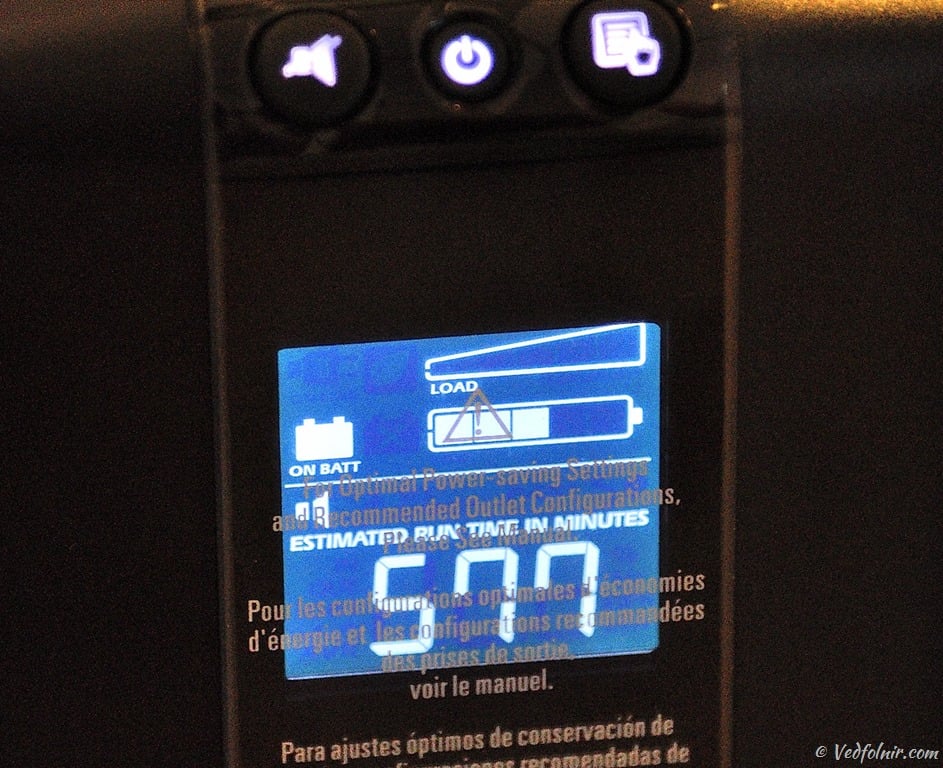
Pressing the Display button illuminates the backlight.
Pressing the Display button cycles through input AC voltage. The “ONLINE” icon in the upper left confirms normal utility operation. The load gauge indicates power consumption in 20% increments (two bars denote 20–40% capacity).
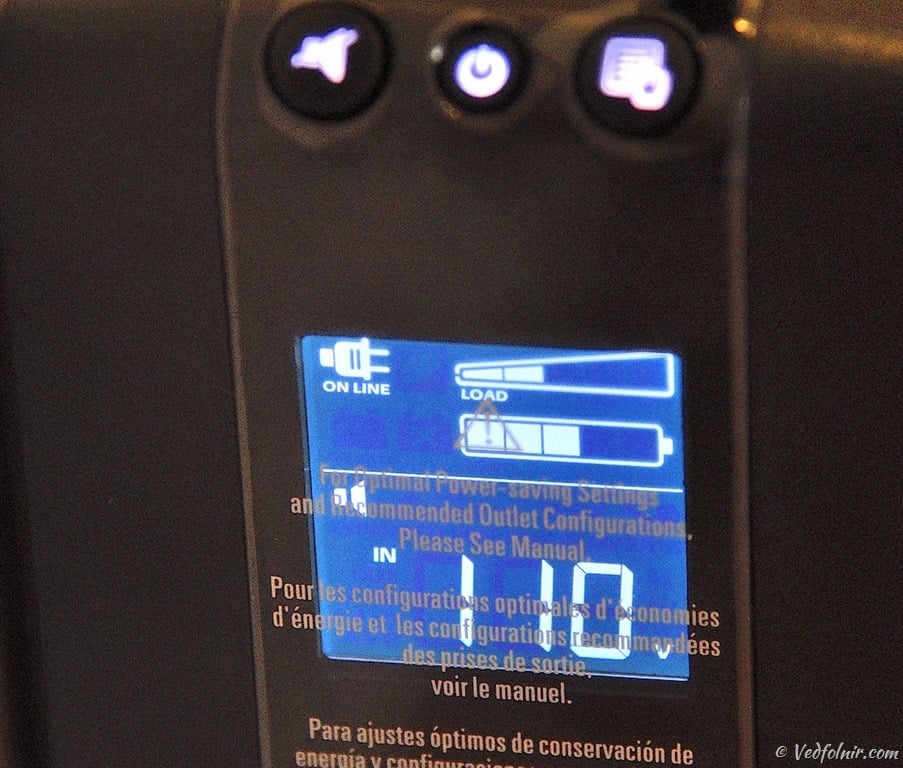
Utility input voltage readout
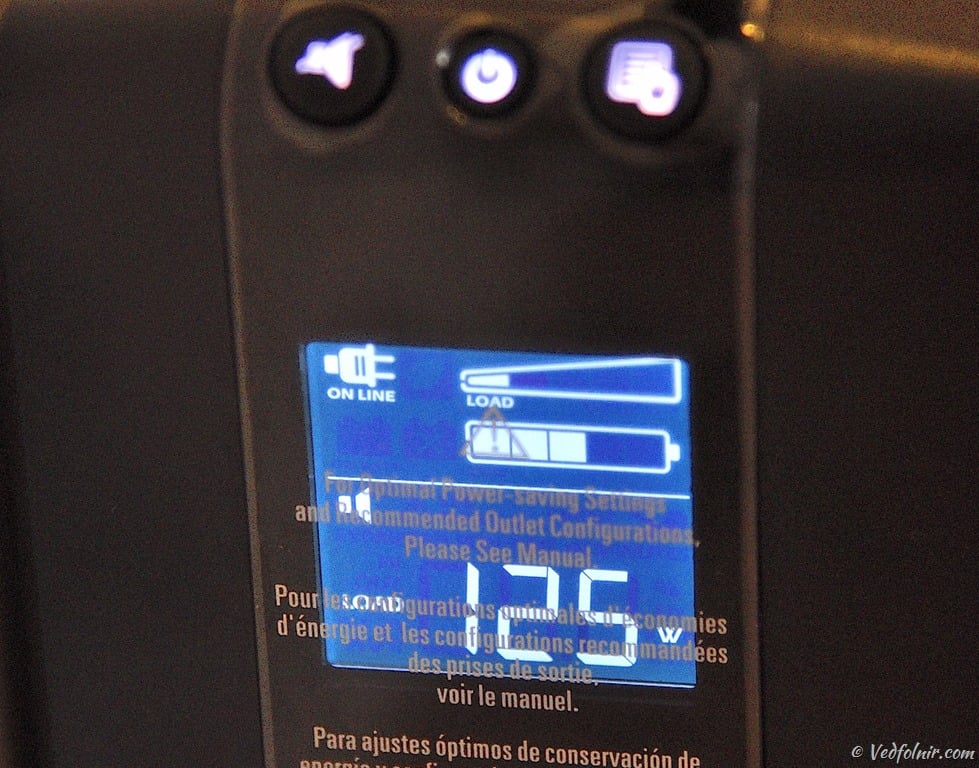
Pressing again shows real-time wattage drawn by connected loads.
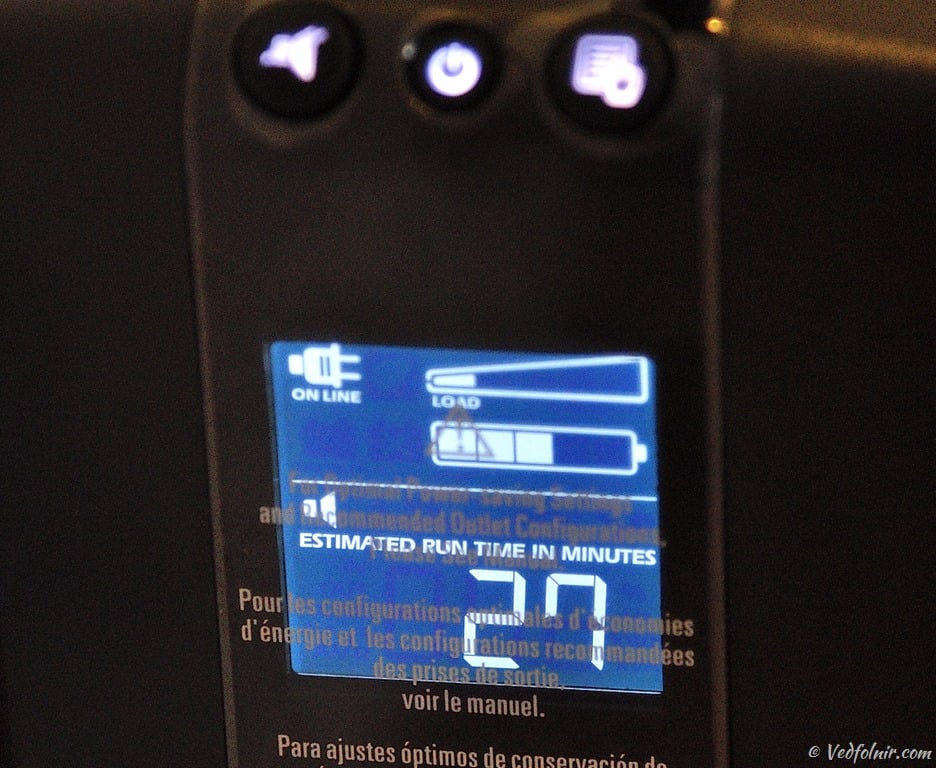
Pressing once more displays estimated battery runtime under current consumption.
Checking System Voltages in BIOS
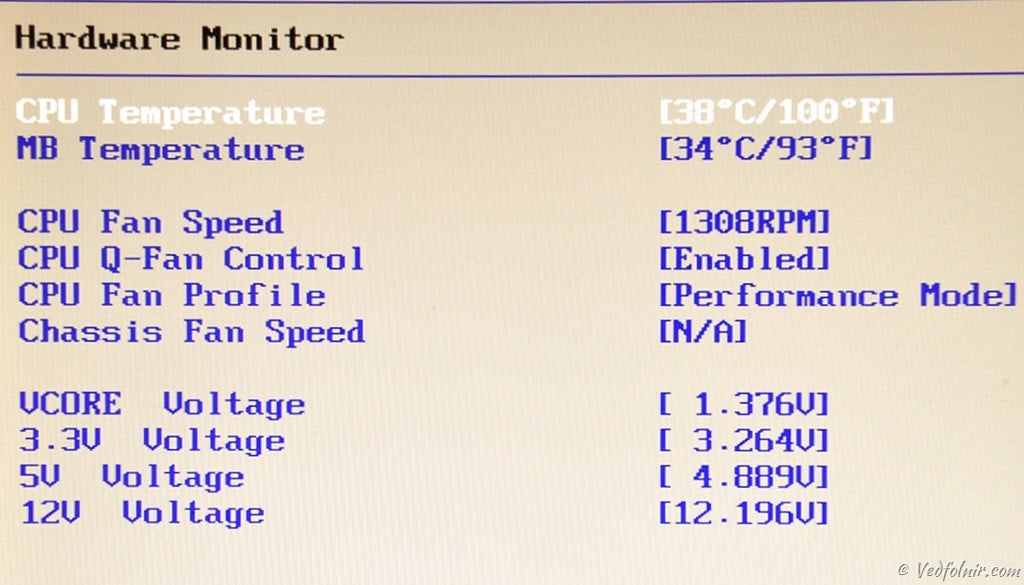
With the UPS conditioning incoming power, internal motherboard voltages remained exceptionally stable.
Technical Specifications: APC Back-UPS Pro 1000
| Specification | Details |
|---|---|
| Model | BR1000G-TW |
| Output Capacity | 1000 VA / 600 W |
| Nominal Output Voltage / Frequency (Utility) | 120 V, 50/60 Hz +/- 3 Hz (auto-sensing) |
| Output Voltage / Frequency (Battery) | 115 V +/- 8%, 50/60 Hz +/- 1 Hz (auto-sensing) |
| Output Connections | Total 8x NEMA 5-15R receptacles: • 4 Battery Backup + Surge (1 Master, 1 Controlled) • 4 Surge-Only (2 Controlled) |
| Waveform Type | Stepped approximation to a sinewave |
| Input Voltage / Frequency | 120 V, 50/60 Hz +/- 3 Hz |
| Input Connection | 6-foot cord with NEMA 5-15P plug |
| Surge Energy Rating | 354 Joules |
| Filtering | Full-time multi-pole noise filtering: 5% IEEE surge let-through, zero clamping response time |
| Data Line Protection | Gigabit Ethernet (10/100/1000 Base-T RJ-45), Coaxial (CATV/SATV/Modem) |
| Dimensions (H x W x D) | 25.0 x 10.0 x 38.2 cm |
| Unit Weight | 10.7 kg |
| Battery Type | Maintenance-free sealed lead-acid |
| Software Management | PowerChute Personal Edition (via USB / Serial) |
| Safety Approvals | FCC Part 15 Class B, TUV, NOM, UL 1778, BSMI |
Further Reading
- APC Back-UPS Pro 1000 Line-Interactive UPS (Product Reference).
- UPS Uninterruptible Power Supply: Fundamentals and Buying Guide.
- APC UPS Power Management Software: Complete Feature Guide and Tutorial for PowerChute.
Support Independent Perspectives & In-Depth Insights
Every thoughtful analysis and candid critique comes from our dedication to truth and quality. We choose not to follow sensational algorithms or clickbait headlines.
Sustaining independent research requires reader support. Make a one-time or monthly contribution, securely processed by Google.
Payments secured by Google · Manage or cancel anytime in your Google Account



Comments