

Ever since the internet became ubiquitous and USB flash drive capacities grew larger, people’s reliance on optical disc drives has decreased markedly. I have even unplugged the power cable from the optical drive inside my desktop computer, powering it on only when strictly necessary. As a result, I no longer keep disc-burning software permanently installed on my computer. I used to love Nero, but now I don’t even know if they are still in business.
That said, the Windows 8.x series does provide basic optical disc burning and ISO image handling. For example, as shown in Figure 1, Windows 8.x includes a built-in ISO mount feature (which creates a virtual disc drive on the system) and the ability to burn disc images, allowing me to discard Alcohol 120% altogether.
 Figure 1. Windows 8.x optical disc burning and ISO image features
However, what I need right now is to create an ISO image directly from an optical drive, which Windows does not seem to have built-in yet. As for the famous WinISO software, their free v5.3 does not support DVD or Blu-ray operations and only runs on Windows 98/XP, while v6.0 costs $20 USD. More importantly, both 5.3 and 6.0 require installation. Therefore, today I want to introduce another tool: “CDBurnerXP.”
If you are like me and prefer not to install too many programs on your system, you can click “More download options” in Figure 2. One option, the “Portable version”, can be used directly right after extraction. Regardless of which version you choose, both 32-bit and 64-bit builds are available, with full support for Windows 8.x.
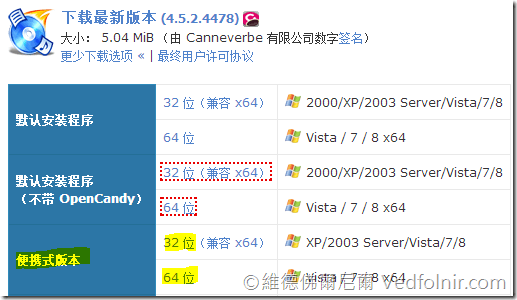
Figure 2. Official download page
As shown in Figure 3, after extracting the downloaded archive into a folder, locate the cdbxpp.exe executable file and launch it to run the application.
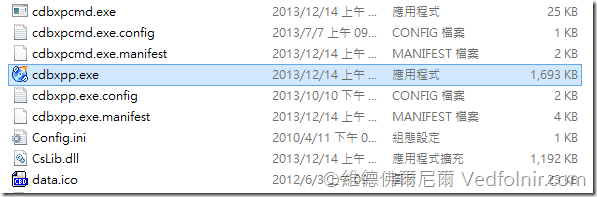
Figure 3. CDBurnerXP directory structure
Setup Steps
As shown in Figure 4, first configure your preferred language; both Traditional Chinese and Simplified Chinese are supported.

Figure 4. Language settings
Once the language is set, you will be taken directly to the core features of the software. From the main menu interface shown in Figure 5 below, you can see the options provided by CDBurnerXP, including:
- Data Disc
- Video DVD
- Audio Disc
- Burn ISO image
- Copy or Grab Disc
- Erase Disc
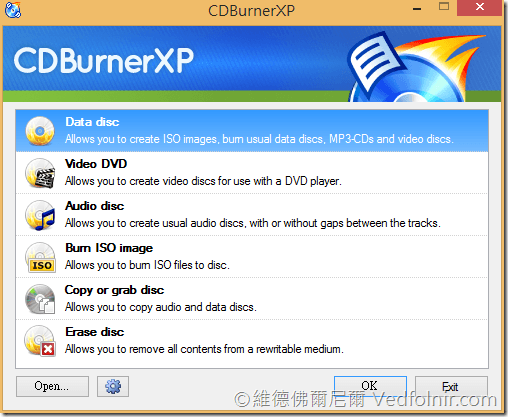
Figure 5. Main software menu interface
These features cover virtually everything needed for disc burning, and their uses are straightforward. Feel free to explore whichever suits your needs.
However, the reason I specifically powered on my optical drive was not to burn a disc, but to rip one and convert it into an ISO image file. Therefore, we will run the Data Disc feature as shown in Figure 6.
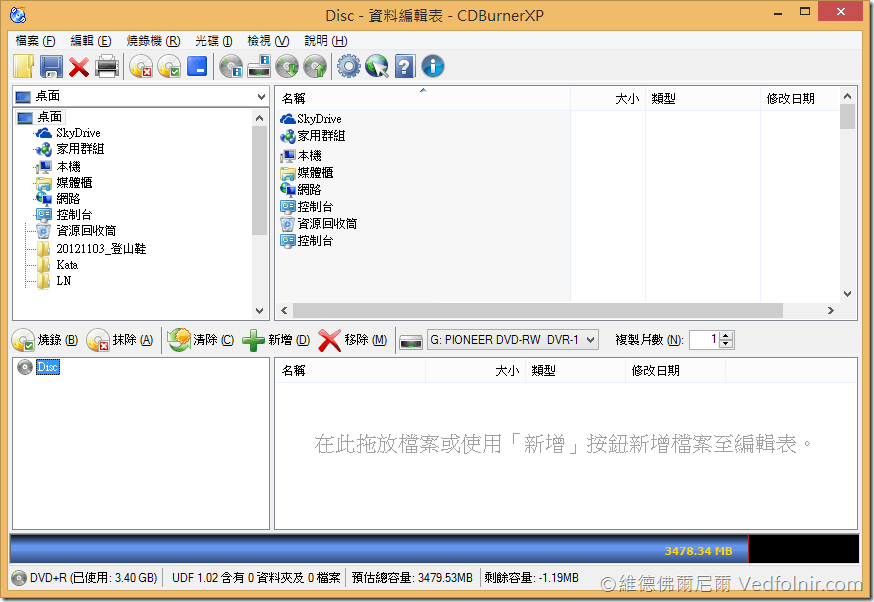
Figure 6. Data Disc editing interface
Next, as shown in Figure 7, use the folder browser in the compilation window to view the contents of the optical drive and add/drag files down into the compilation list below.
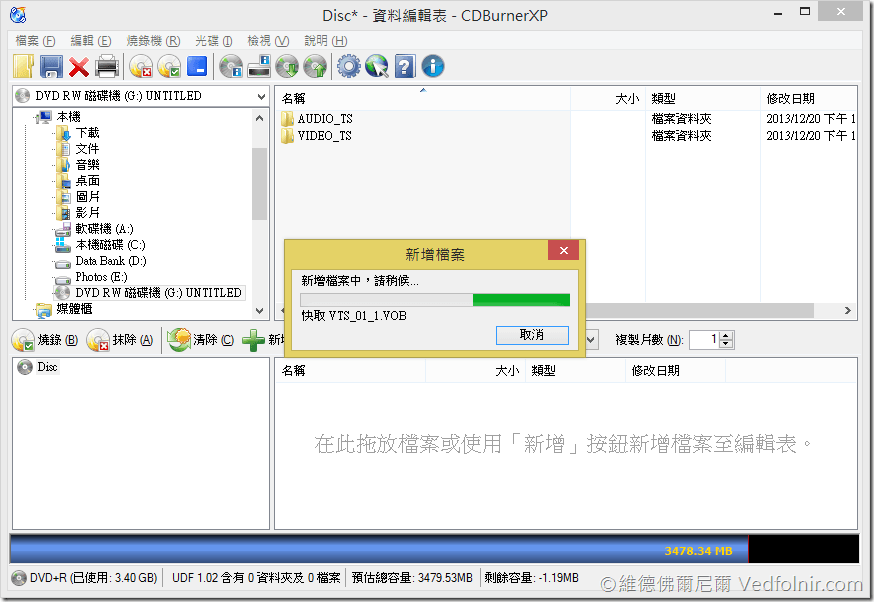
Figure 7. Data compilation interface
Finally, as shown in Figure 8, open the “File” menu and select “Save compilation as ISO file,” which allows you to save the contents and structure of the compilation as an ISO image.
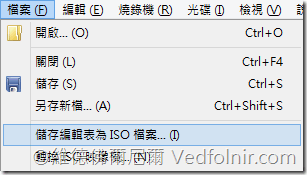
Figure 8. File menu
After clicking “Save compilation as ISO file” shown in Figure 8, as depicted in Figure 9, CDBurnerXP will automatically begin generating a new ISO image file from the compilation content.

Figure 9. Creating ISO image
Reference Resources
- Official Website: http://cdburnerxp.se/en/download
Support Independent Perspectives & In-Depth Insights
Every thoughtful analysis and candid critique comes from our dedication to truth and quality. We choose not to follow sensational algorithms or clickbait headlines.
Sustaining independent research requires reader support. Make a one-time or monthly contribution, securely processed by Google.
Payments secured by Google · Manage or cancel anytime in your Google Account



Comments