
I finally ordered a single-board computer I had been eyeing for a long time—the Raspberry Pi 3—to experiment with. In this post, I want to document the process of assembling the acrylic enclosure with the motherboard, highlight a few tricky pitfalls I ran into, and share some practical assembly tips.
Below is the acrylic panel kit designed specifically for the Raspberry Pi. It usually comes as a 6-piece enclosure set, but since I planned to mount an LCD touchscreen on top, I only needed 5 pieces.
I recommend peeling off all the protective kraft paper backing before you start assembling. Some people hesitate, worrying that the pristine, transparent acrylic might pick up fingerprints or scratches. I felt that hesitation too at first. But when you realize that any gear you actually use is bound to show wear over time, that mindset shifts. Rather than preserving a fragile illusion only to waste time dealing with protective paper later, you might as well peel off the mask right from the start!
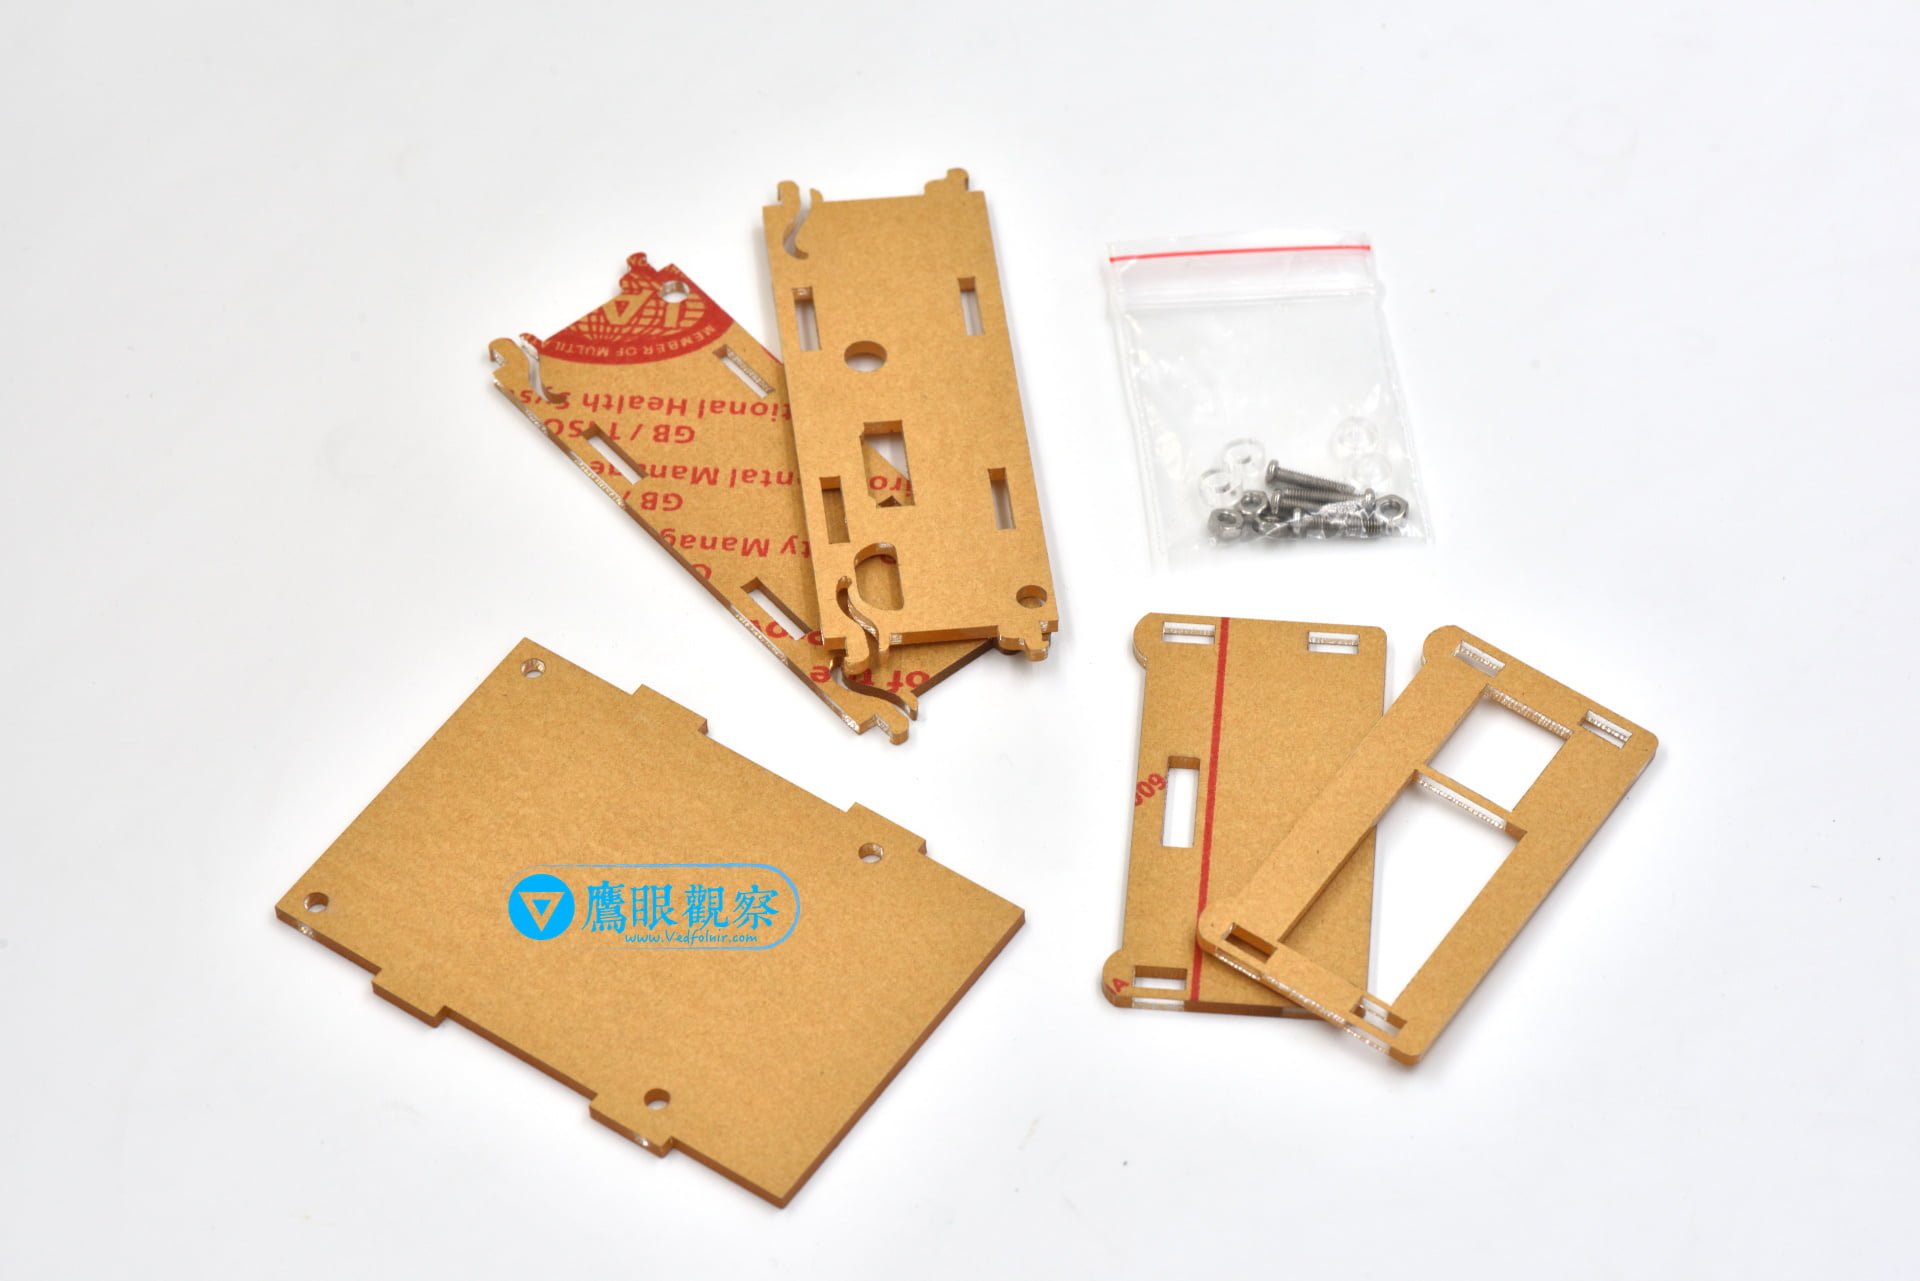
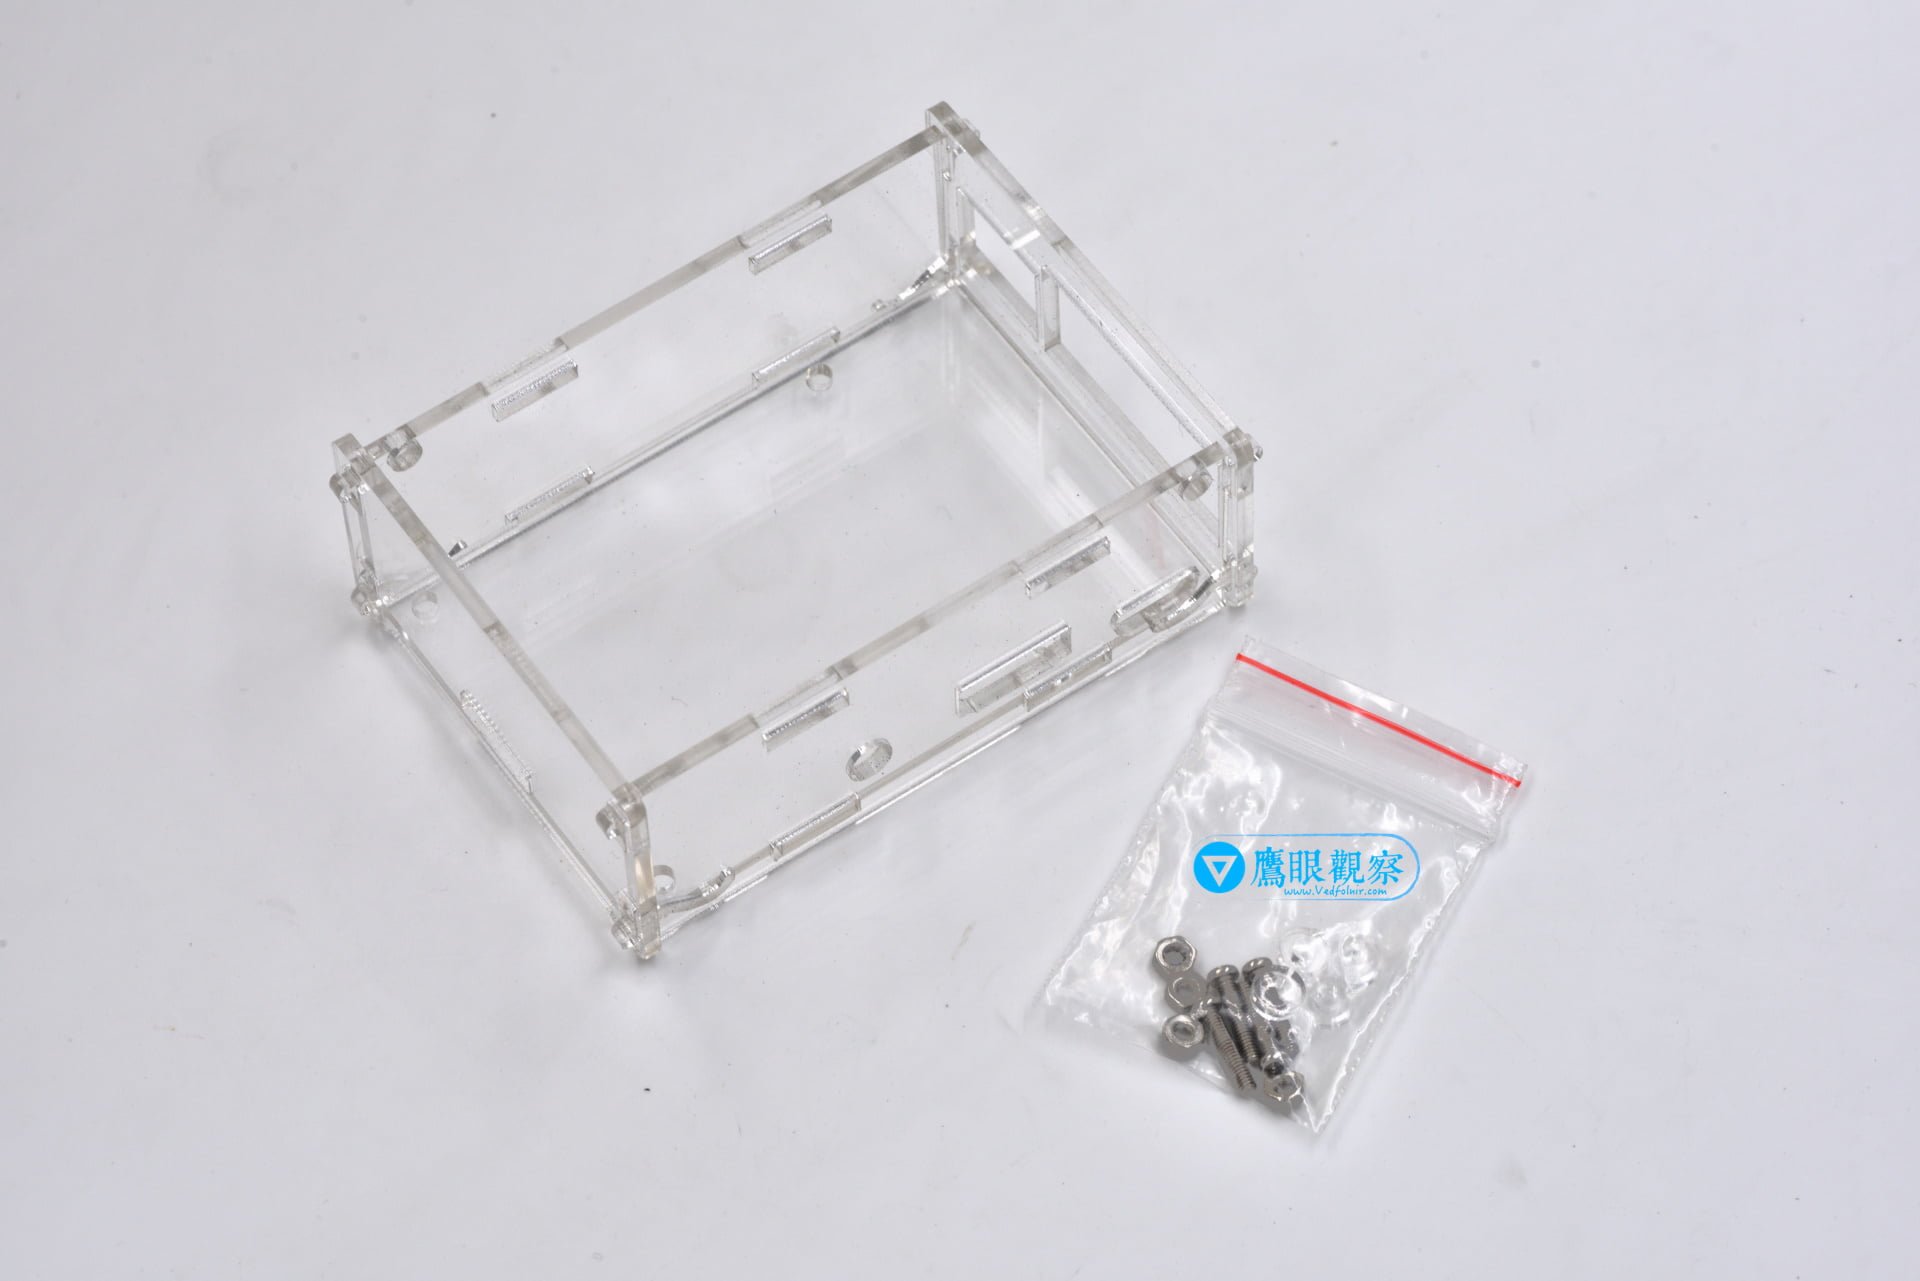
The image below shows the initial 3D dry fit. The five interlocking acrylic panels provide sufficient structural stability through their mortise-and-tenon joints alone. The included screws and standoffs are meant for anchoring the main PCB.
Note that the short side panels have a distinct top and bottom orientation: the bottom side features small protruding rounded feet that elevate the case off the desk. Furthermore, the bottom baseplate only aligns and slots into two specific cutouts on one side of the long panel—if you try to force it in backward, it will not fit.
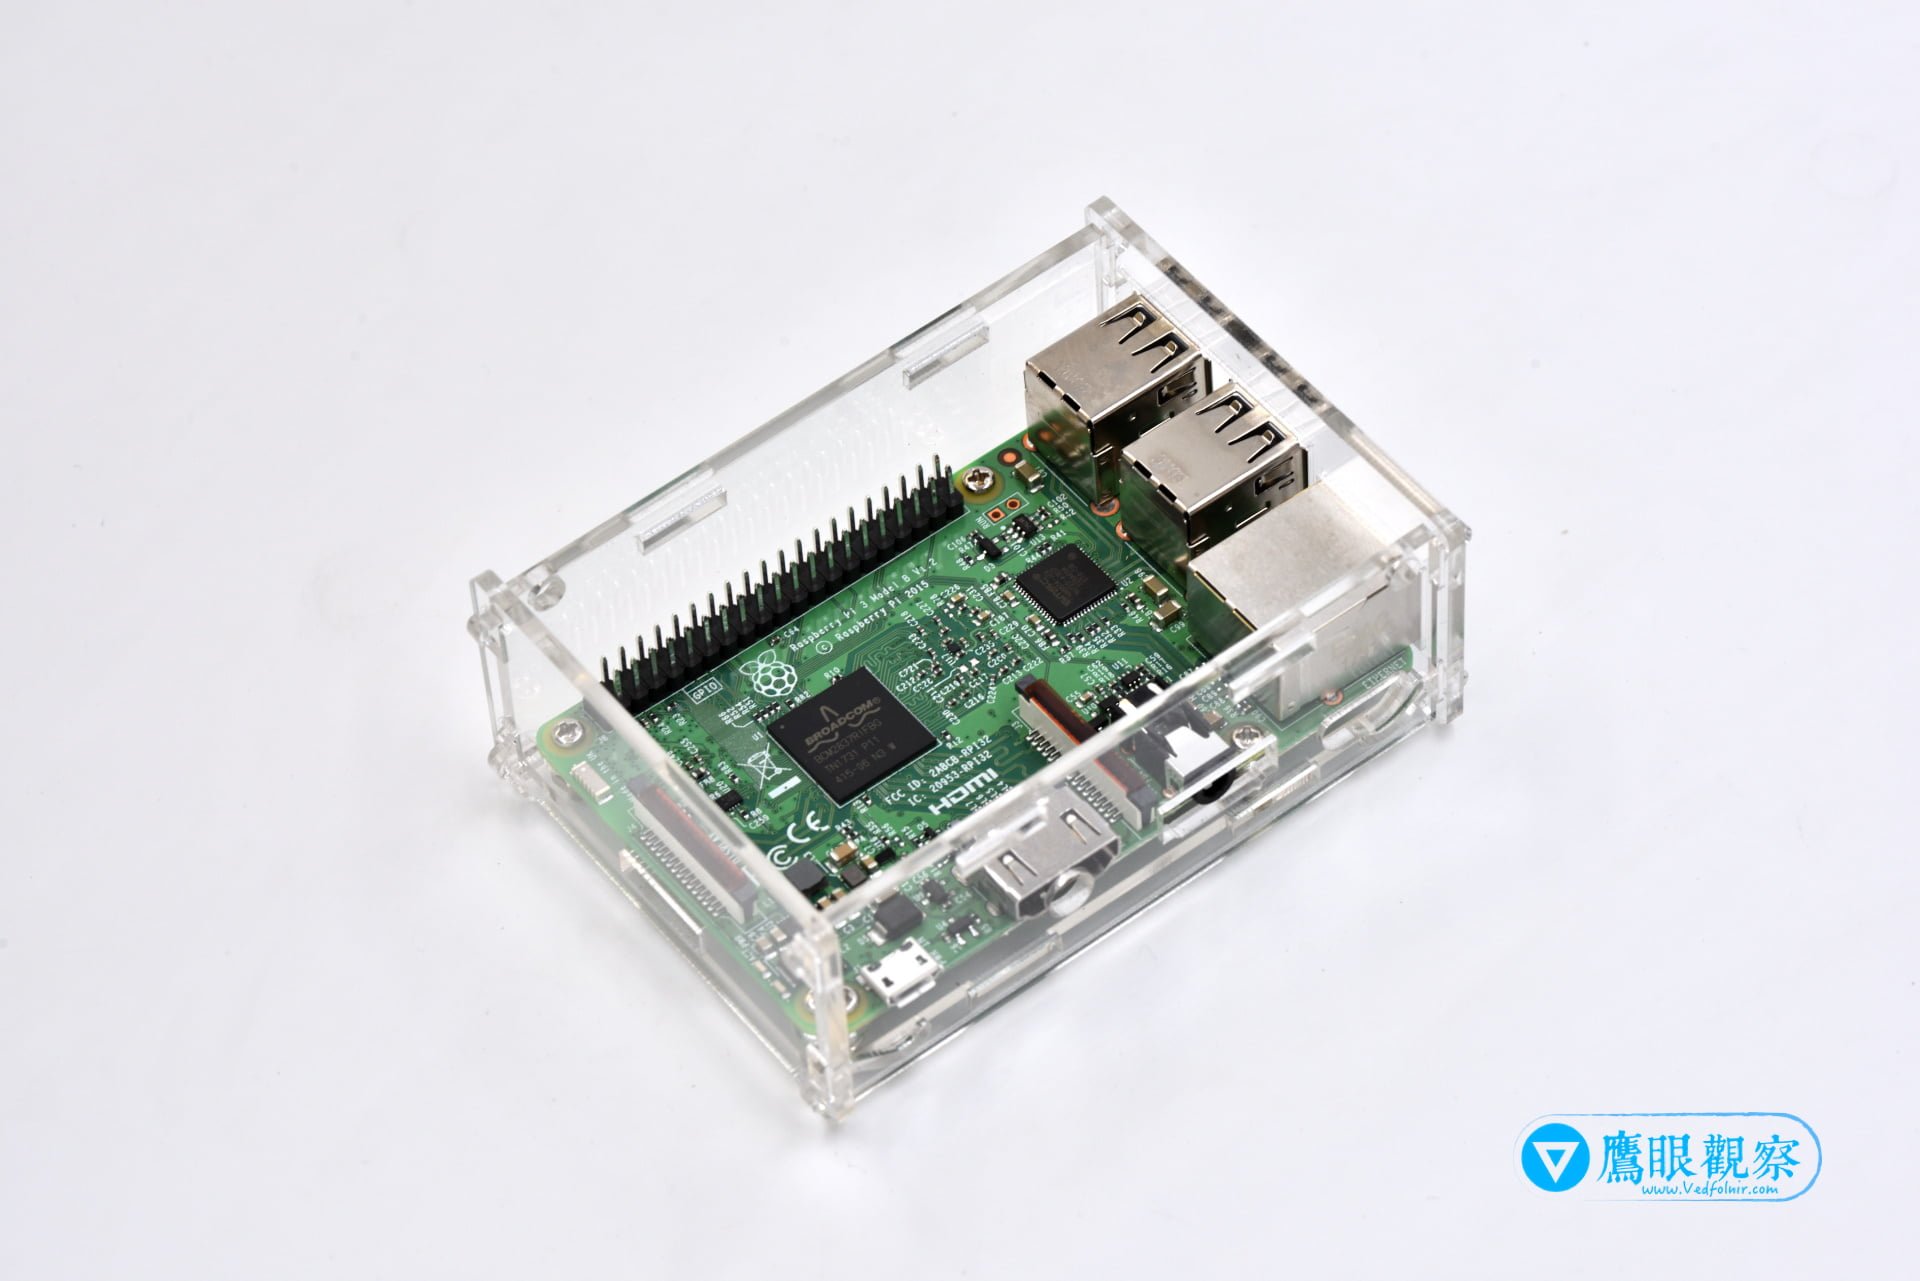
Take a look at the photo below. While an empty case looks symmetrical and fits together smoothly regardless of direction, once you drop in the circuit board, you may find one of the long side panels installed upside down or flipped. In the photo below, you can see that the HDMI port and 3.5mm audio jack cutouts are completely inverted relative to the motherboard connectors.
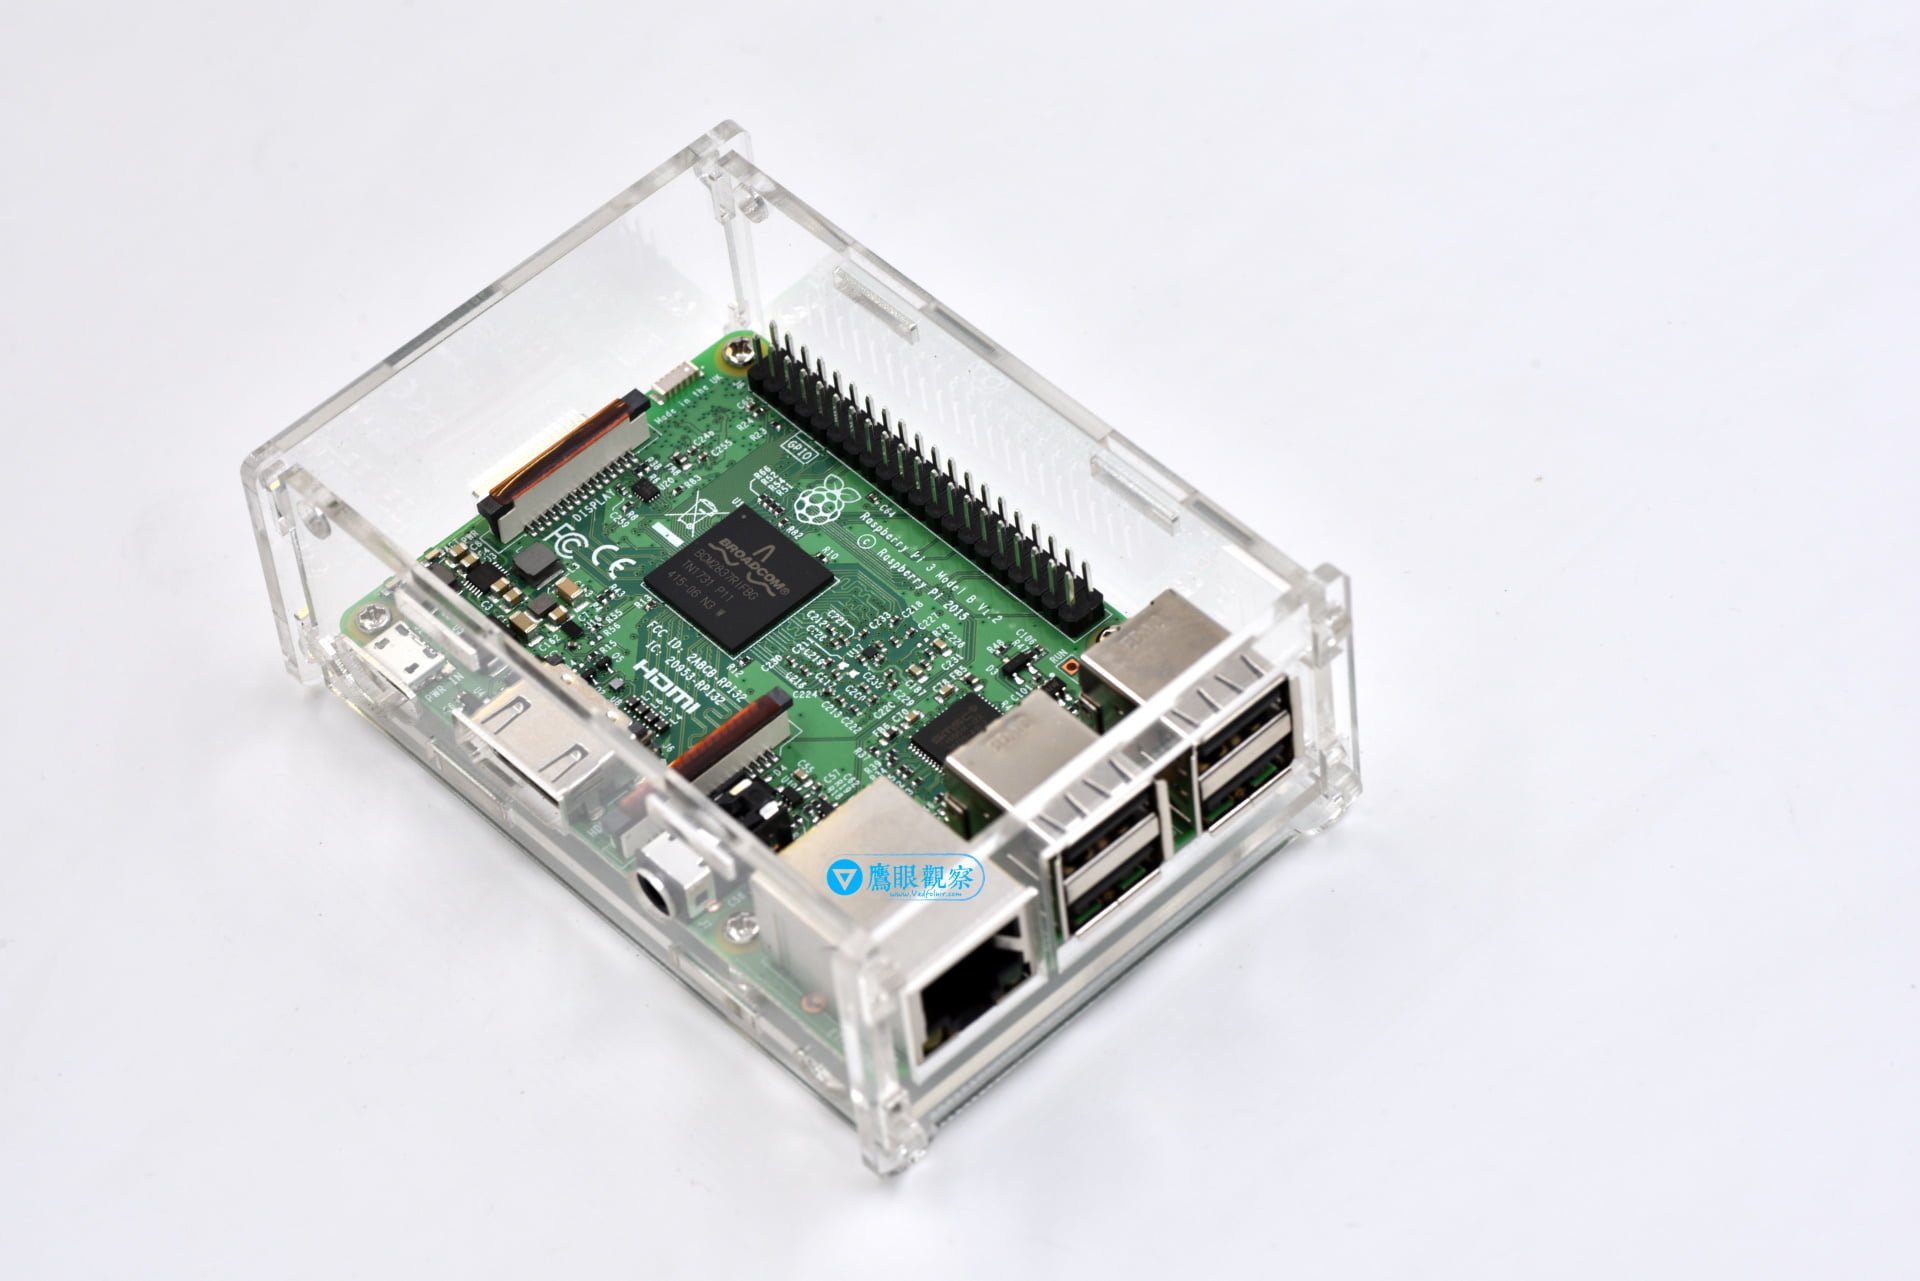
See the photo below: after disassembling the reversed panel and flipping it around, all ports and cutouts line up precisely with the board’s connectors.
My recommendation is to first mount the circuit board loosely onto the bottom baseplate, attach the side panel with the most port cutouts first, and then assemble the remaining side plates around it one by one.
Additionally, when initially fastening the motherboard onto the bottom plate, do not tighten the screws all the way down. Keeping them slightly loose makes it much easier to guide protruding connectors (such as the audio jack) into their corresponding acrylic cutouts. Once all five panels click firmly into place, tighten down all the mounting screws.
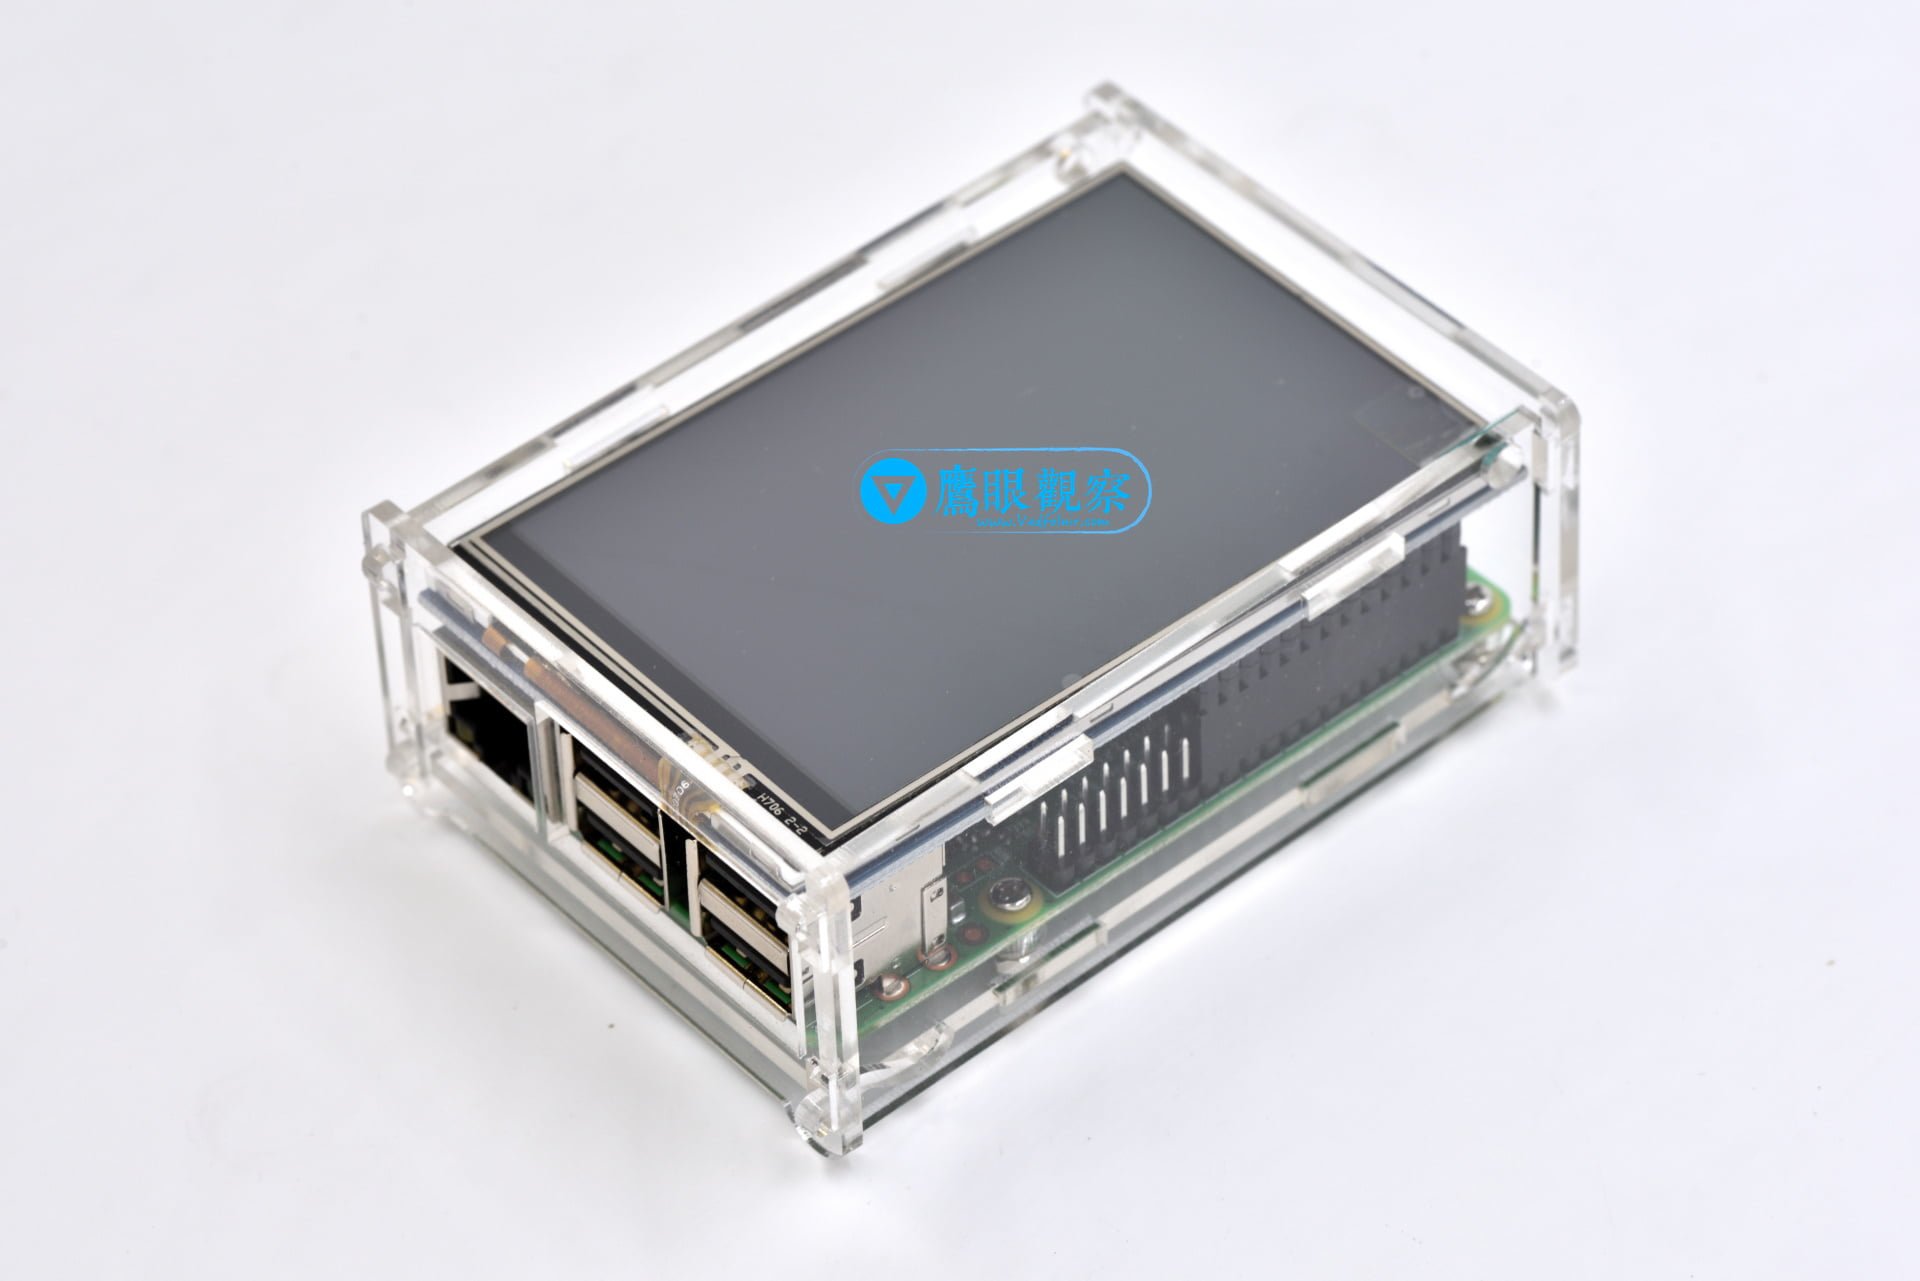
Finally, check the image below for the complete setup with the LCD touchscreen mounted directly on top of the Raspberry Pi motherboard headers.
Product References:
- Raspberry Pi 3 Single-Board Computer Kit
- High-Transparency Clear Acrylic Case
Support Independent Perspectives & In-Depth Insights
Every thoughtful analysis and candid critique comes from our dedication to truth and quality. We choose not to follow sensational algorithms or clickbait headlines.
Sustaining independent research requires reader support. Make a one-time or monthly contribution, securely processed by Google.
Payments secured by Google · Manage or cancel anytime in your Google Account

Comments