
After using an Amazon Kindle e-reader (specifically the Kindle Paperwhite) for a while, reading novels and academic research on it has become second nature. Especially when linked to a mainland China Amazon account, the quick English-Chinese dictionary lookup and translation functions make working through foreign-language research immensely helpful.
However, many online articles exist primarily as web pages. Having to print or export them as PDF files just to transfer them to the Kindle via a USB cable quickly becomes tedious.
As for browsing live websites directly with Kindle’s experimental web browser—that is hardly practical. Between complex layout formatting and limited processing power, the browser frequently stutters and struggles under Kindle’s modest system resources.
For example, the screenshot below shows a typical web page. In addition to the main article, it includes extra sidebars and banners. If exported directly to PDF, all that visual clutter gets saved alongside the text, creating a frustrating reading experience.
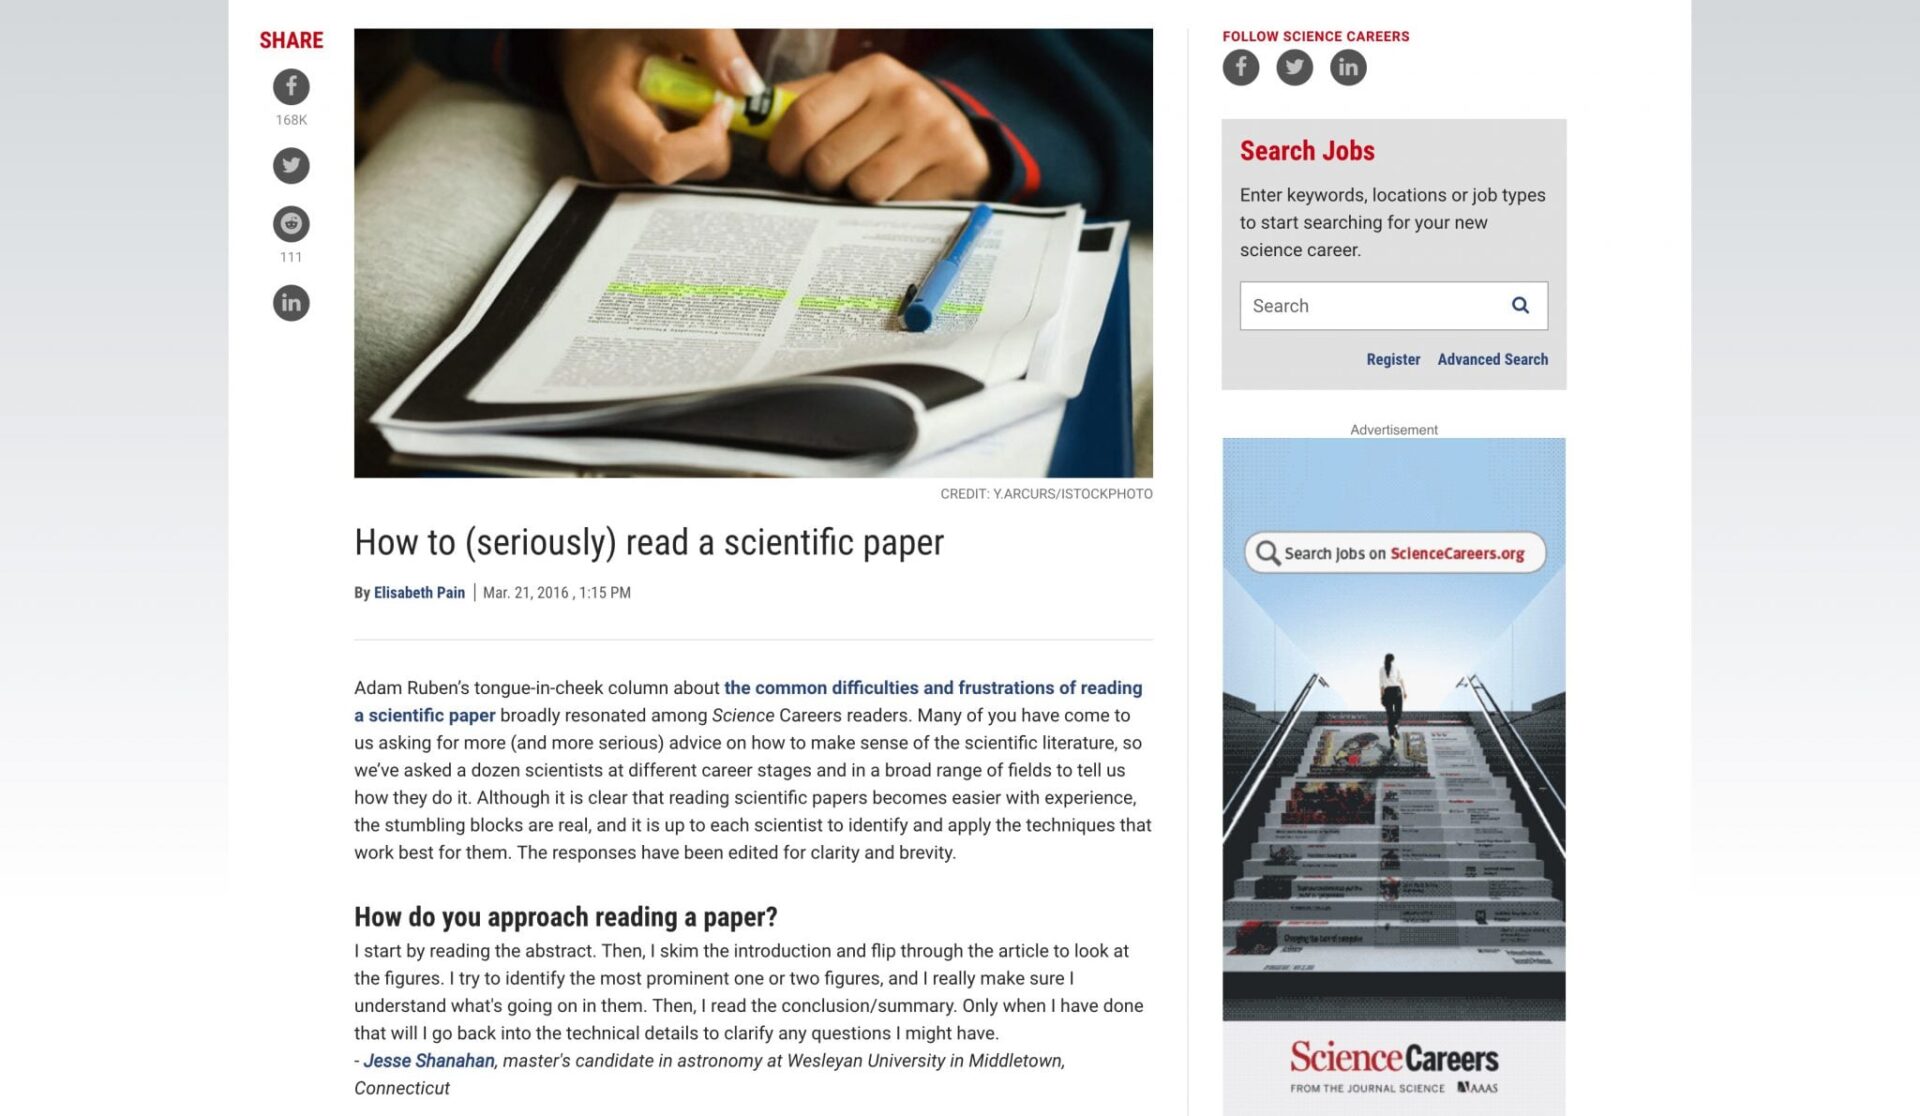 Science journal web article.
Fortunately, Amazon provides a built-in email service known as the Kindle Personal Documents Service. Simply attach your document file to an email and send it to your dedicated Kindle email address, and Amazon automatically processes and transmits the content wirelessly to your device over the network.
Even better, it renders the text in Kindle’s native reflowable reading format without requiring manual adjustments.
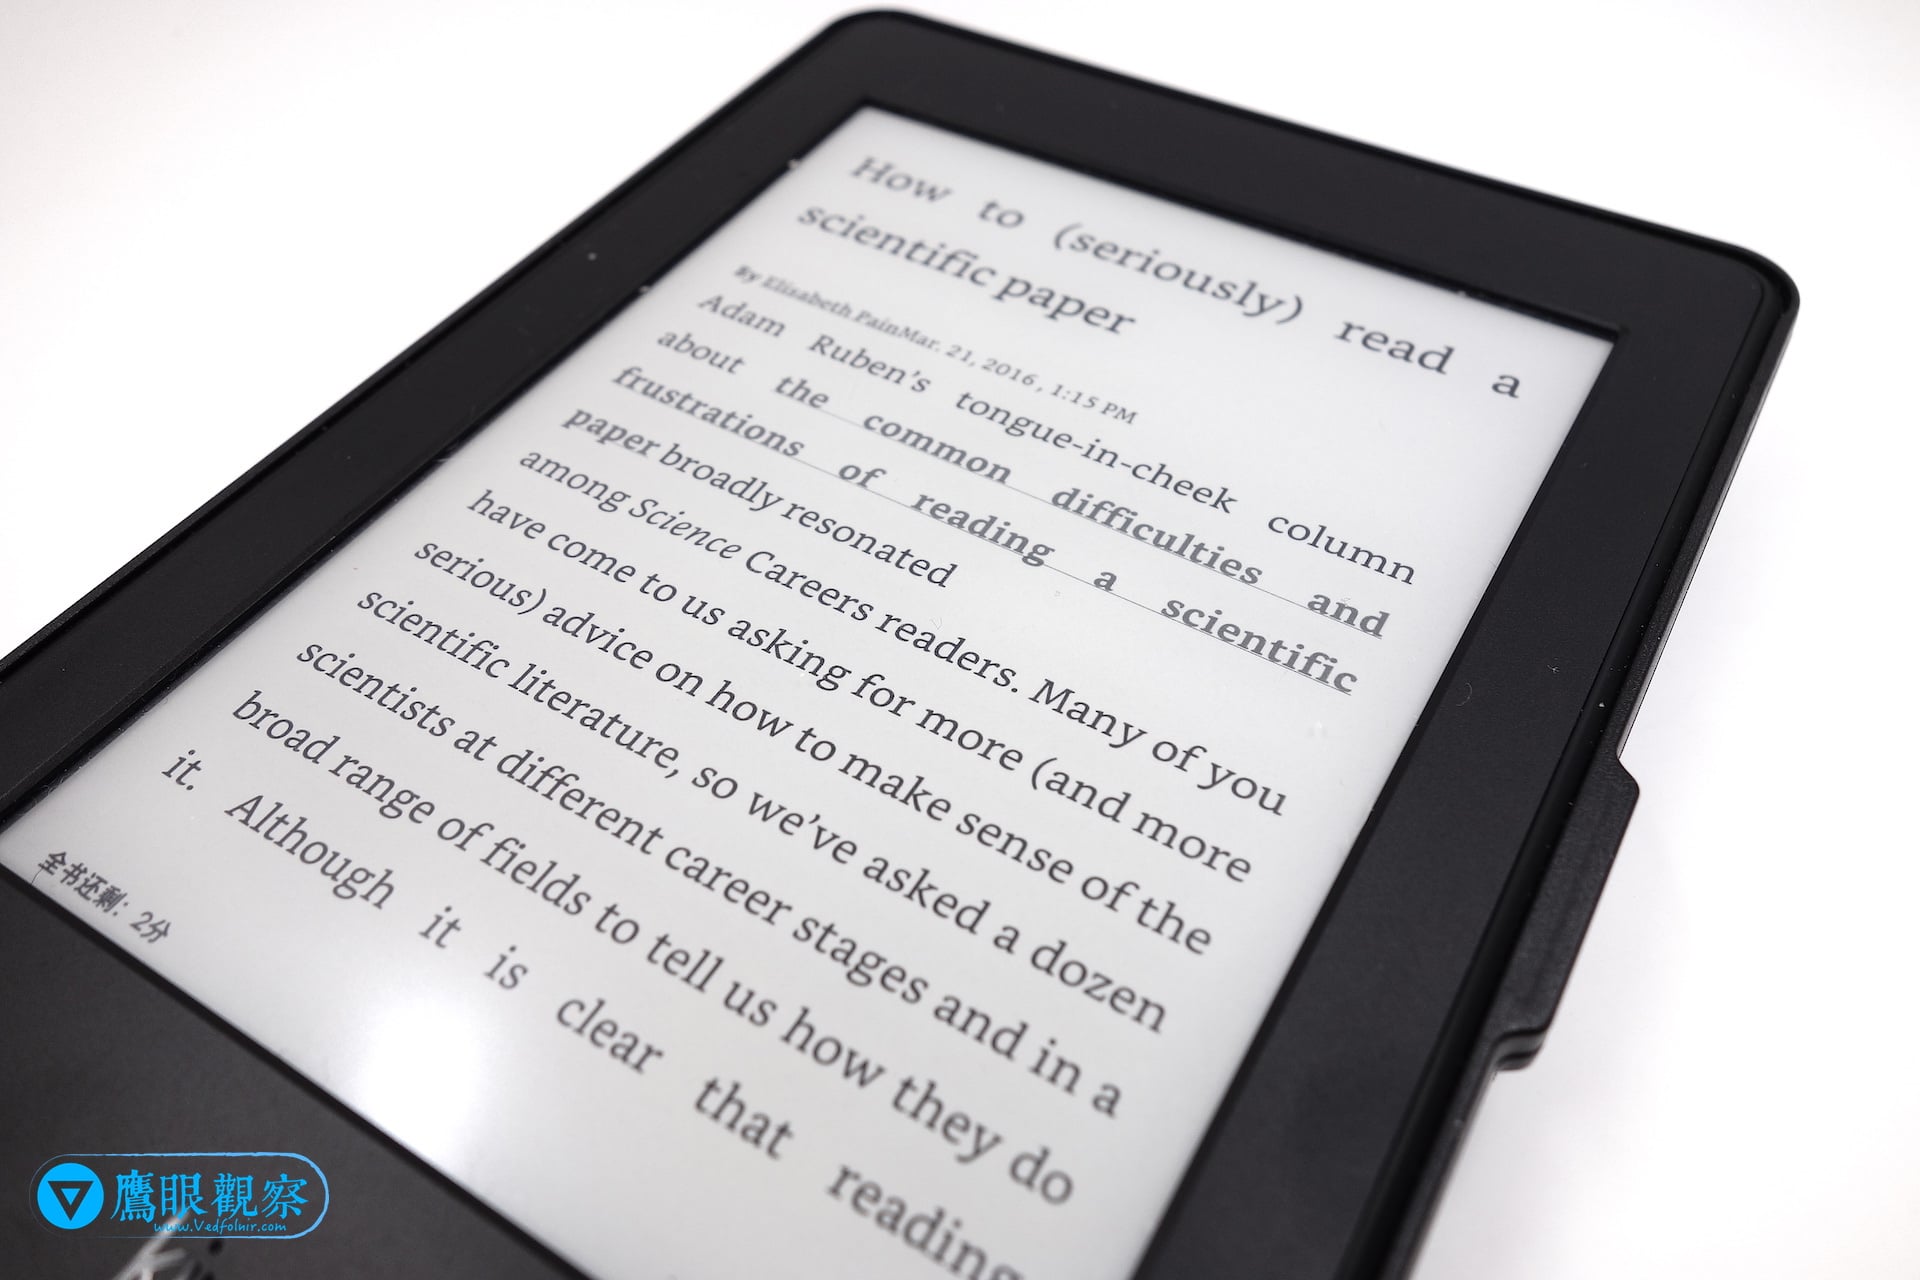 Amazon Kindle document reading interface.
The following guide explains how to convert web articles into clean document files and locate your dedicated Amazon Kindle email address.
Converting Web Articles into Documents for Send-to-Kindle Email Delivery
Before anything else, we need to convert the online article into a standalone document file.
While most modern browsers support saving pages as HTML or printing to PDF, as mentioned earlier, raw exports often retain messy column layouts and excessive sidebars.
Therefore, I recommend opening a lightweight rich-text editor (such as WordPad on Microsoft Windows, or TextEdit on Apple macOS) and simply copying and pasting the article content into it. Then save it in a Kindle-supported format (such as an RTF (Rich Text Format) file exported via WordPad or TextEdit).
As shown below, once you paste the web content into a text editor and clean up unwanted navigation links, the layout becomes clean and readable. Fine typography details like bolding, italics, or links can usually be retained automatically.
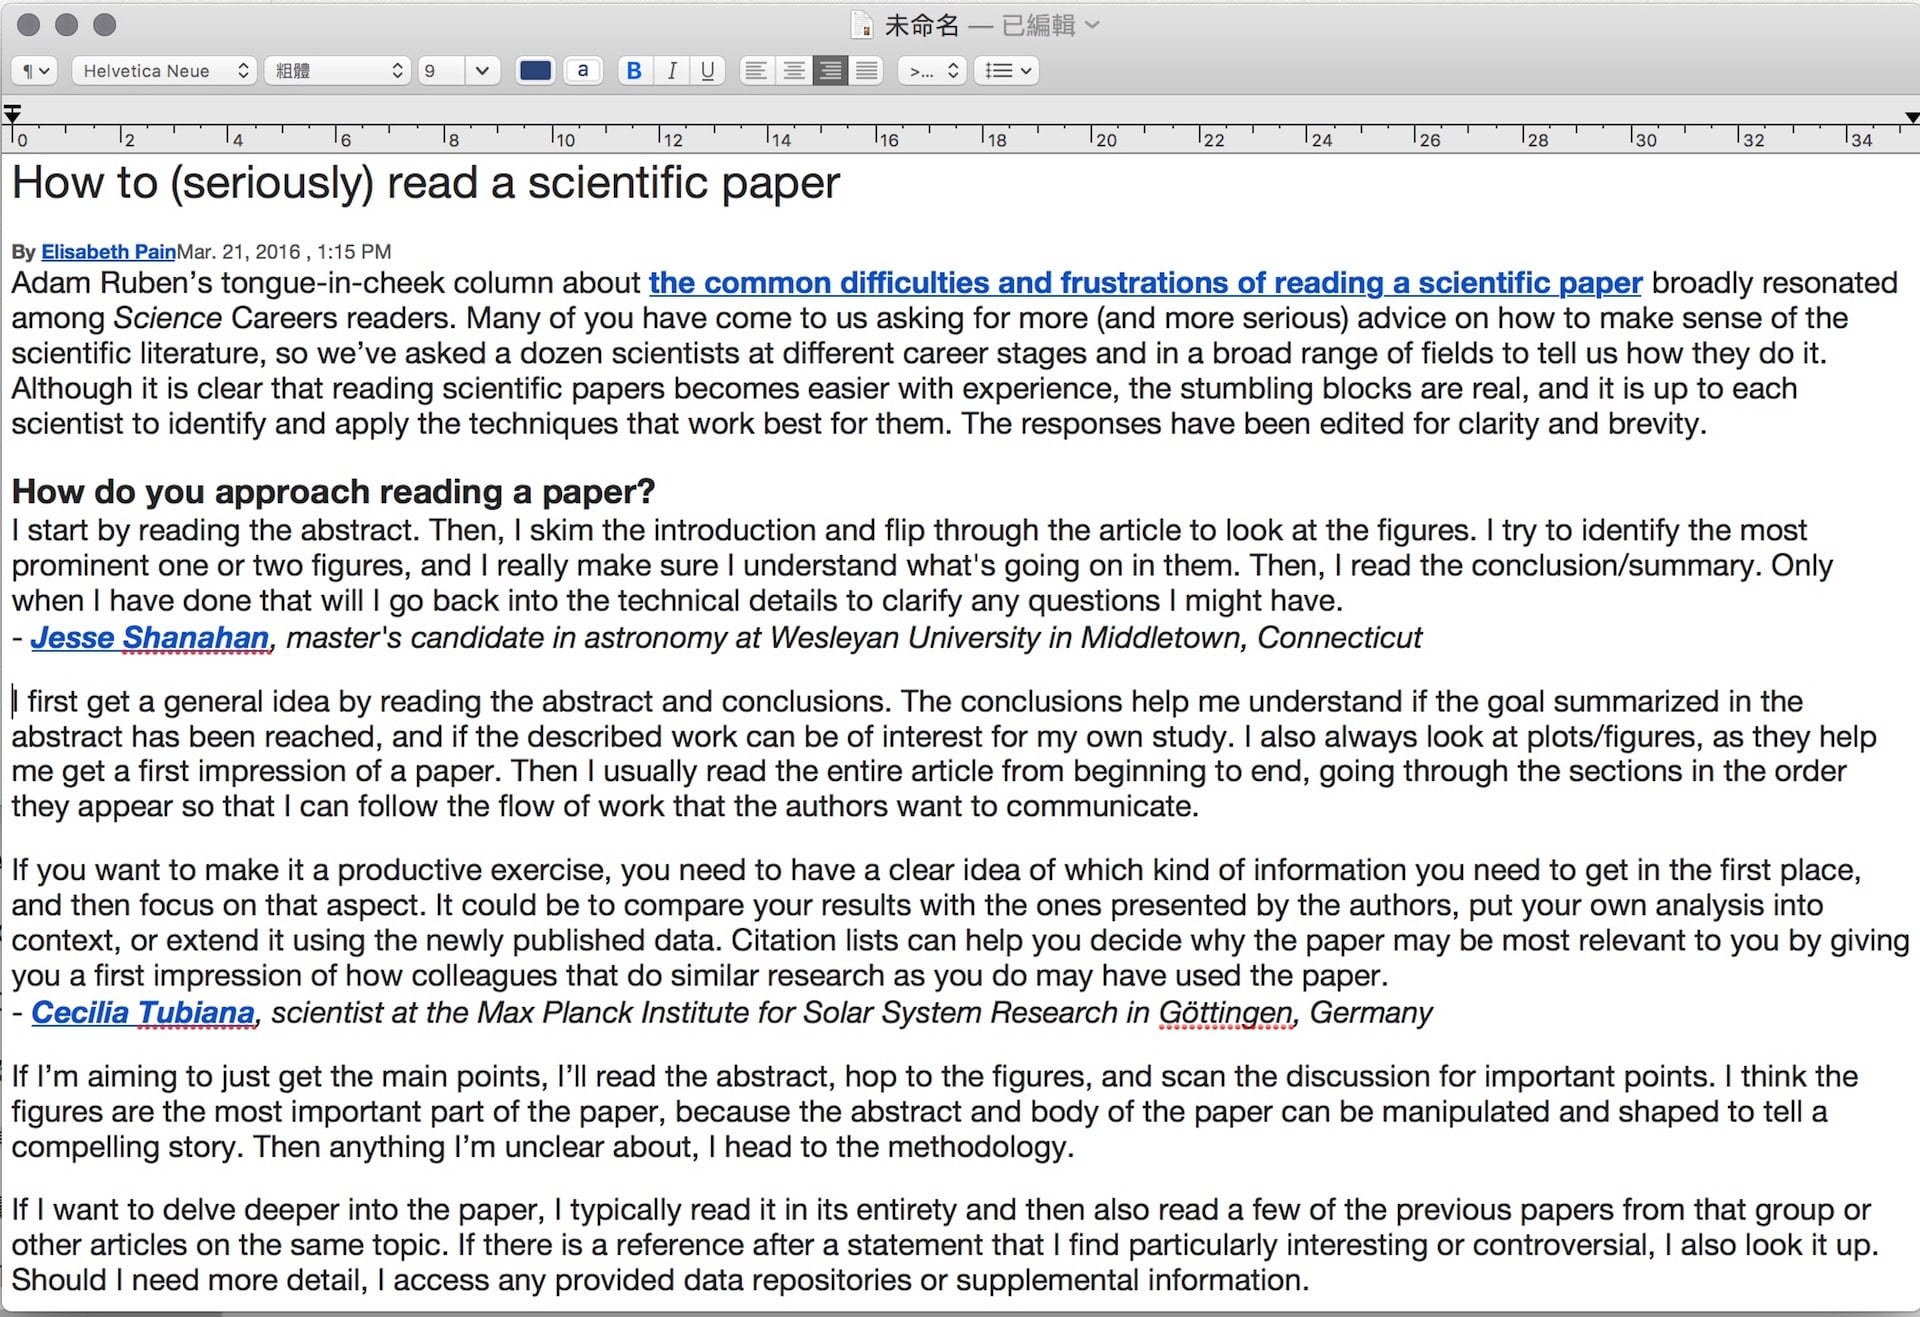 Pasting article content into a text editor.
After saving your file, attach the document to an email and send it directly to your Amazon Personal Documents email address, allowing Amazon’s servers to convert and push the file to your device.
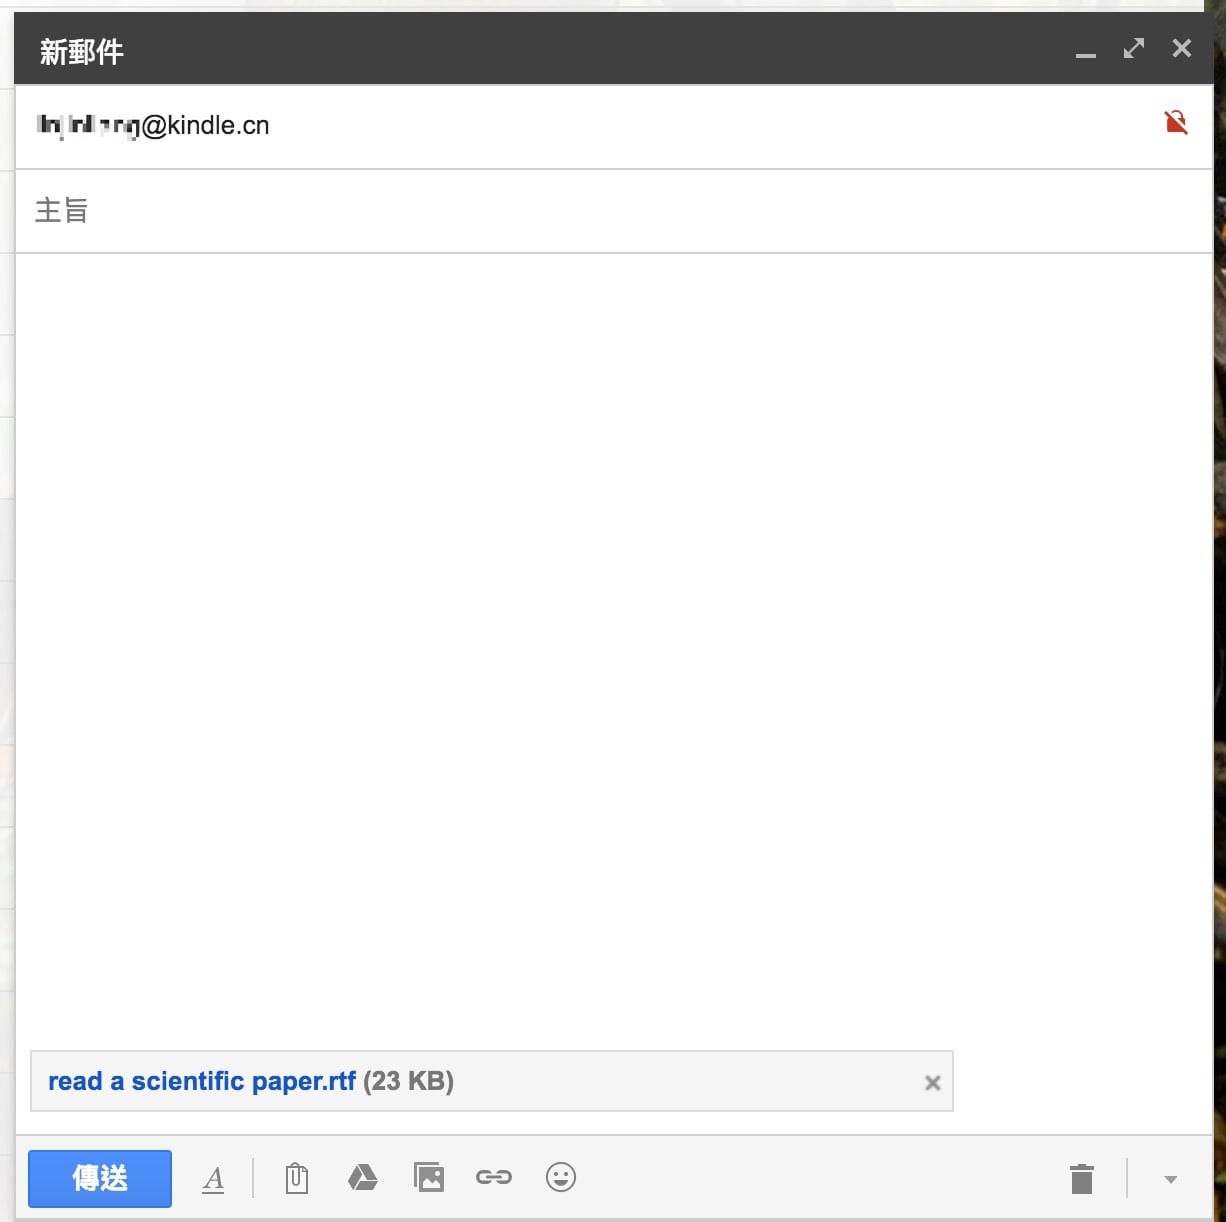 Sending an email with an attached document file to the Amazon Kindle mail server via Gmail.
3 Ways to Find Your Dedicated Amazon Send-to-Kindle Email Address
Method 1: Find It Directly in Your Kindle Device Settings
As shown below, tap the menu button ”☰” in the upper-right corner of the screen, select Settings, then tap My Account. Under the Send-to-Kindle Email section, you will see your assigned Kindle email address (for example: [email protected] or [email protected]).
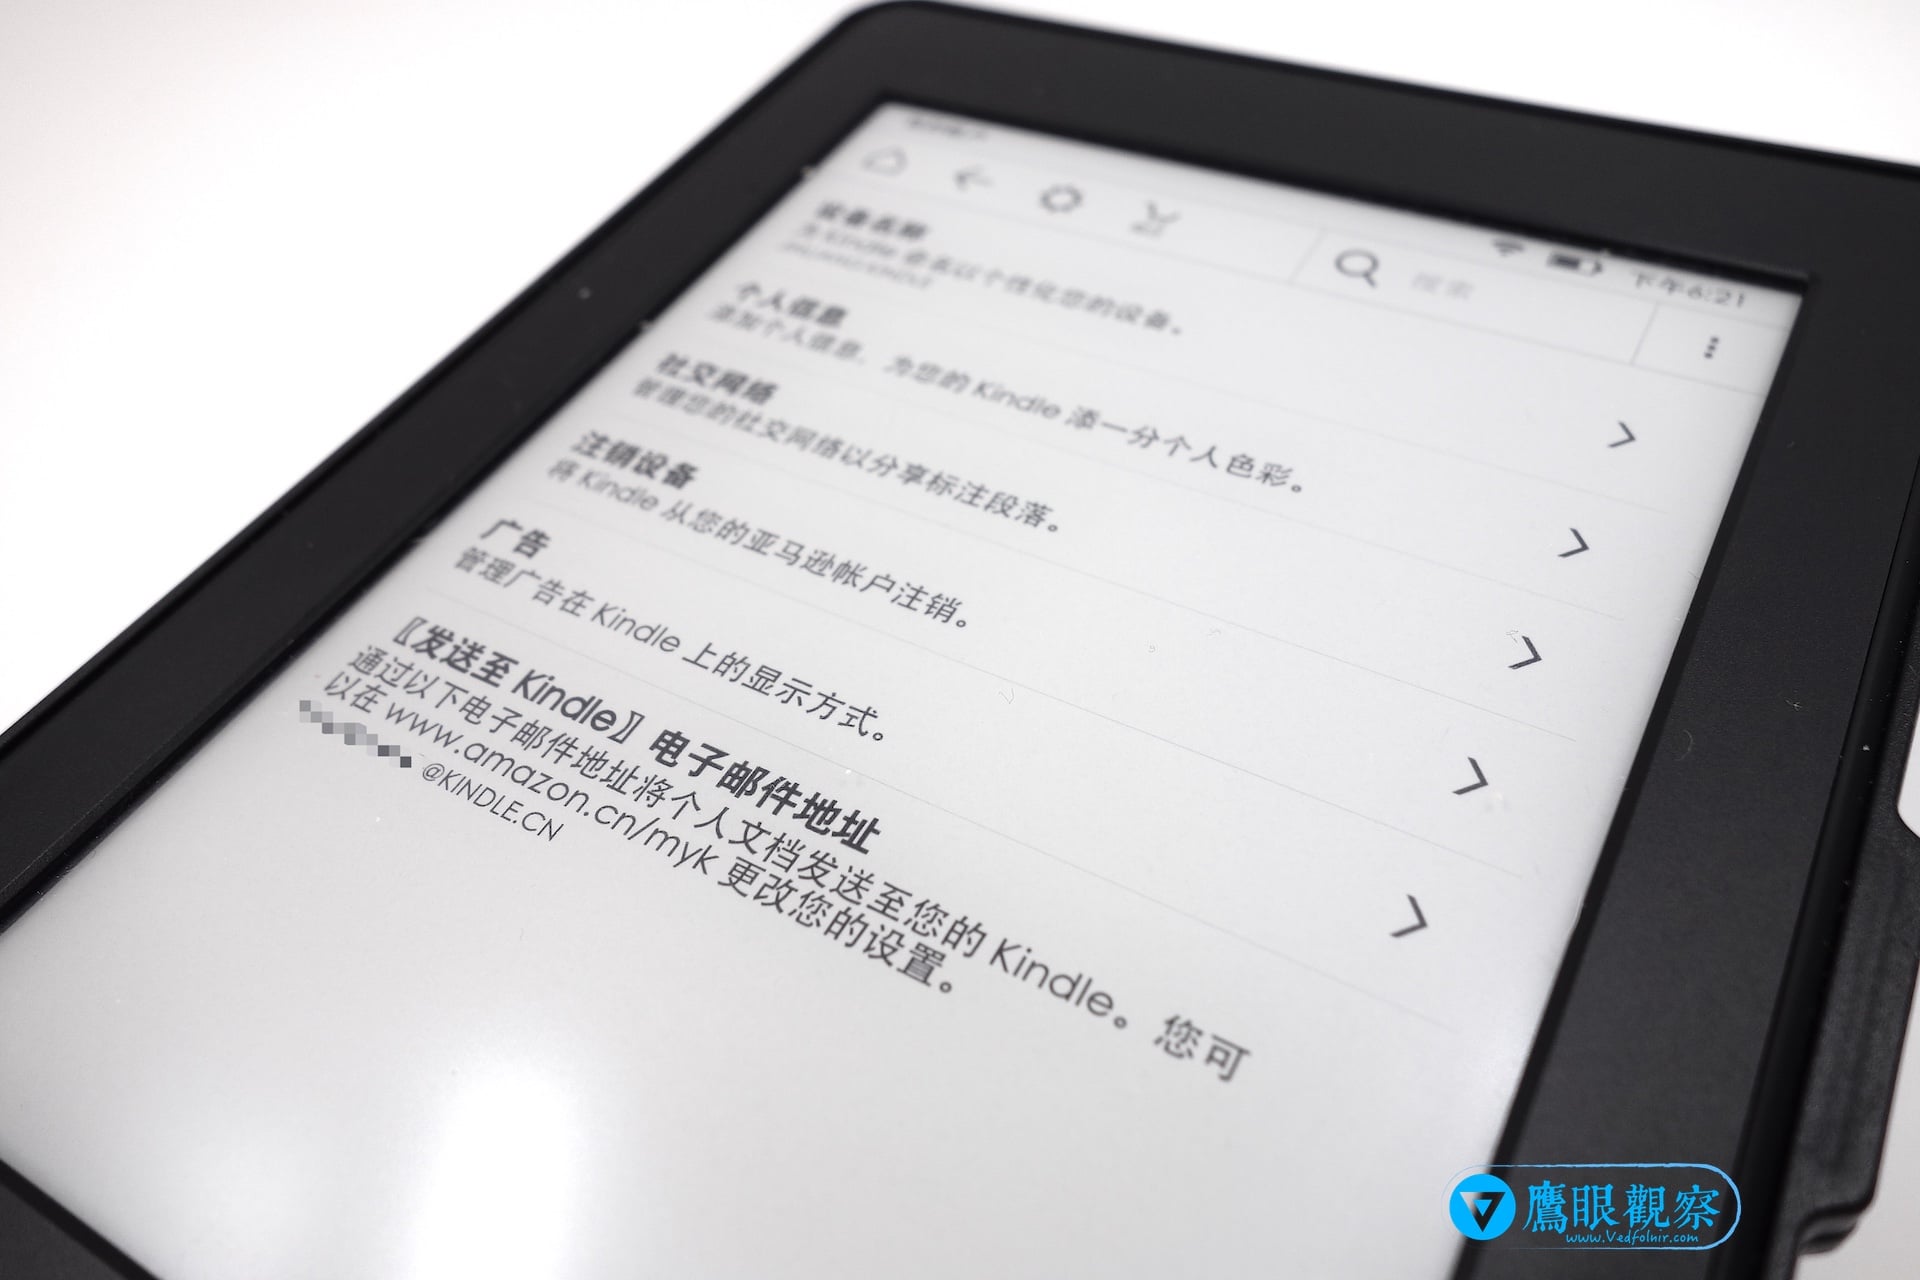 Amazon Kindle e-reader settings screen.
You can customize this email handle on the “Manage Your Content and Devices” page on the official Amazon website.
Method 2: Find It on the Amazon Website
Navigate to the Amazon website, visit Manage Your Content and Devices, and open the Preferences or Devices tab.
As shown below, in the Devices section, select your registered Kindle e-reader. You will see its unique email address displayed in the device details. You can edit this handle to ensure it remains unique. Once configured, you can send documents directly to this address for server-side processing and over-the-air syncing.
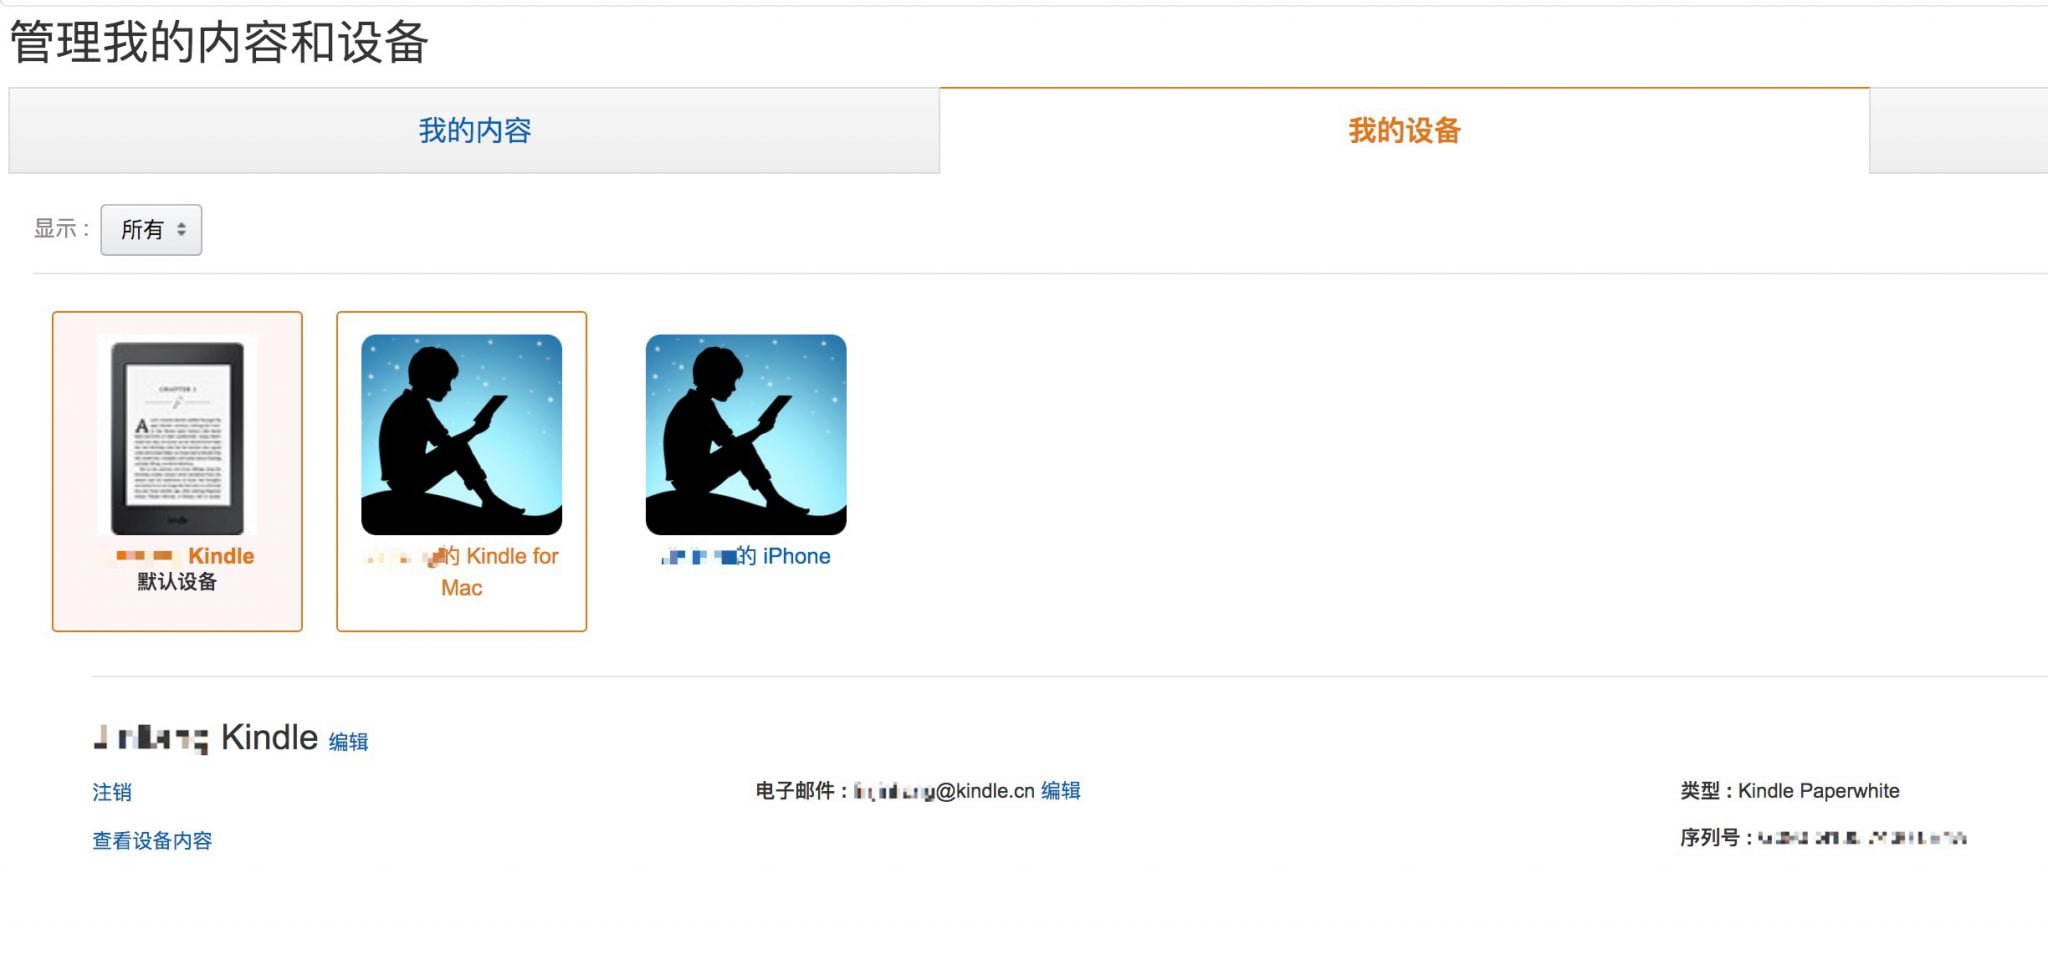 Amazon backend portal: Manage Your Content and Devices.
Method 3: Check Other Registered Devices and Apps
Referring back to the dashboard above, you may also see entries like “Kindle for Mac” or “Kindle for iPhone” if you have installed the Kindle app on other hardware. While they operate similarly, remember that each registered device or application has its own distinct Send-to-Kindle email address!
In other words, files sent to your physical Kindle’s email will not automatically appear in the Kindle app on your iPhone. This differs from books purchased directly from the Amazon Kindle Store, which sync automatically across all registered apps and devices.
Supported File Formats and Restrictions for Send-to-Kindle
Amazon’s Personal Documents Service supports specific file formats. The service will process attachments matching the following extensions:
- Microsoft Word (
.doc,.docx) - Rich Text Format (
.rtf) - HTML (
.htm,.html) - Plain Text (
.txt) - MOBI format (
.mobi, though newer EPUB support has succeeded MOBI in later updates) - Image formats: JPEG (
.jpg,.jpeg), GIF (.gif), BMP (.bmp), and PNG (.png) - Adobe PDF (
.pdf) - ZIP archives: Compressed archives containing supported document types will be unpacked automatically by Amazon’s servers.
If you send a document to your Kindle email and it does not appear on your device right away, connect your Kindle to Wi-Fi and tap Sync and Check for Items to trigger a manual download.
If the document still does not arrive, check your personal email inbox; Amazon sends an automated notification if a delivery fails or requires one-time sender verification.
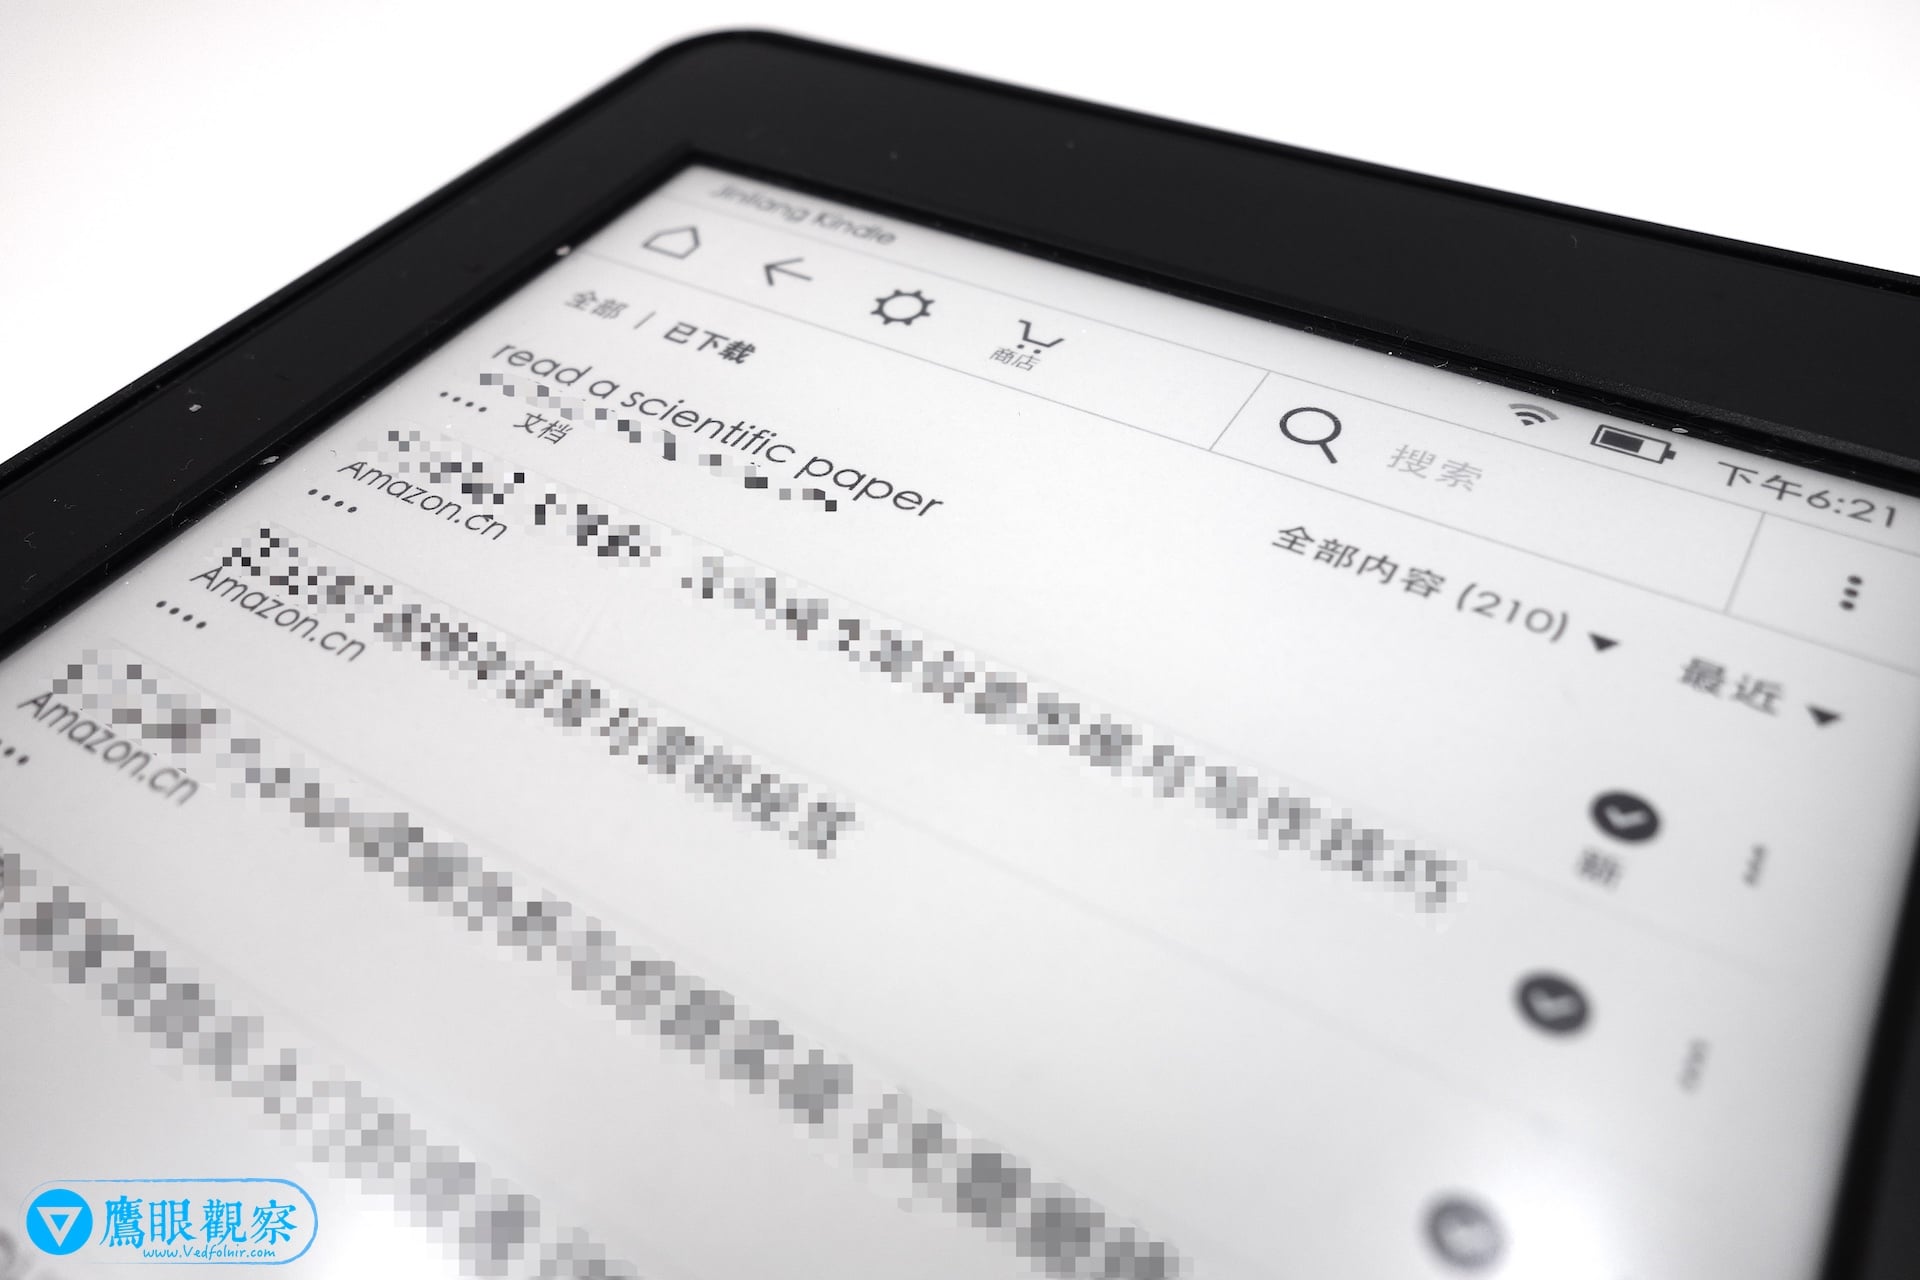 The Amazon Kindle home screen displays newly received personal documents at the top.
Further Reading
- Amazon Kindle Free Global 3G / Cellular Connectivity: What to Know Before Buying
- Amazon Kindle Device Management Portal
Support Independent Perspectives & In-Depth Insights
Every thoughtful analysis and candid critique comes from our dedication to truth and quality. We choose not to follow sensational algorithms or clickbait headlines.
Sustaining independent research requires reader support. Make a one-time or monthly contribution, securely processed by Google.
Payments secured by Google · Manage or cancel anytime in your Google Account

Comments