
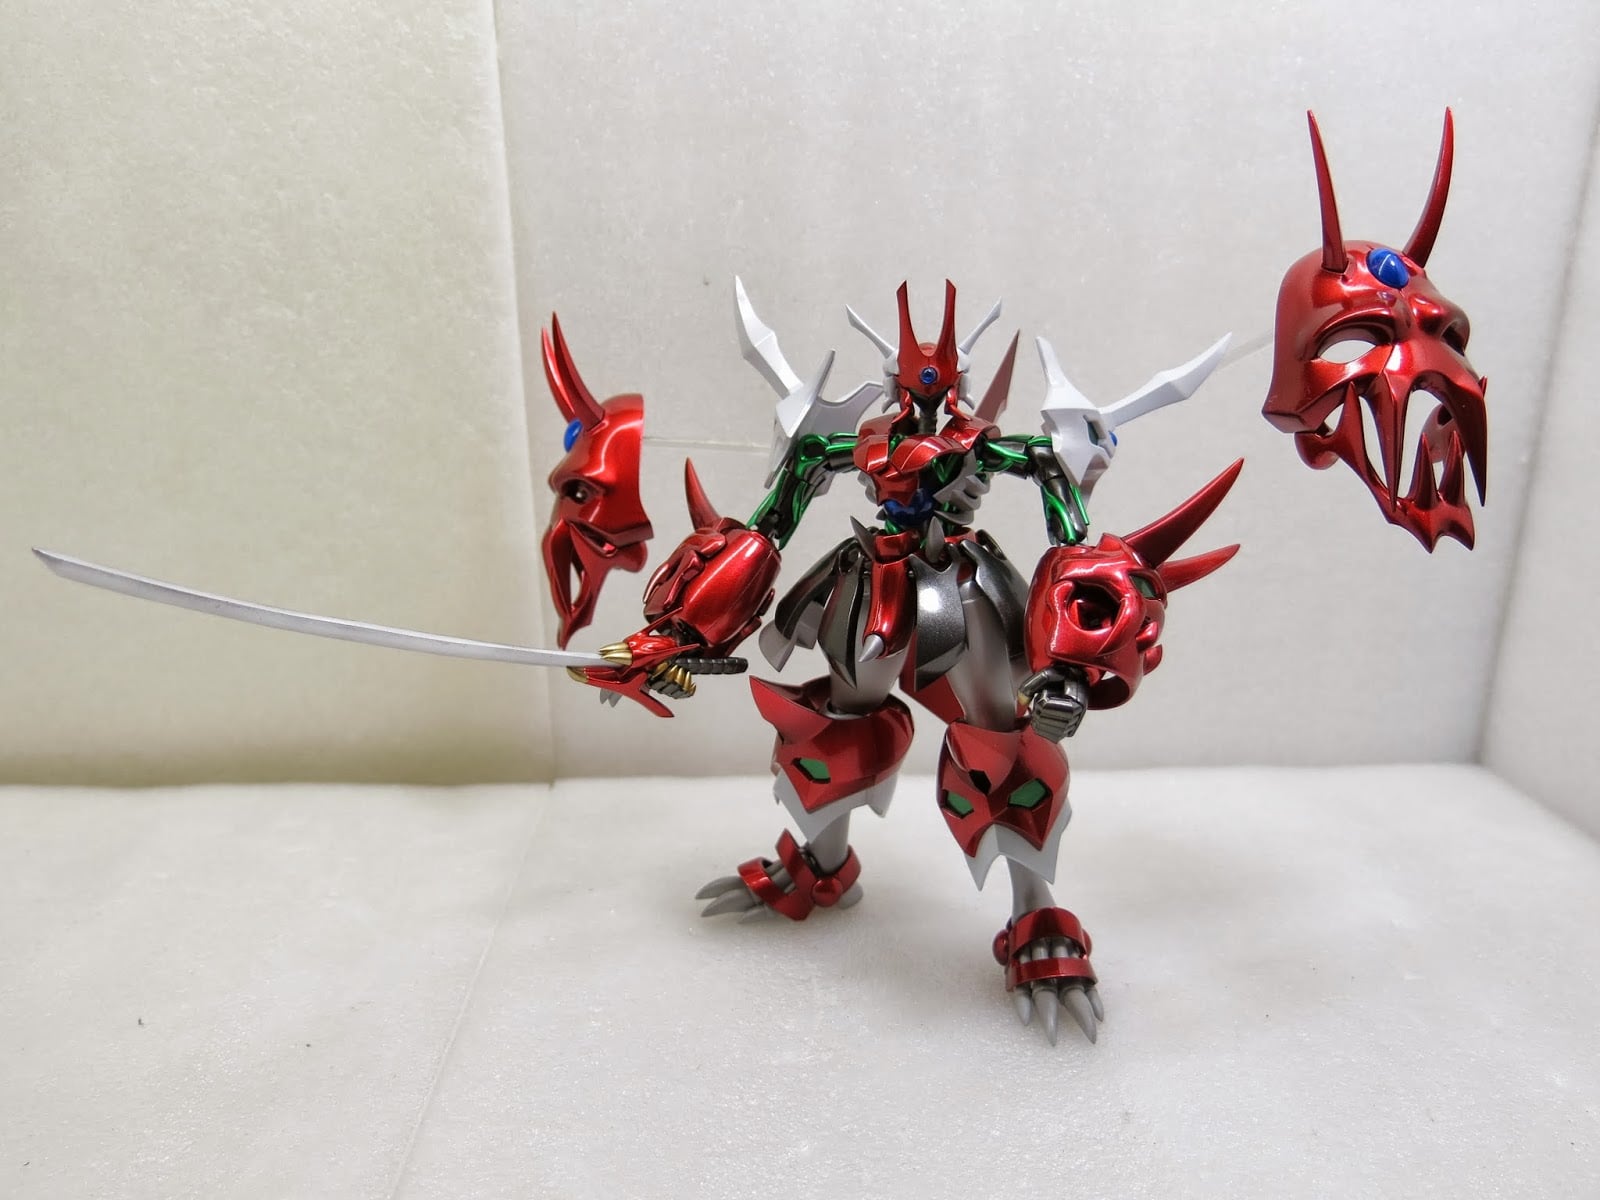
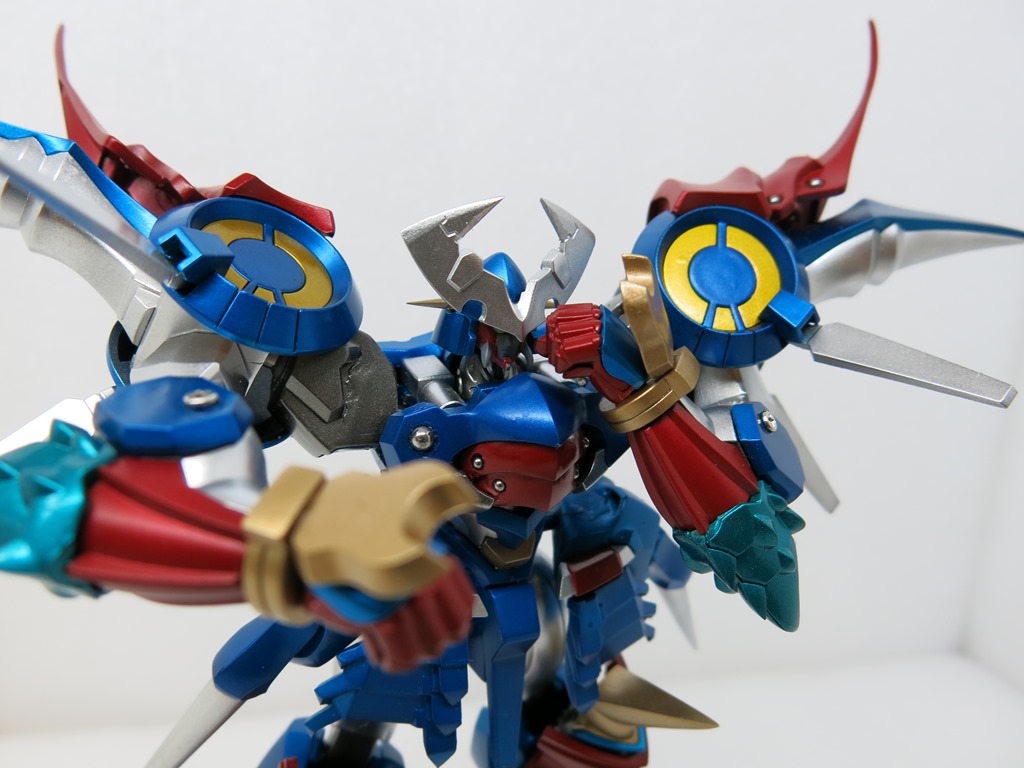
Today Joseph introduces a model kit named Lightning Saix, which also happens to be Joseph’s very first TOMY ZOIDS build.
This kit belongs to a veteran collector. Wishing to eliminate the kit’s toy-like plastic feel, he followed bad rumors online, bought water-based silver paint, and brushed it on himself. Realizing he couldn’t achieve his desired finish, he reached out to Joseph for professional help.
Upon receiving the package, Joseph inspected the instruction manual, which bore the stamps “Made in Thailand” and “Production Date 1983.” In 1983, Joseph was just a newborn—this kit is almost as old as I am!
Just looking at the kit in person made it completely believable that it had been around for over 25 years. The exterior was battered, and the owner’s amateur paint job was equally agonizing to look at.
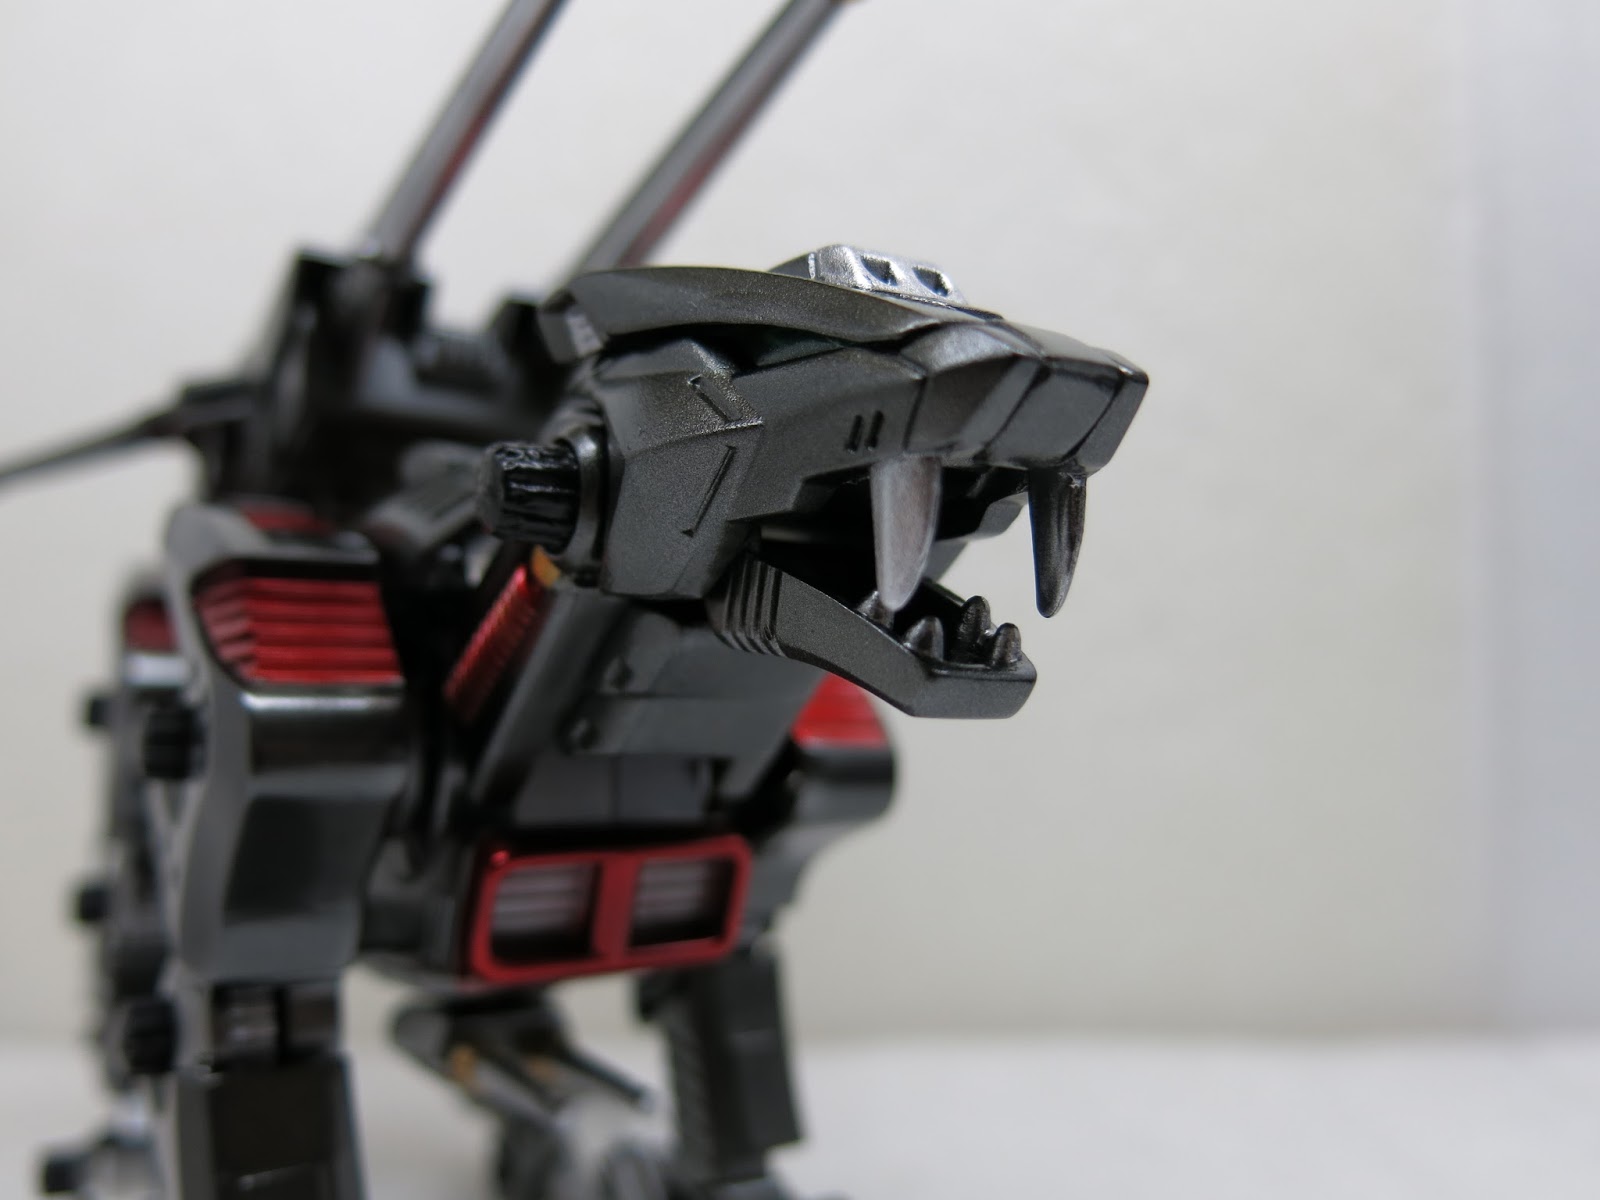
Lightning Saix
First, let’s take stock of the original kit’s inherent factory defects:
- Sink marks everywhere—where they should shrink, and even where they shouldn’t.
- Terrifyingly large parting-line step differences from sliding molds; an untrained eye might think they were intentional steps.
- Mold parting lines so razor-sharp they could slice fingers.
- Short-shot plastic starvation in certain corners where molten plastic never filled the mold.
- Textured armor sections that had been scratched during factory demolding.
Then come the user-inflicted damages:
- Horribly hacked gate nubs, with gouged depressions into the plastic.
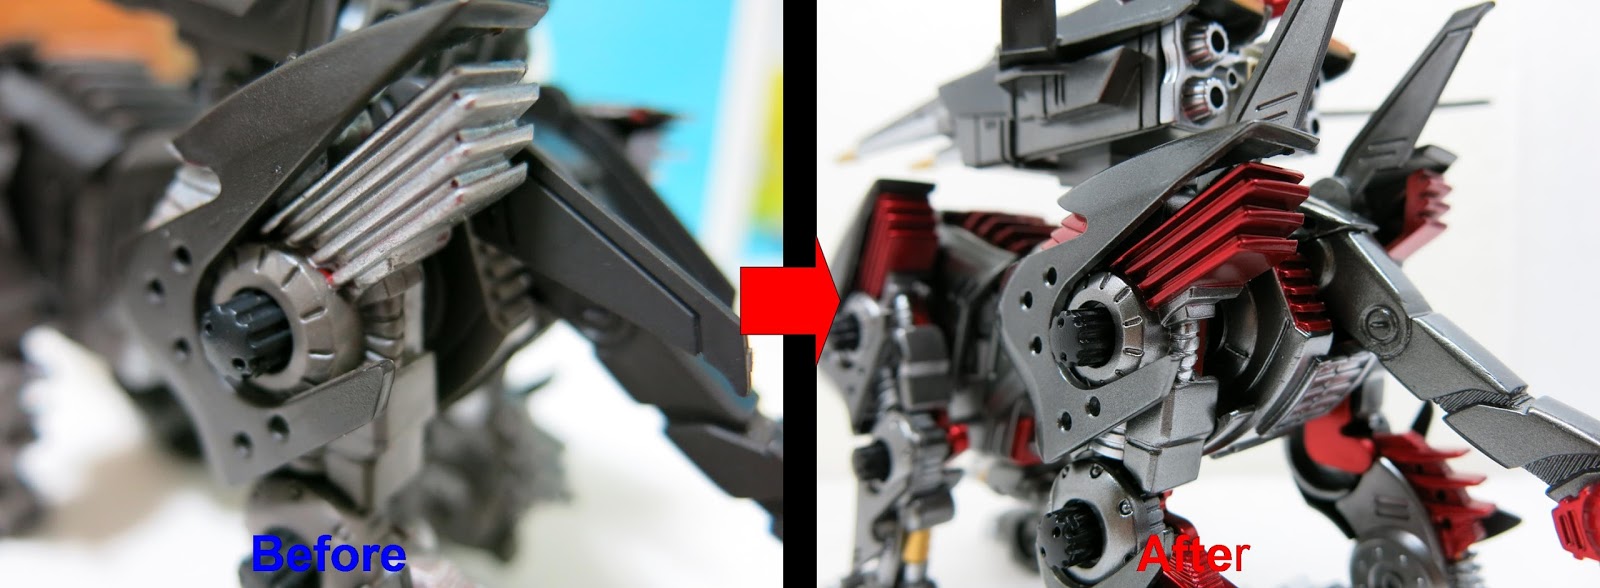
- The red segments were slathered in completely matte, dull silver paint.
- Two missing rubber attachment caps.
- Completely dead motorized movement; wiring appeared corroded.
- The owner had actually smeared heavy “automotive grease” across all joints—Vaseline would have been bad enough, but automotive grease!
It became immediately apparent that this restoration would consume vastly more putty than expected.
After sizing up the required repairs, Joseph rolled up his sleeves and got to work.
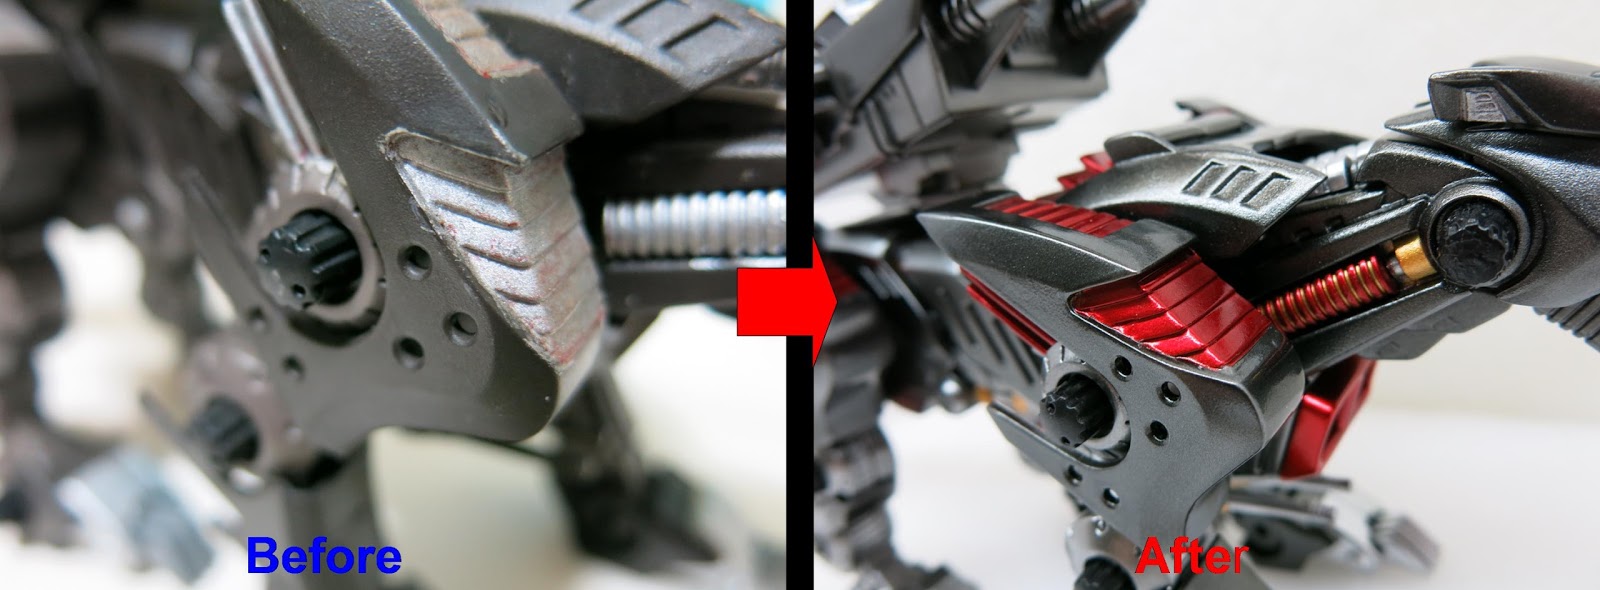
The three comparison photos below show the client’s amateur brushwork, the factory original plastic colors, and Joseph’s custom painted result:
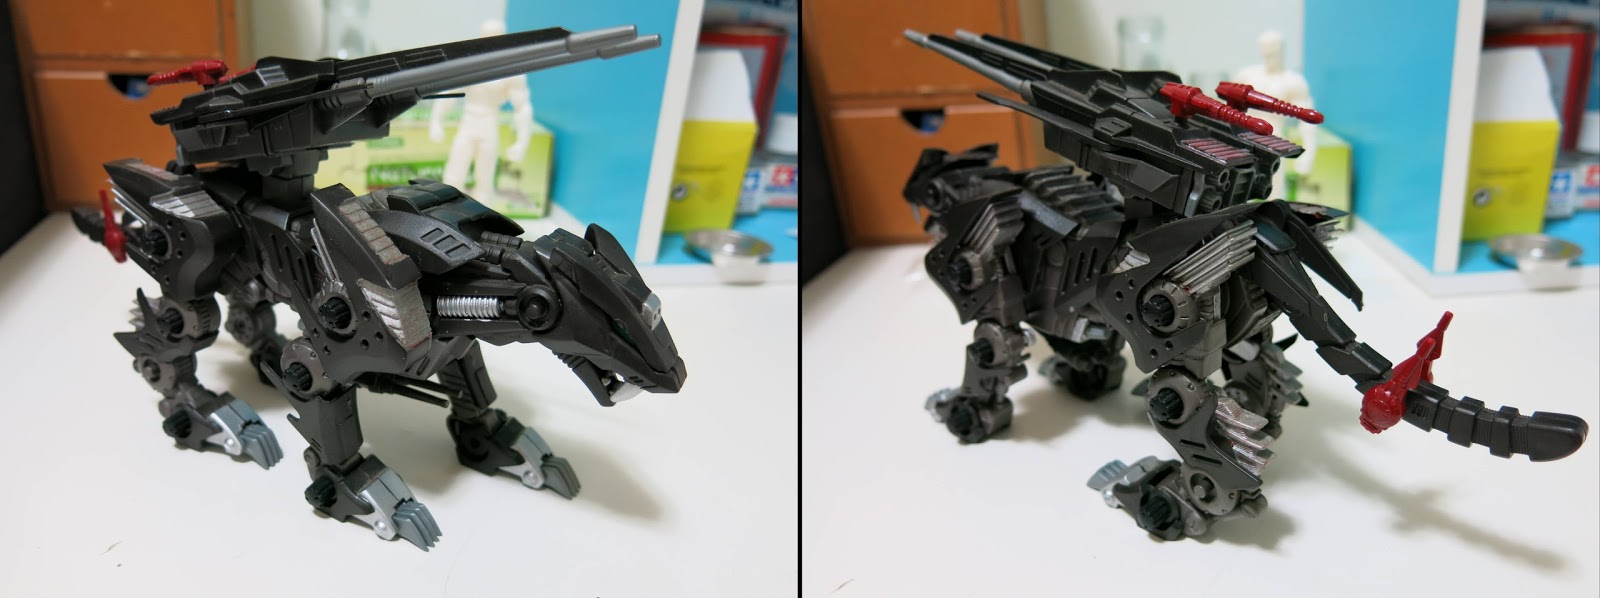
Client’s DIY hand-painting
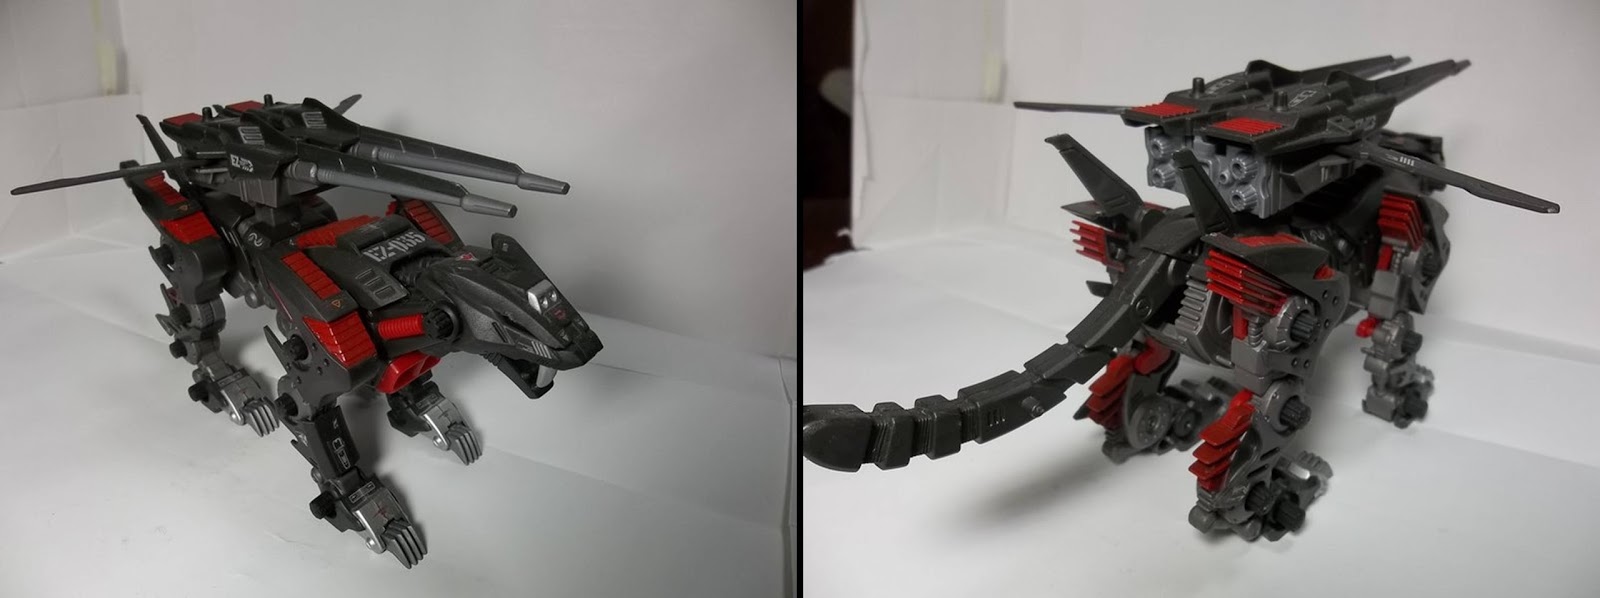
Factory stock colors
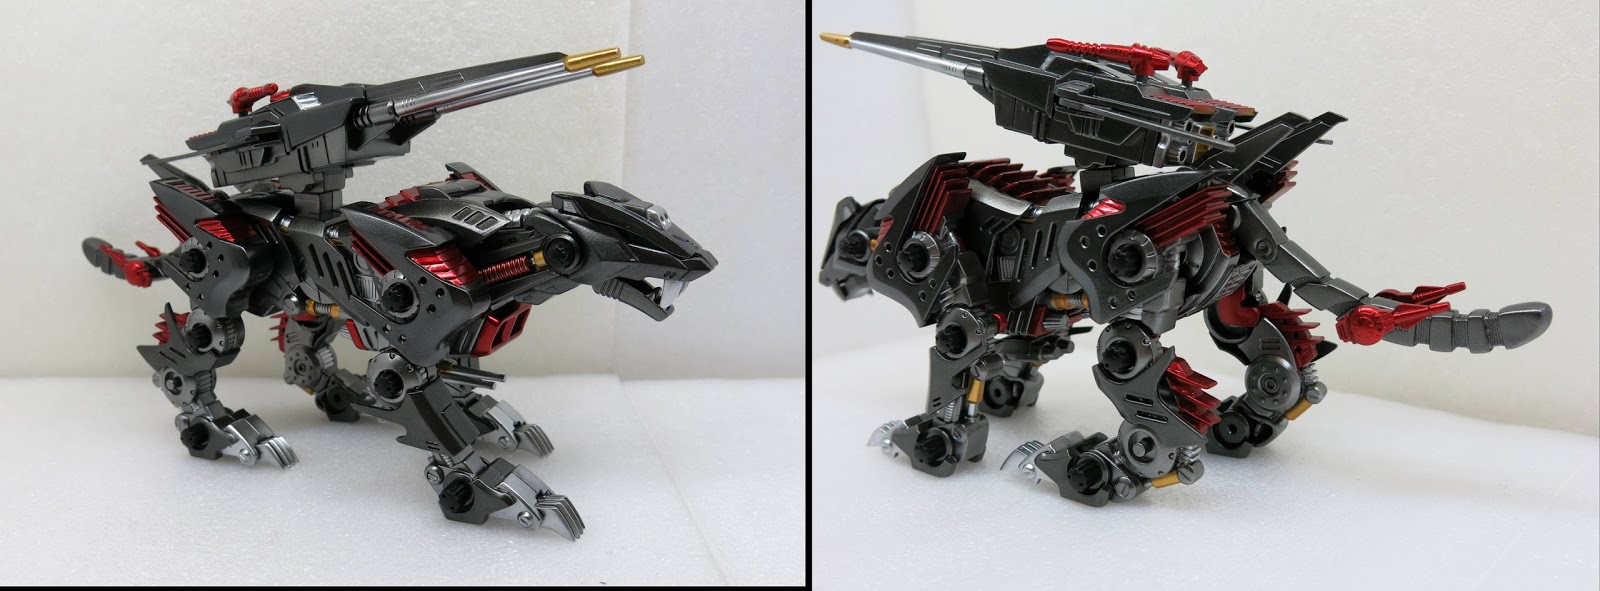
Joseph’s custom paint finish
The client had a few uncompromising requests:
- Eliminate all sharp flash and parting lines that could cut hands.
- The armor must look weighty and solid. Since it is a cheetah, the overall colorway must evoke blazing speed (a very tough balance!).
- The red radiator fins must be brilliant and metallic.
- Hopefully restore motorized movement (I couldn’t guarantee this beforehand—if the motor itself was burned out, I’d be helpless).
- Detailed color separation on all weaponry.
Techniques Joseph applied:
- Filling sink marks and leveling slide-mold step gaps.
- Stripping off the original paint.
- Sanding gate nubs flat.
- Smoothing mold parting lines.
- Motorized gearbox and electrical repair.
- Metallic shading and precision masking for color separation.
- Seam line welding.
- Resin recasting for missing parts.
Paints used:
GAIA 041, GAIA 002, GAIA 003, GAIA 006, GAIA 007, GAIA 010, GAIA 043, GAIA 121, GAIA 122, GAIA 125, plus several of Joseph’s custom custom-blended mixes.
Building and Restoration Process
First, disassembling the unit to diagnose why the motor wasn’t working:
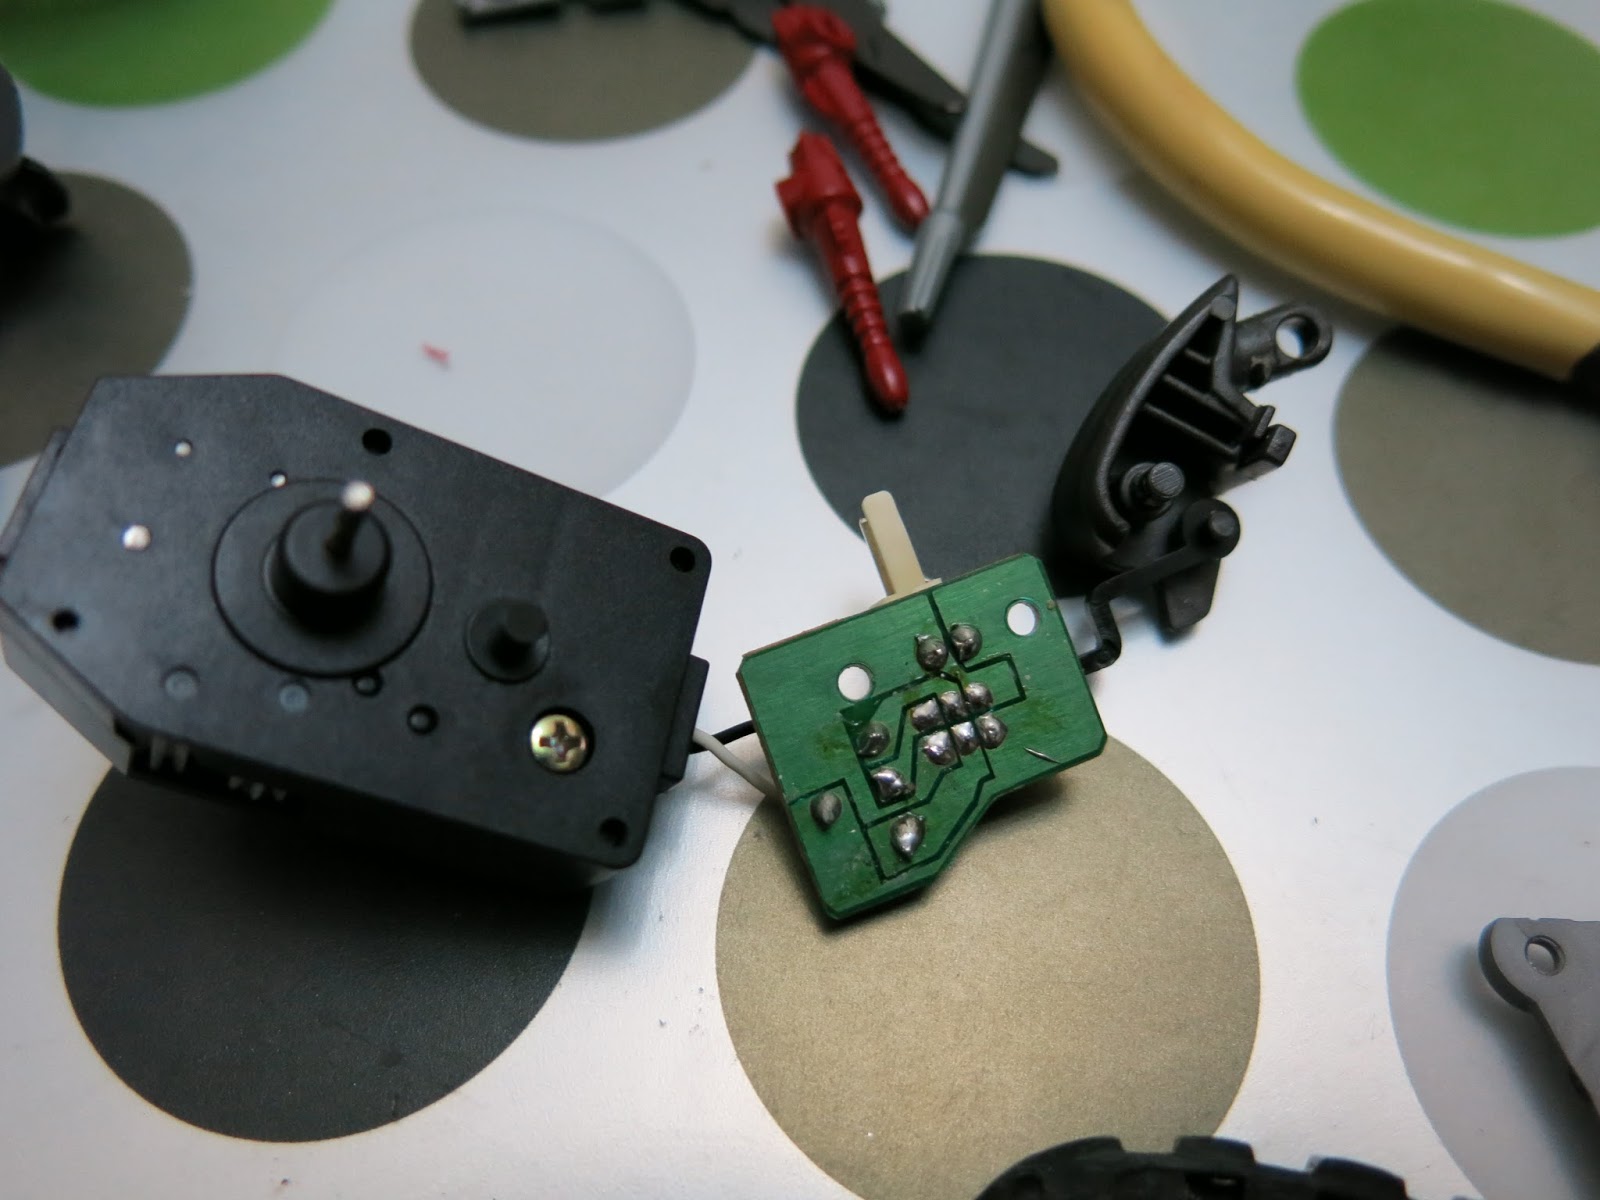
Circuit board
Joseph spotted micro-cracks in the soldering on the green circuit board, which were resoldered.
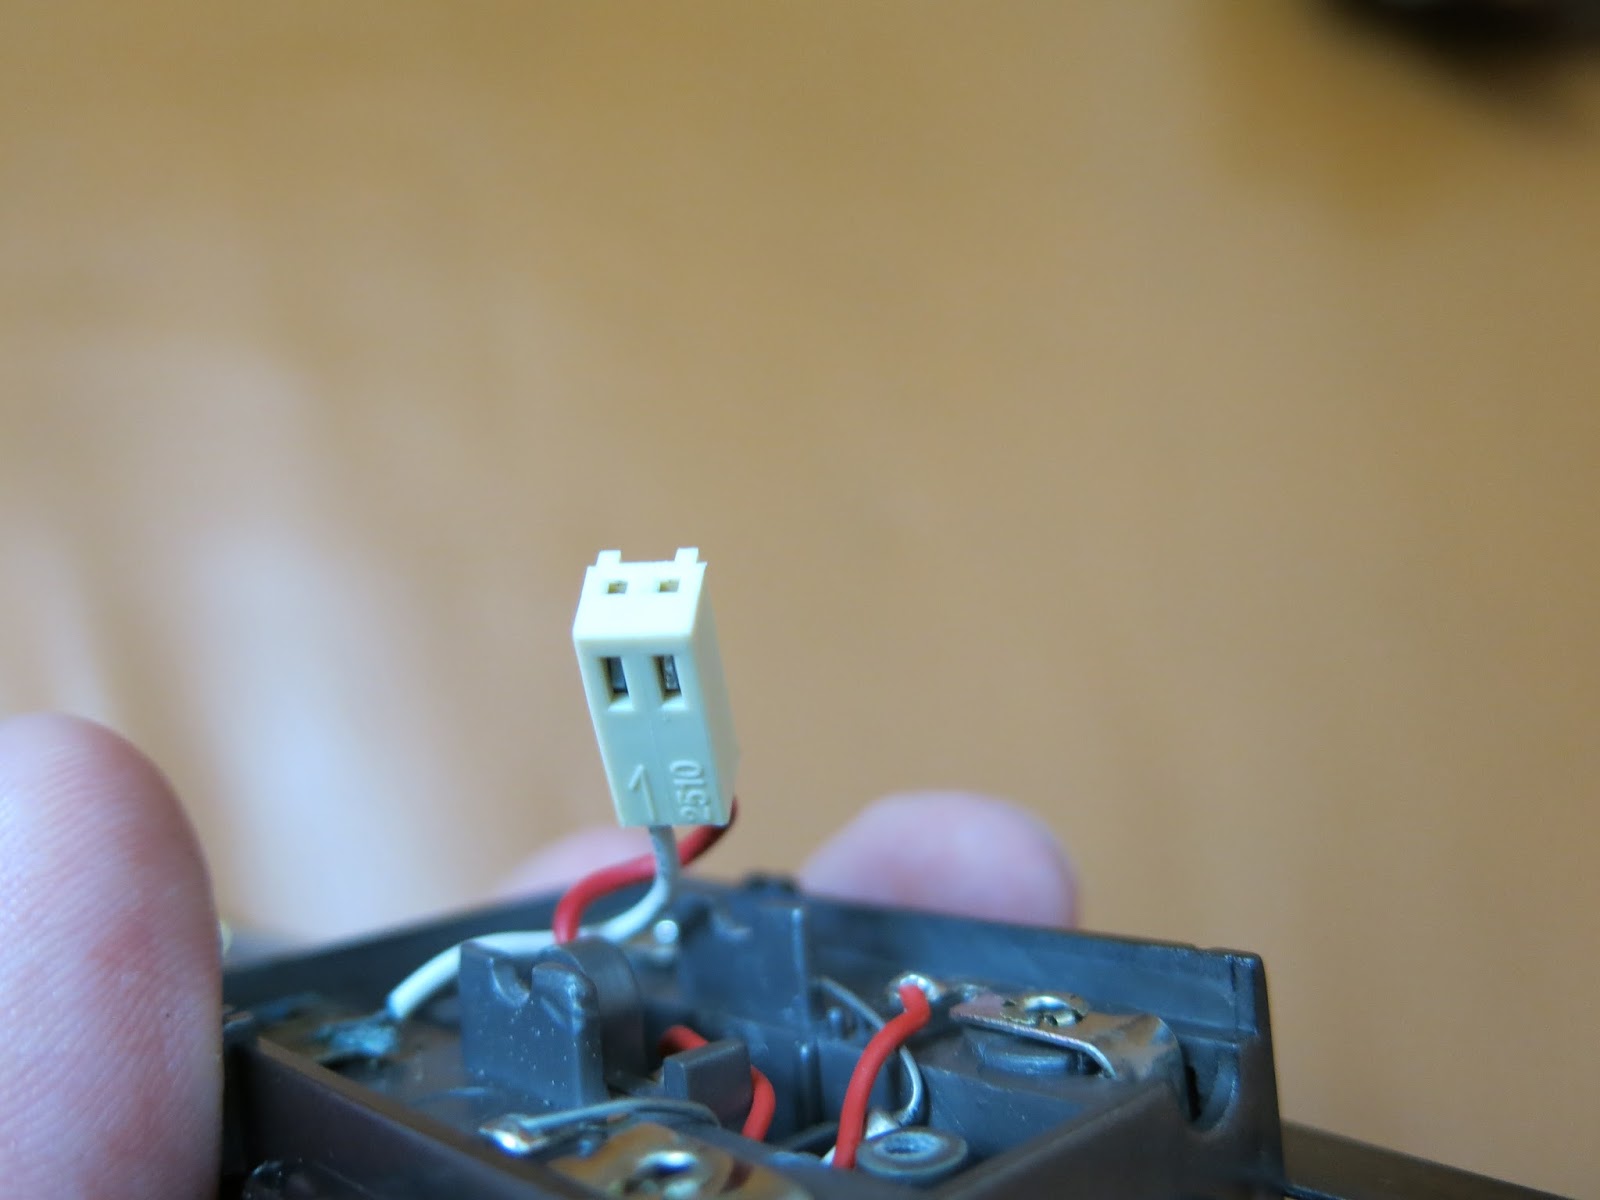
Connector
The battery connector had loosened from age, failing to establish reliable contact. I disassembled the housing, realigned the internal spring contacts, and secured them.
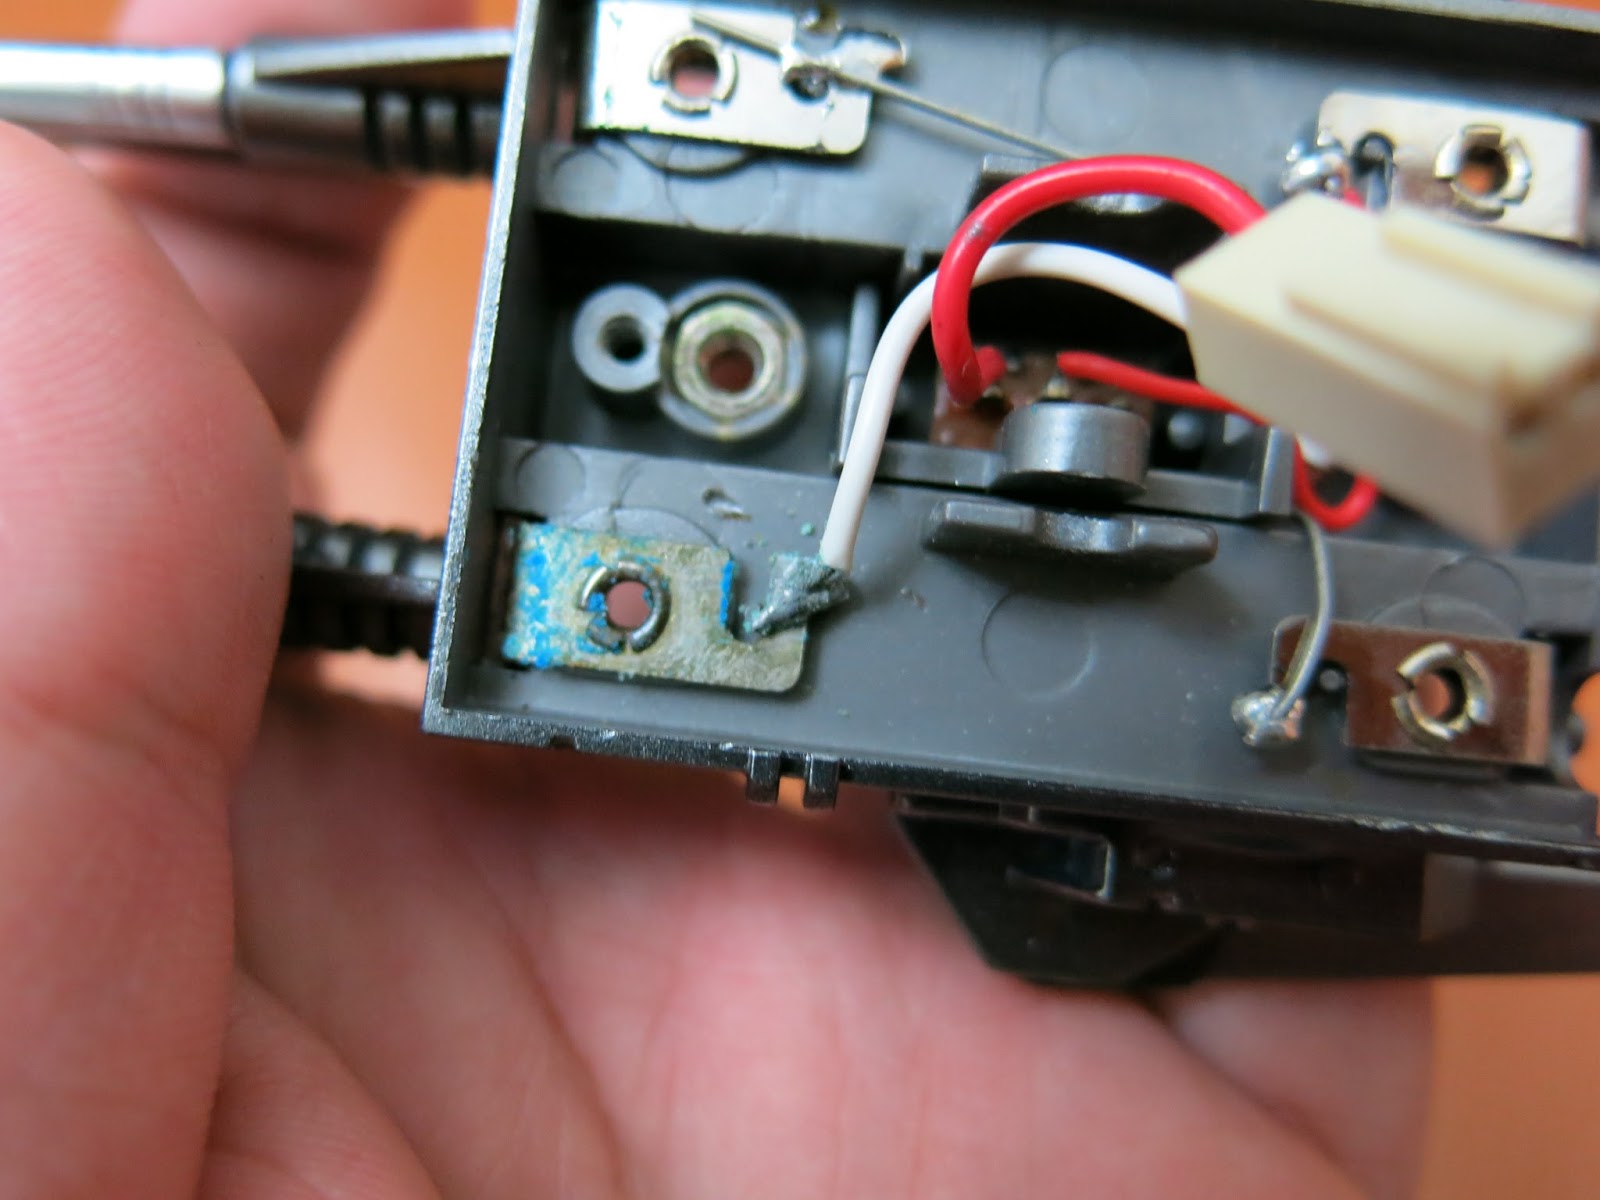
Severely oxidized terminals
Internal corrosion and rust were cleaned thoroughly.
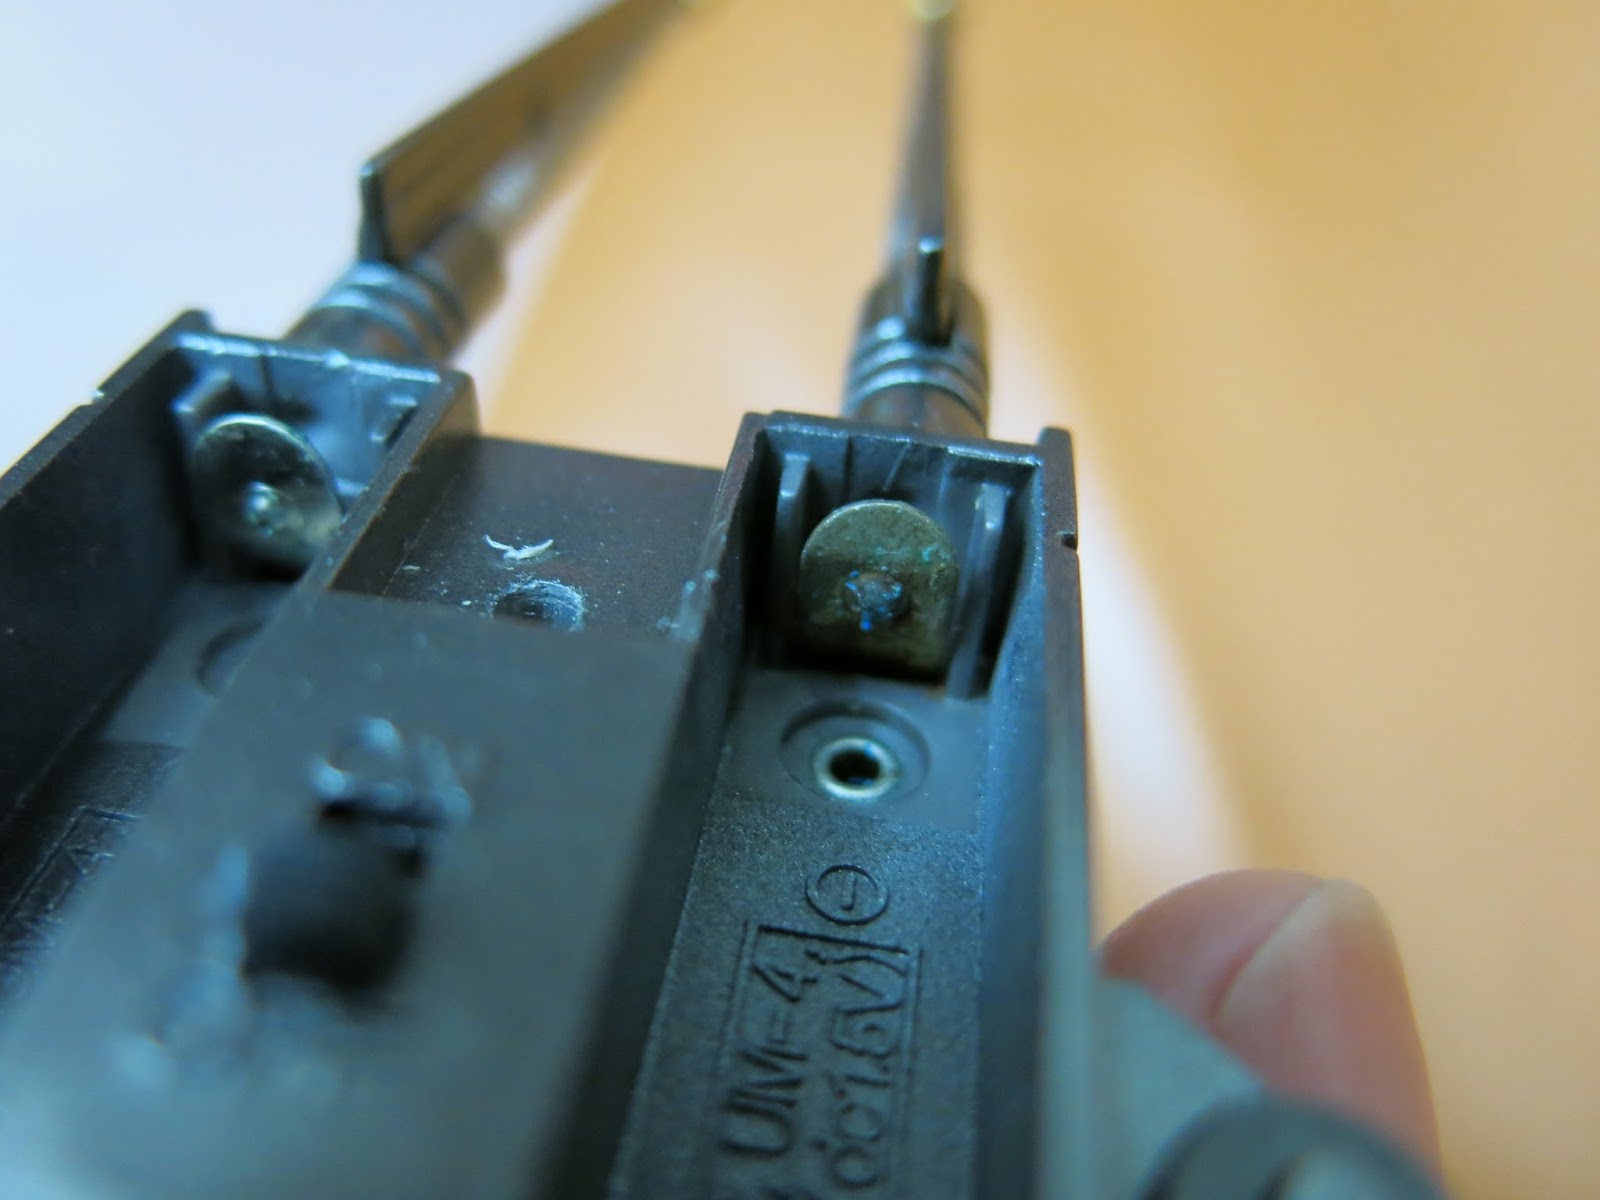
Corroded battery box contacts
The metal battery terminals had been eaten away by leaking battery electrolyte. I wiped away dried battery acid residue and used chemical rust remover to strip the oxidation.
Once Joseph addressed these aged electrical components, a live test confirmed the motor operated flawlessly once again.
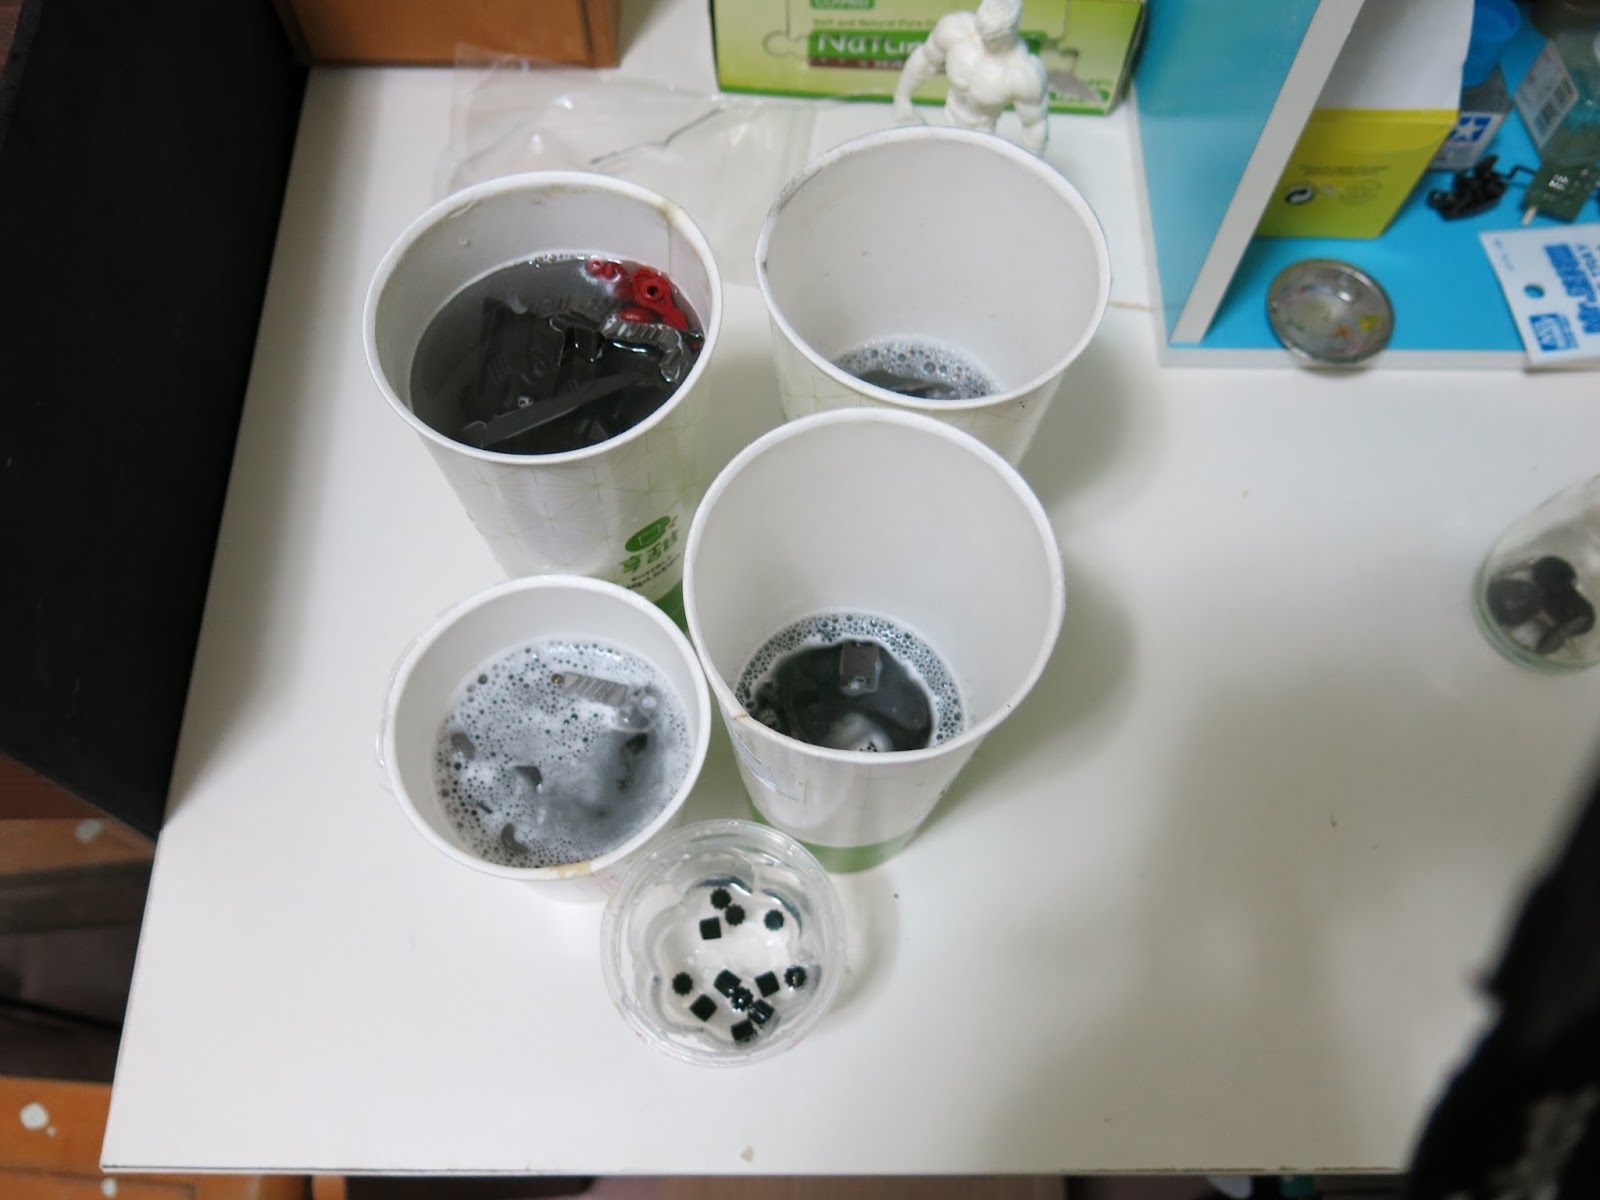
Autumn is meant for soaking in a warm bath. Do not disturb!
While repairing the mechanical drive, Joseph soaked all plastic parts in stripping solvent to wash off the owner’s amateur paint, followed by degreaser to dissolve that cursed grease.
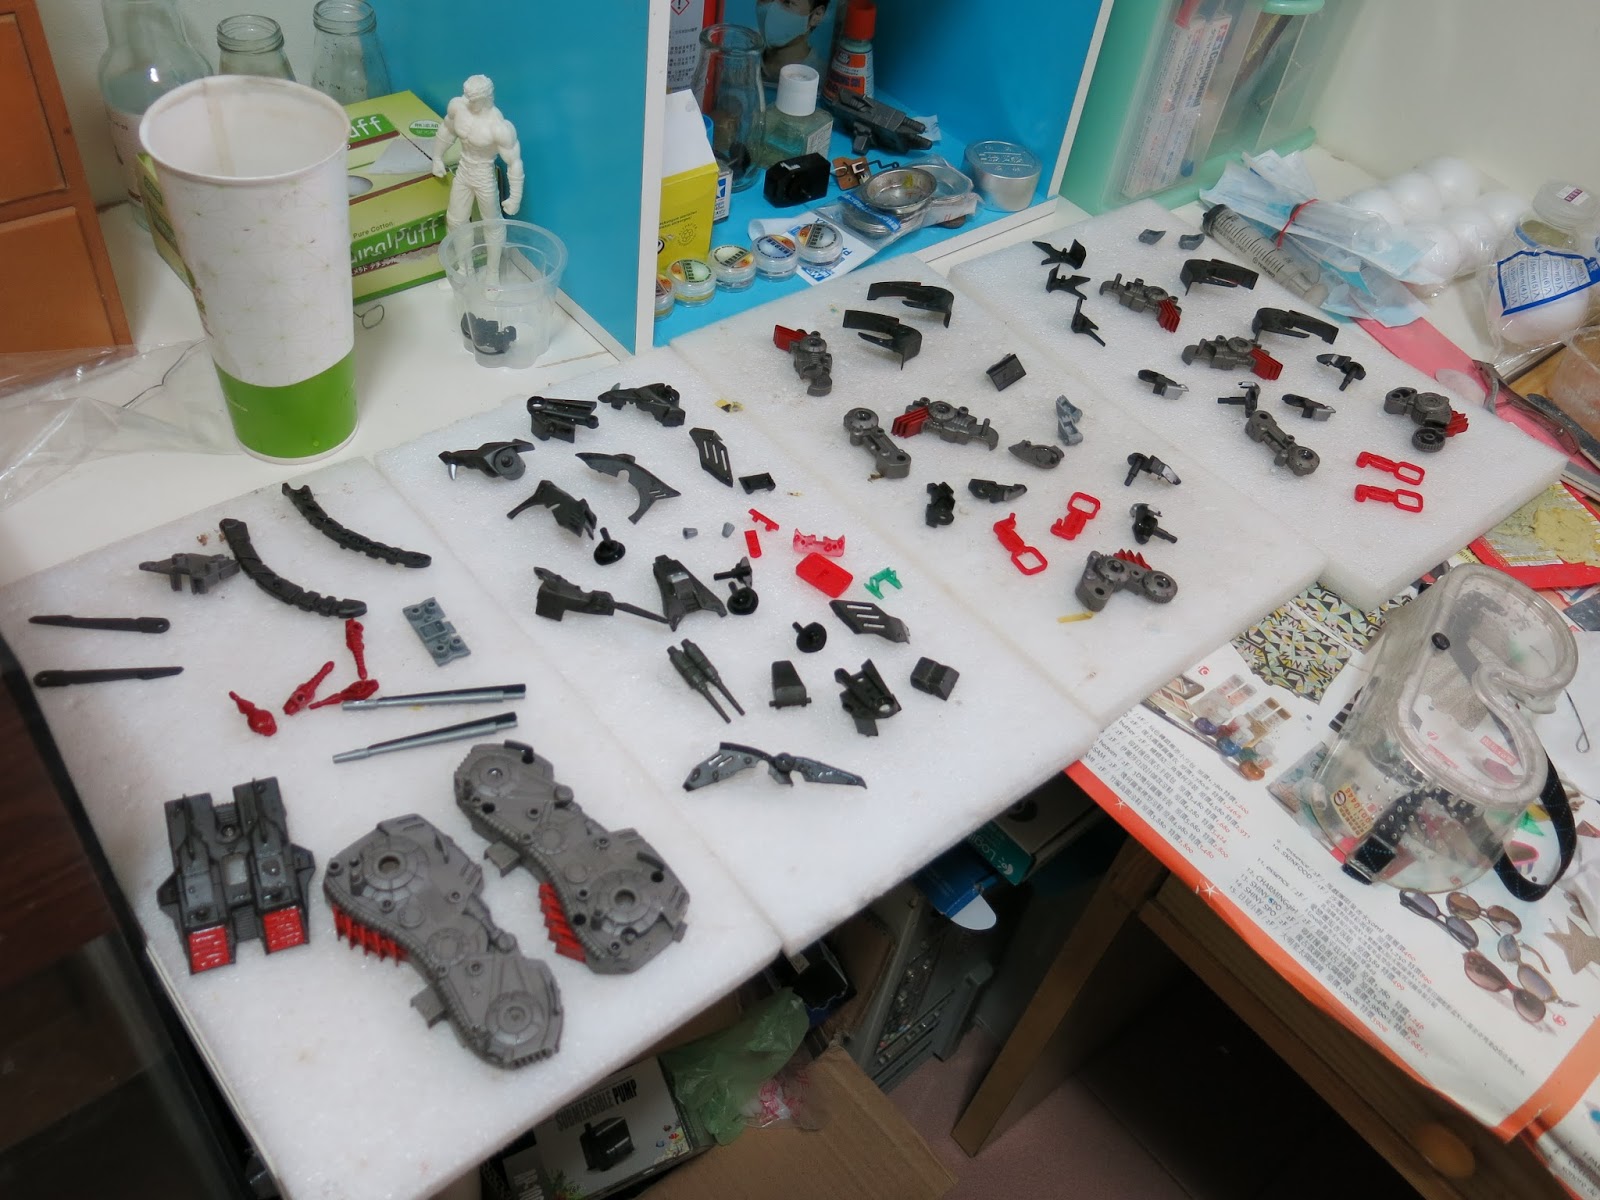
Washed clean and laid out to dry
Painting recipe for all power conduits: Primer Surfacer → Gloss Black → GAIA 121 & GAIA 122.
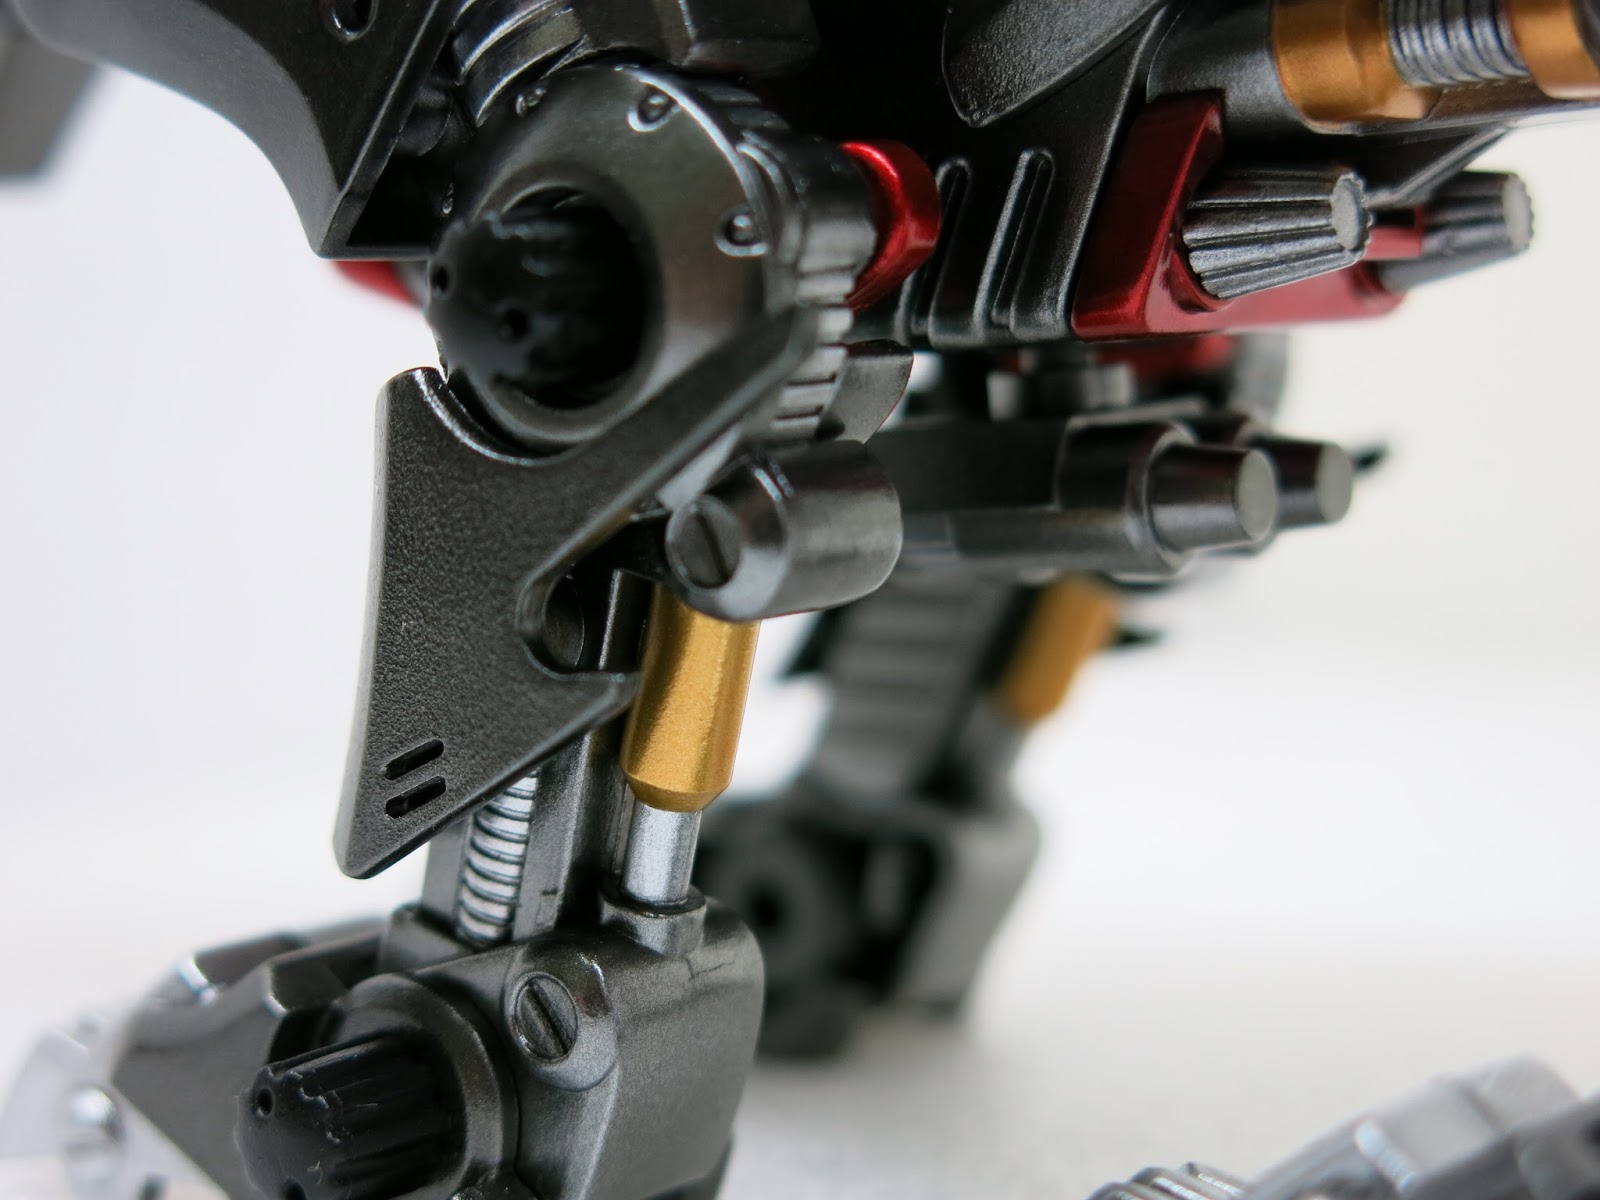
Power conduits
Radiator fin painting: Primer Surfacer → Gloss Black → GAIA 122 → GAIA 041.
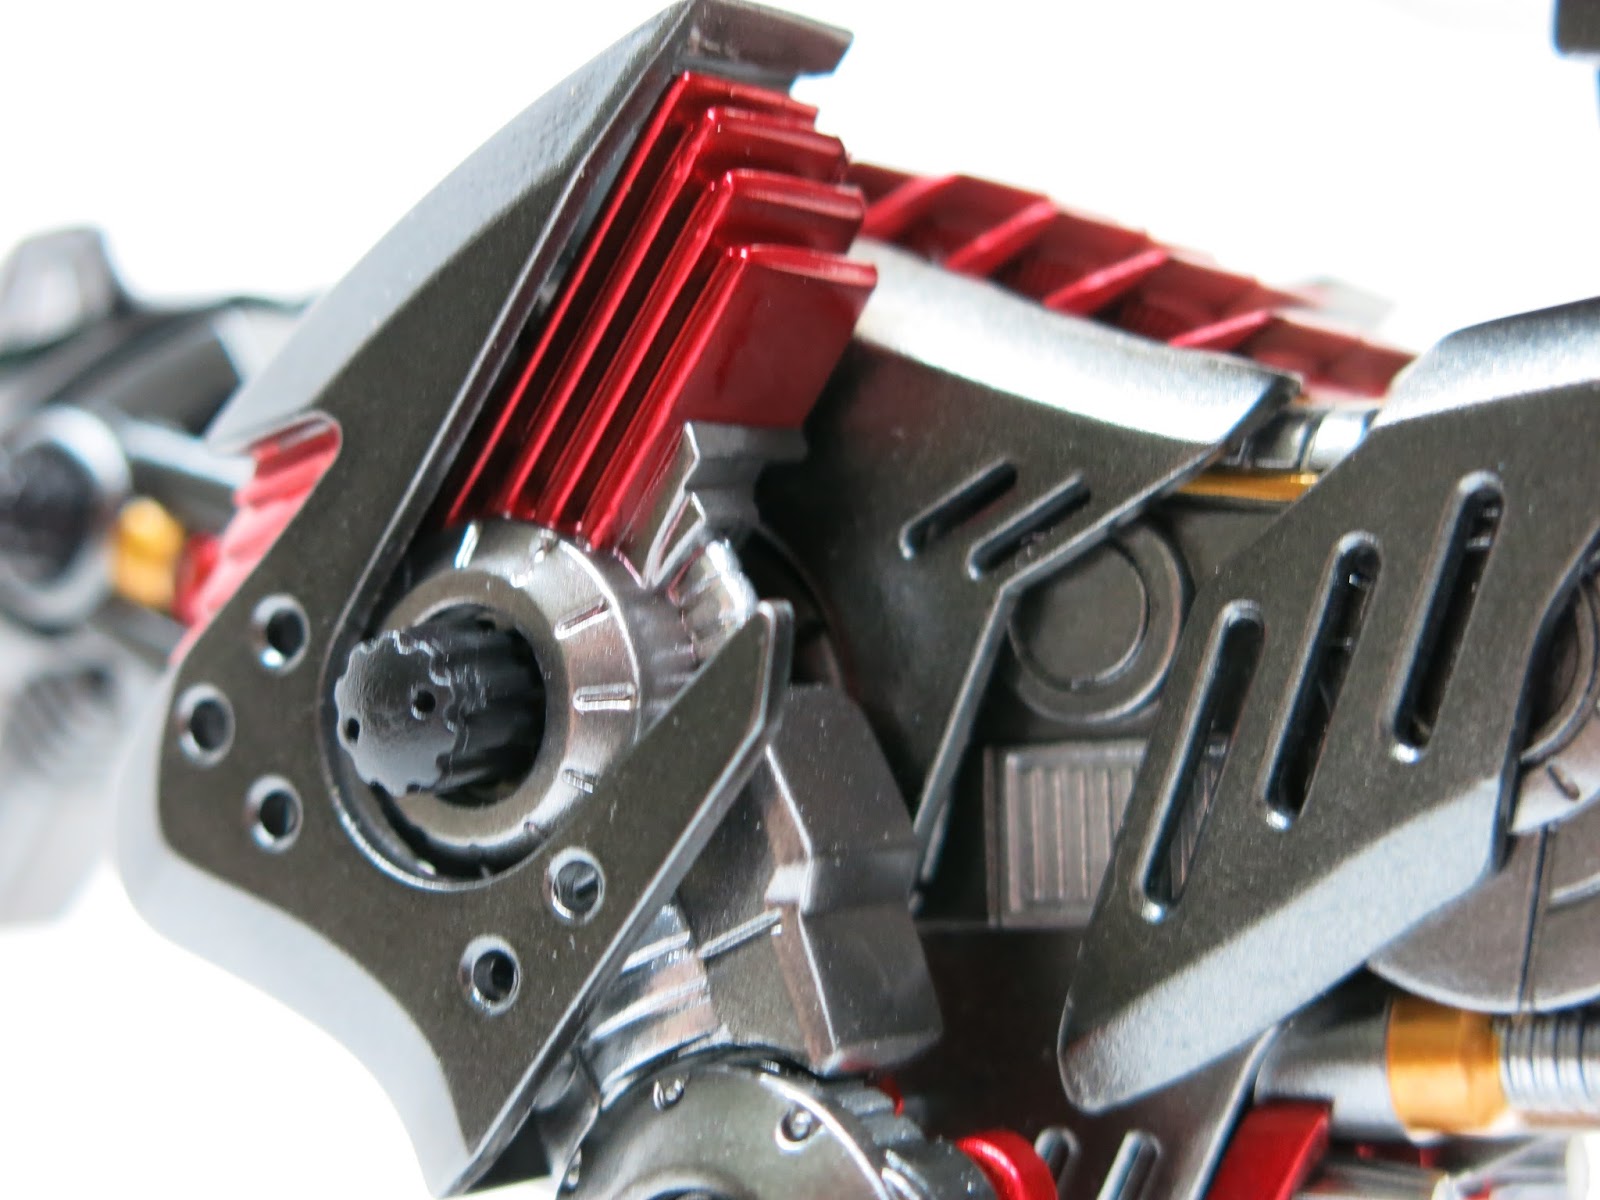
Radiator fins
Outer armor painting: Primer Surfacer → Gloss Black → GAIA 125 → 2 to 3 coats of Clear Black (three coats in recessed shadow areas to enhance depth).
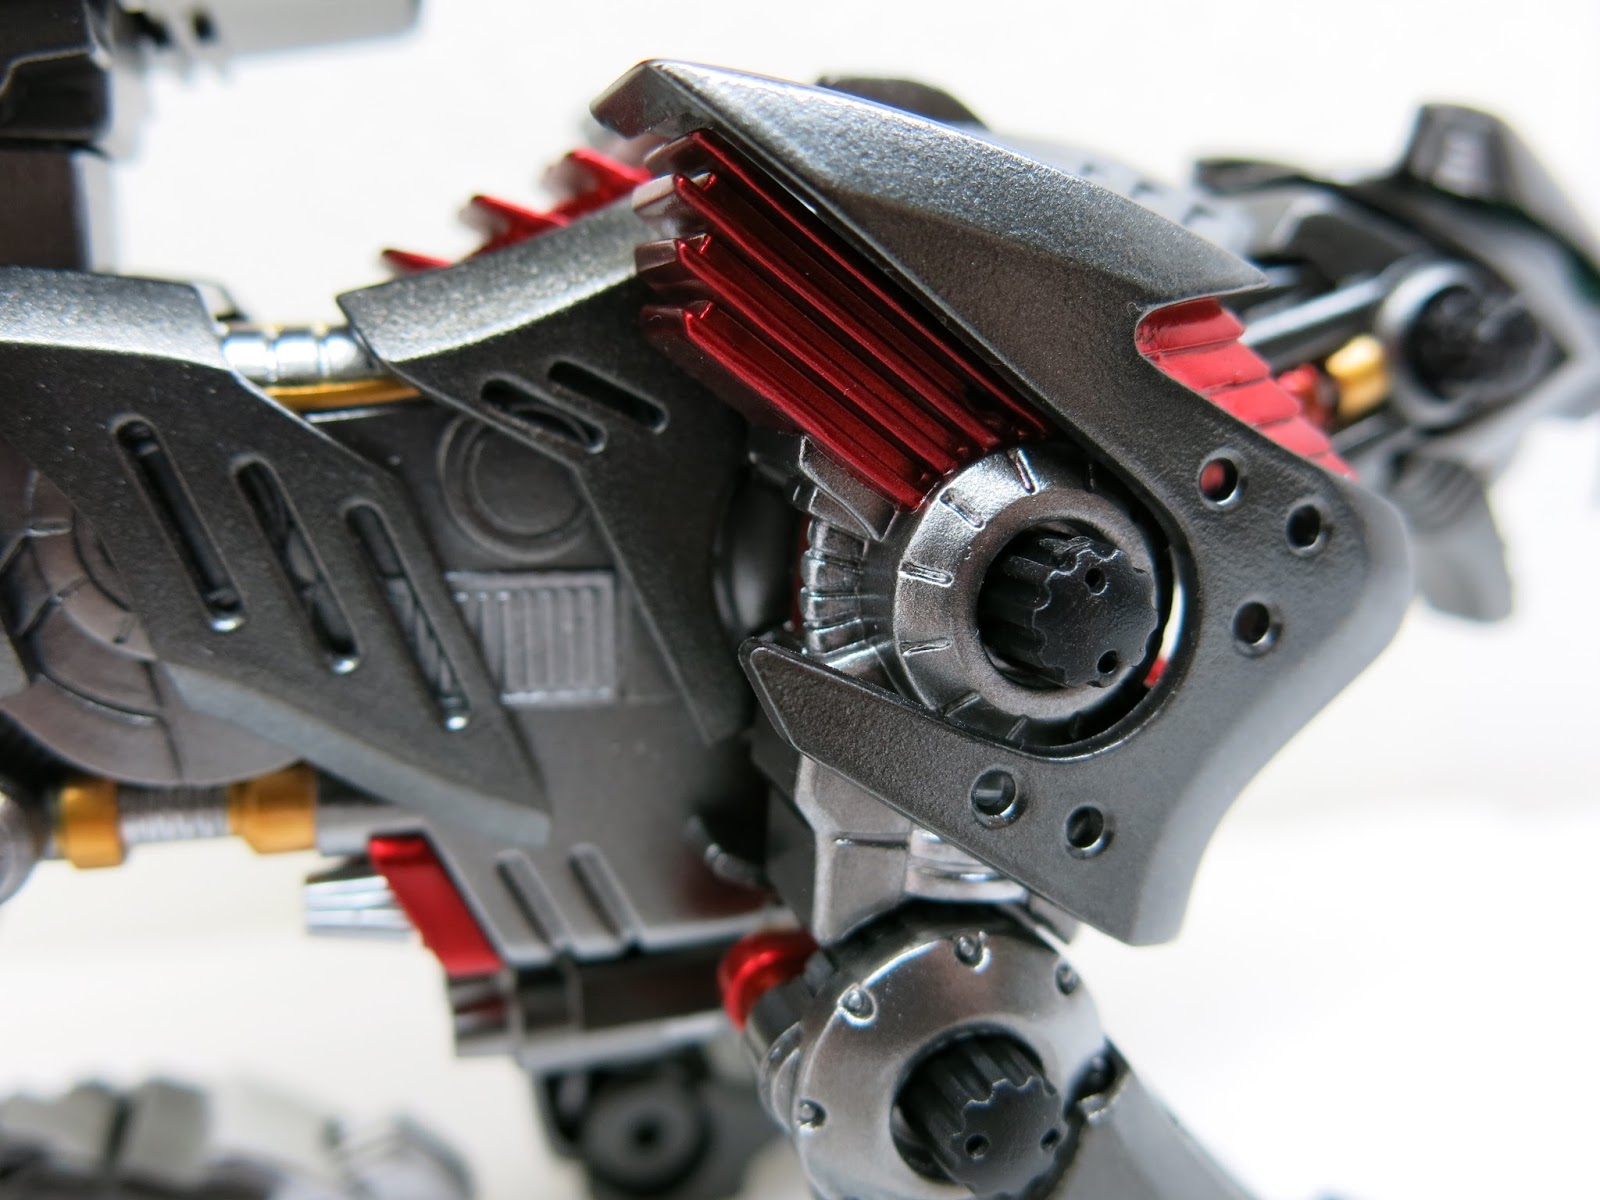
Outer armor
Inner chassis frame: Primer Surfacer → Gloss Black → GAIA 121 (40%) + GAIA 125 (60%) + a touch of GAIA 122 → Clear Gloss coat.
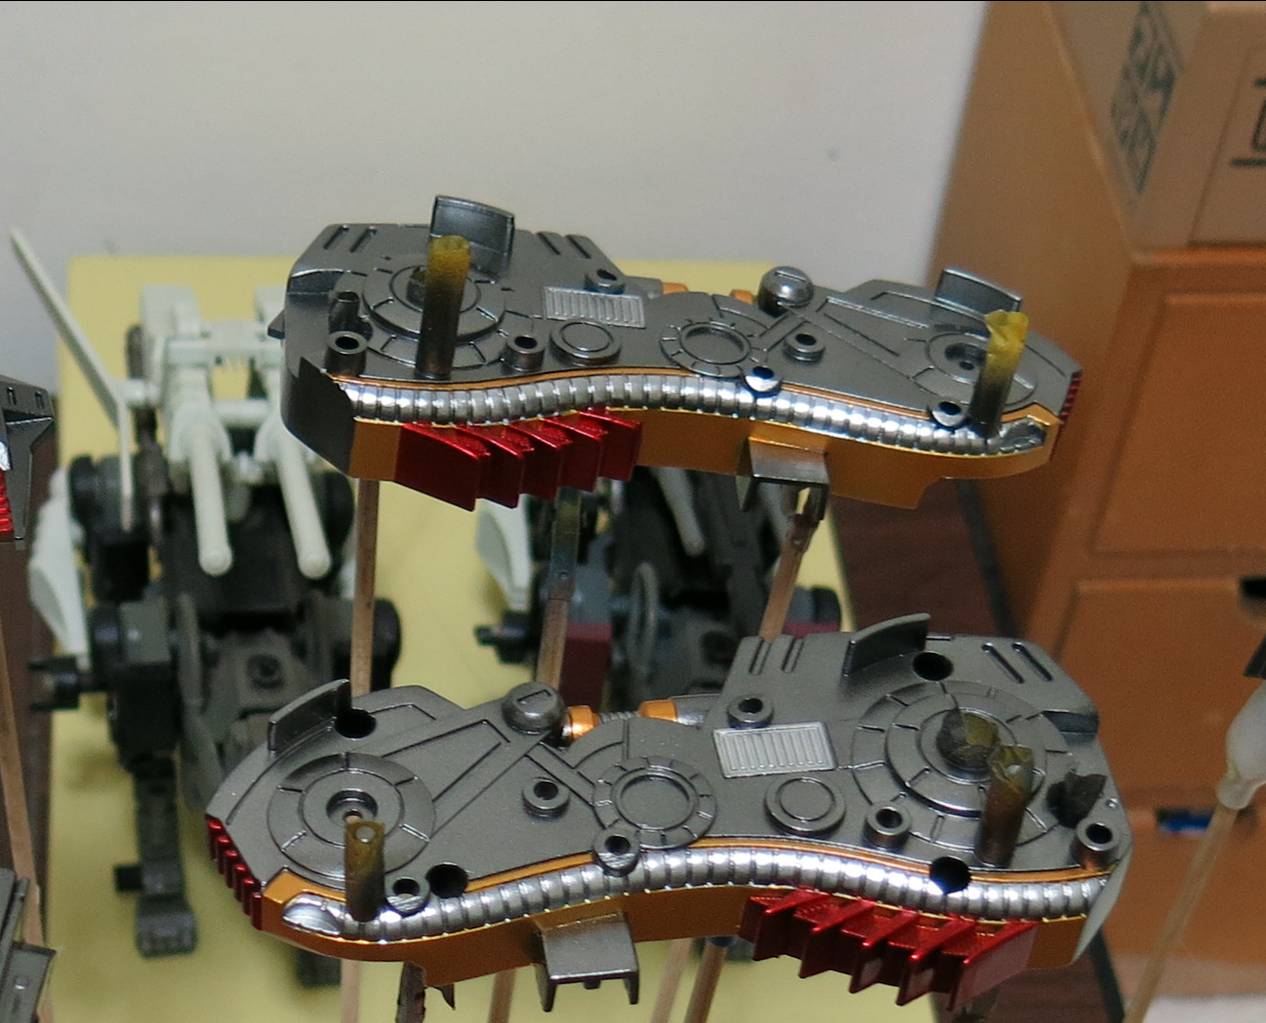
Inner chassis frame
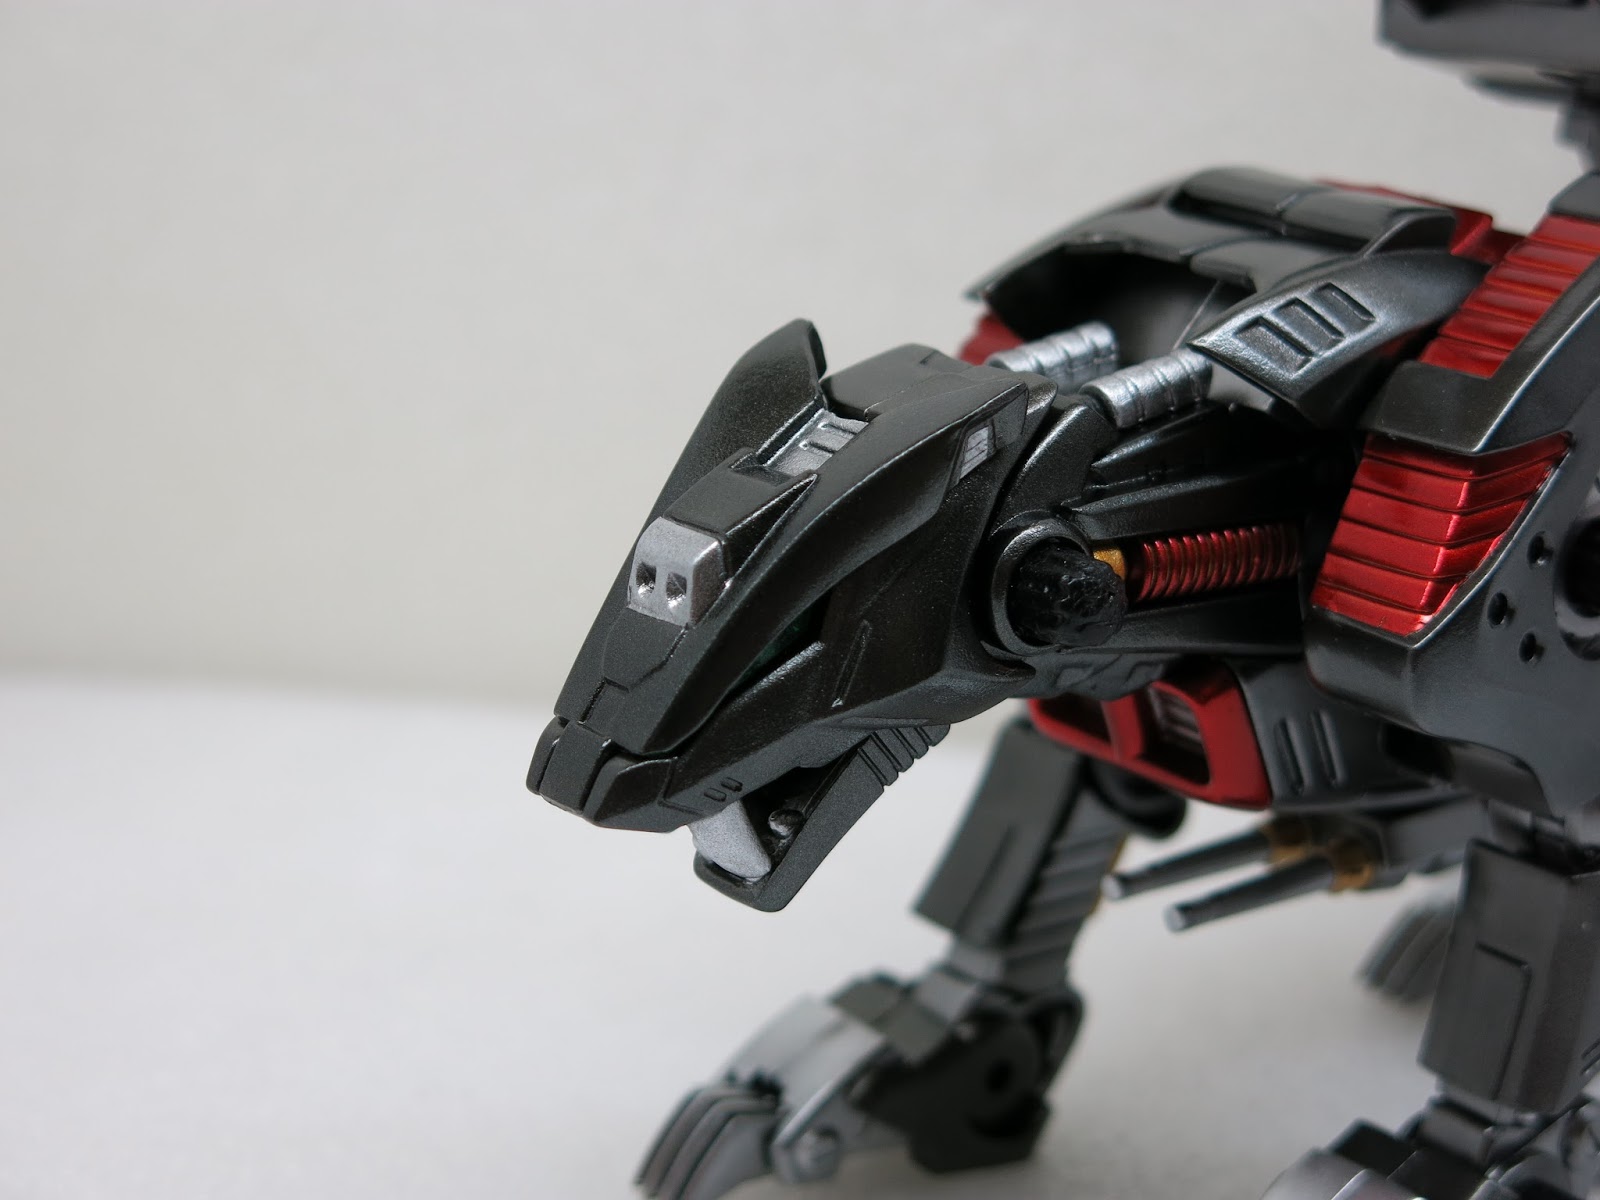
For the coiled spring pipes along the neck, Joseph used masking cord rather than tape, which was both faster and delivered much cleaner edges.
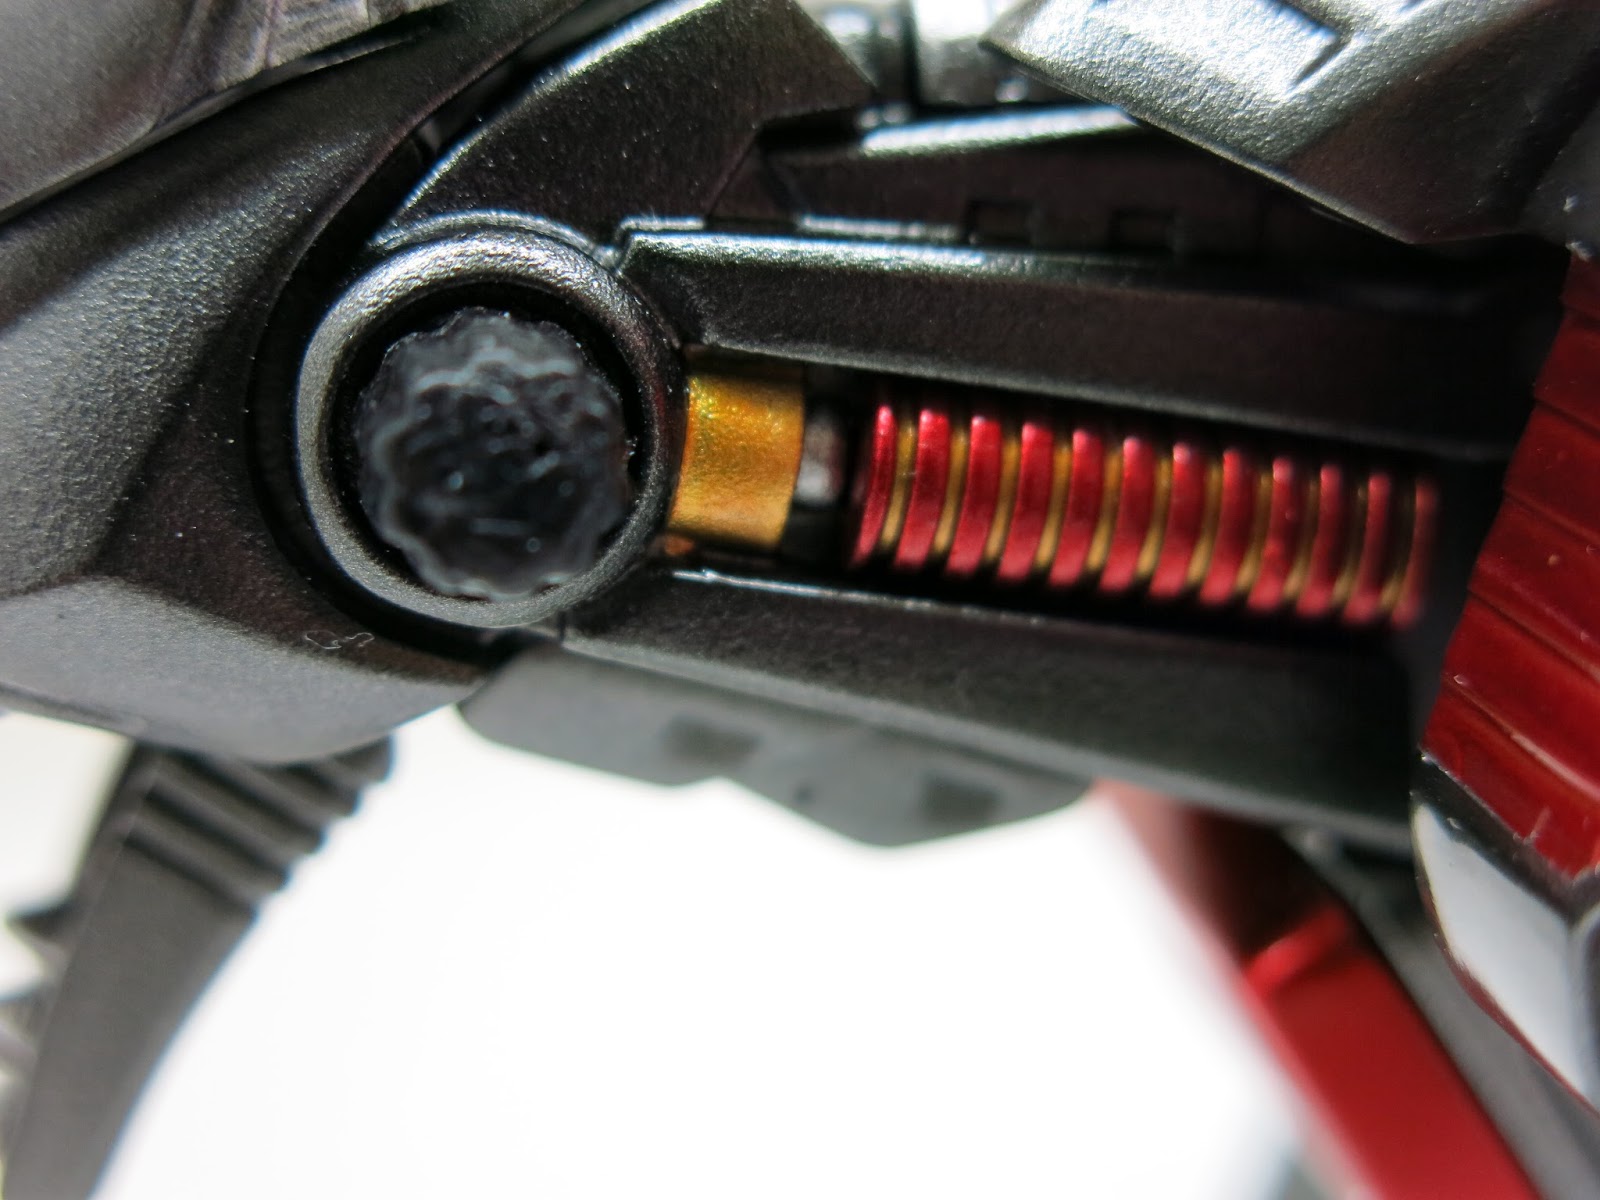
Neck power springs
Finally, after extensive painting and curing, this kit was brought triumphantly back to life. Let’s feast our eyes on the completed photos!
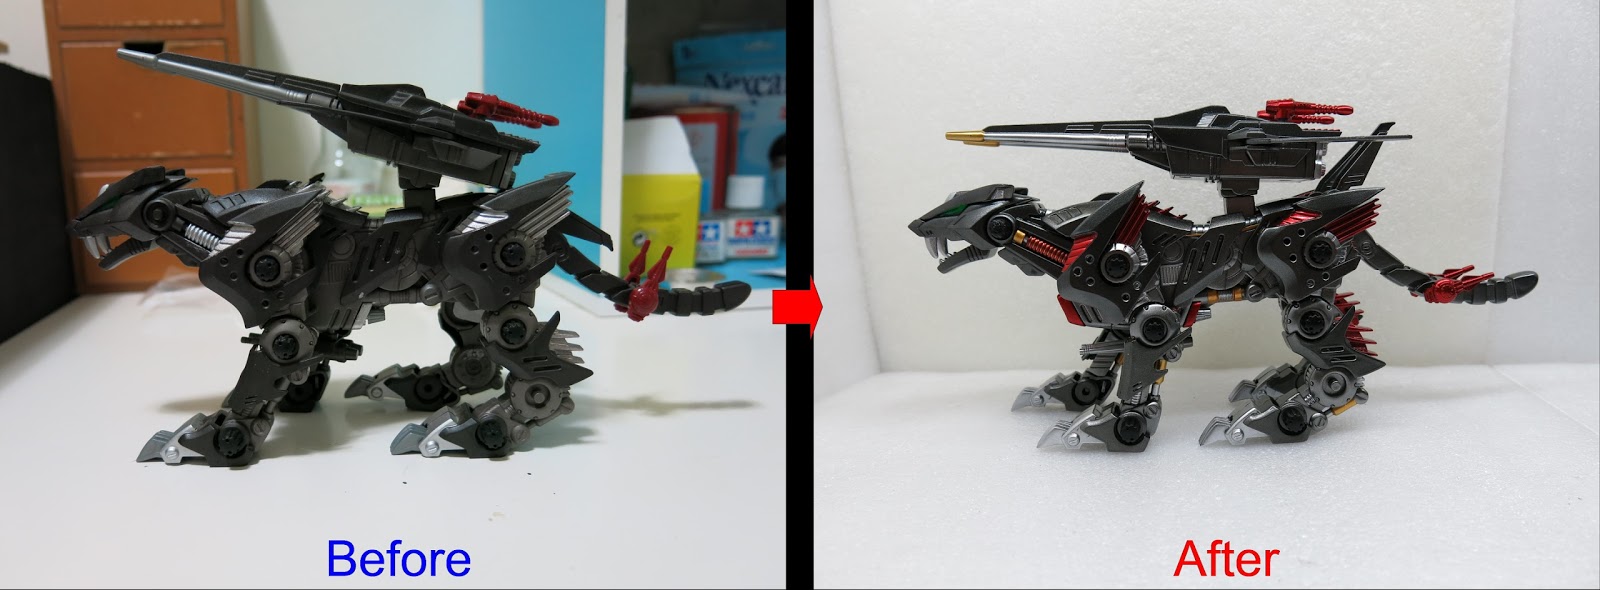
Side view
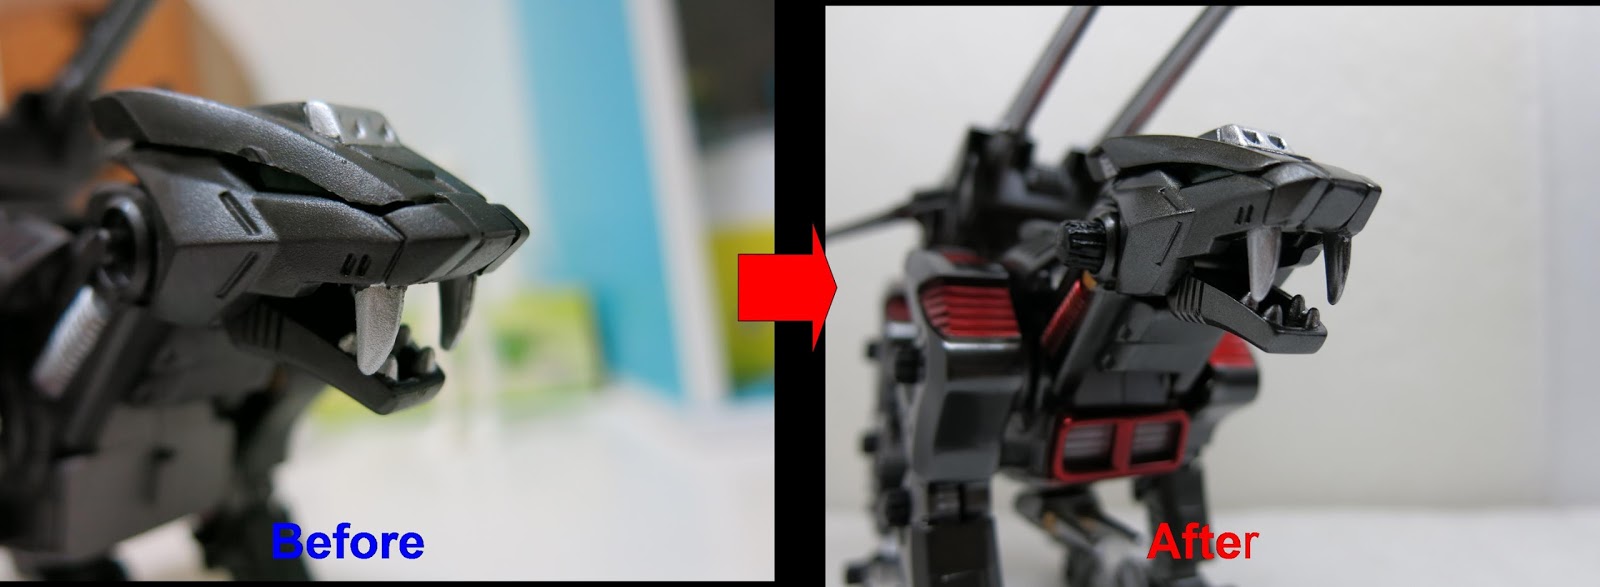
Front three-quarter view
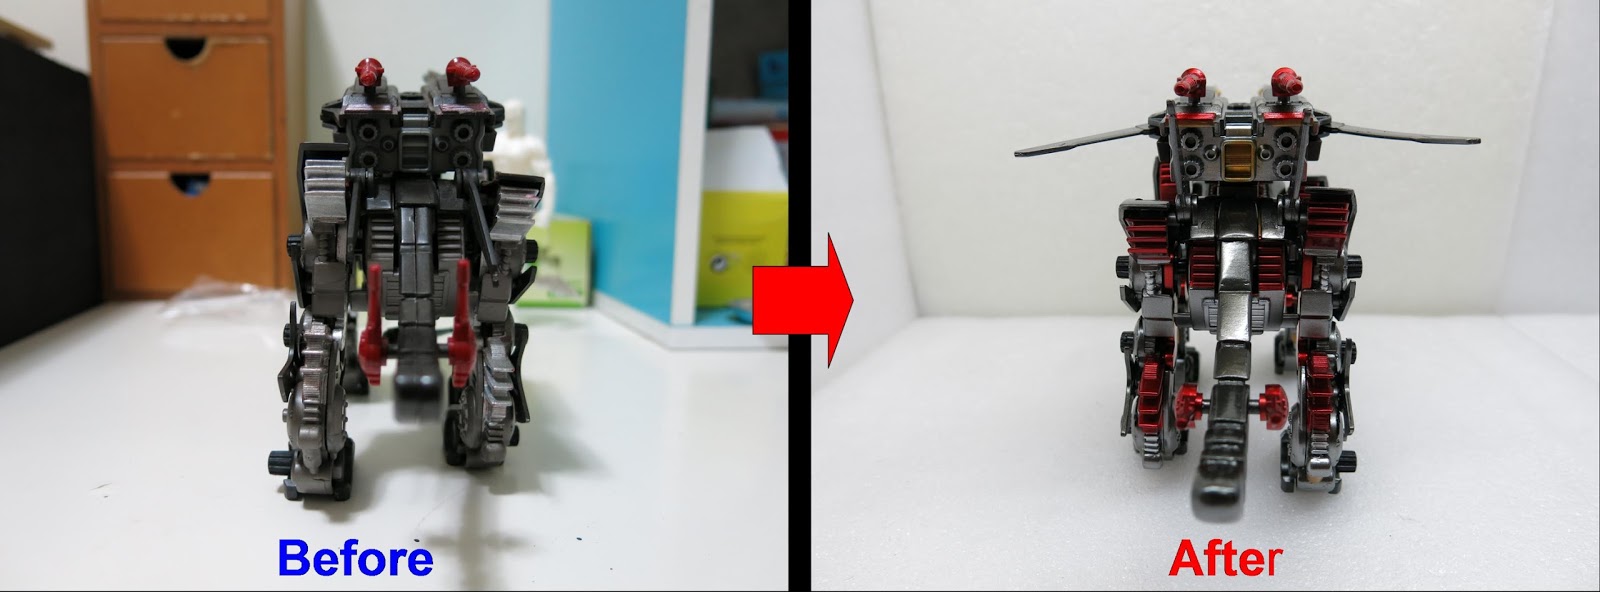
Rear view
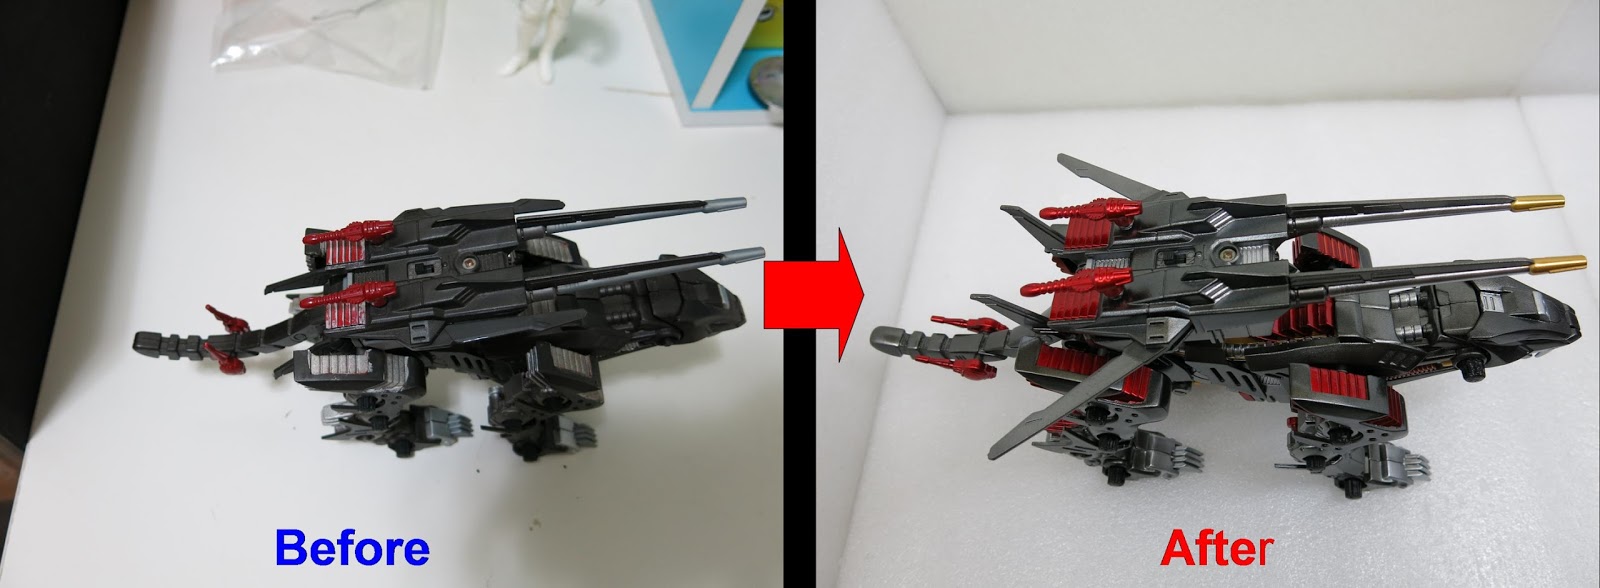
Top-down view
Tail details
Neck details
Lightning Saix, launch!
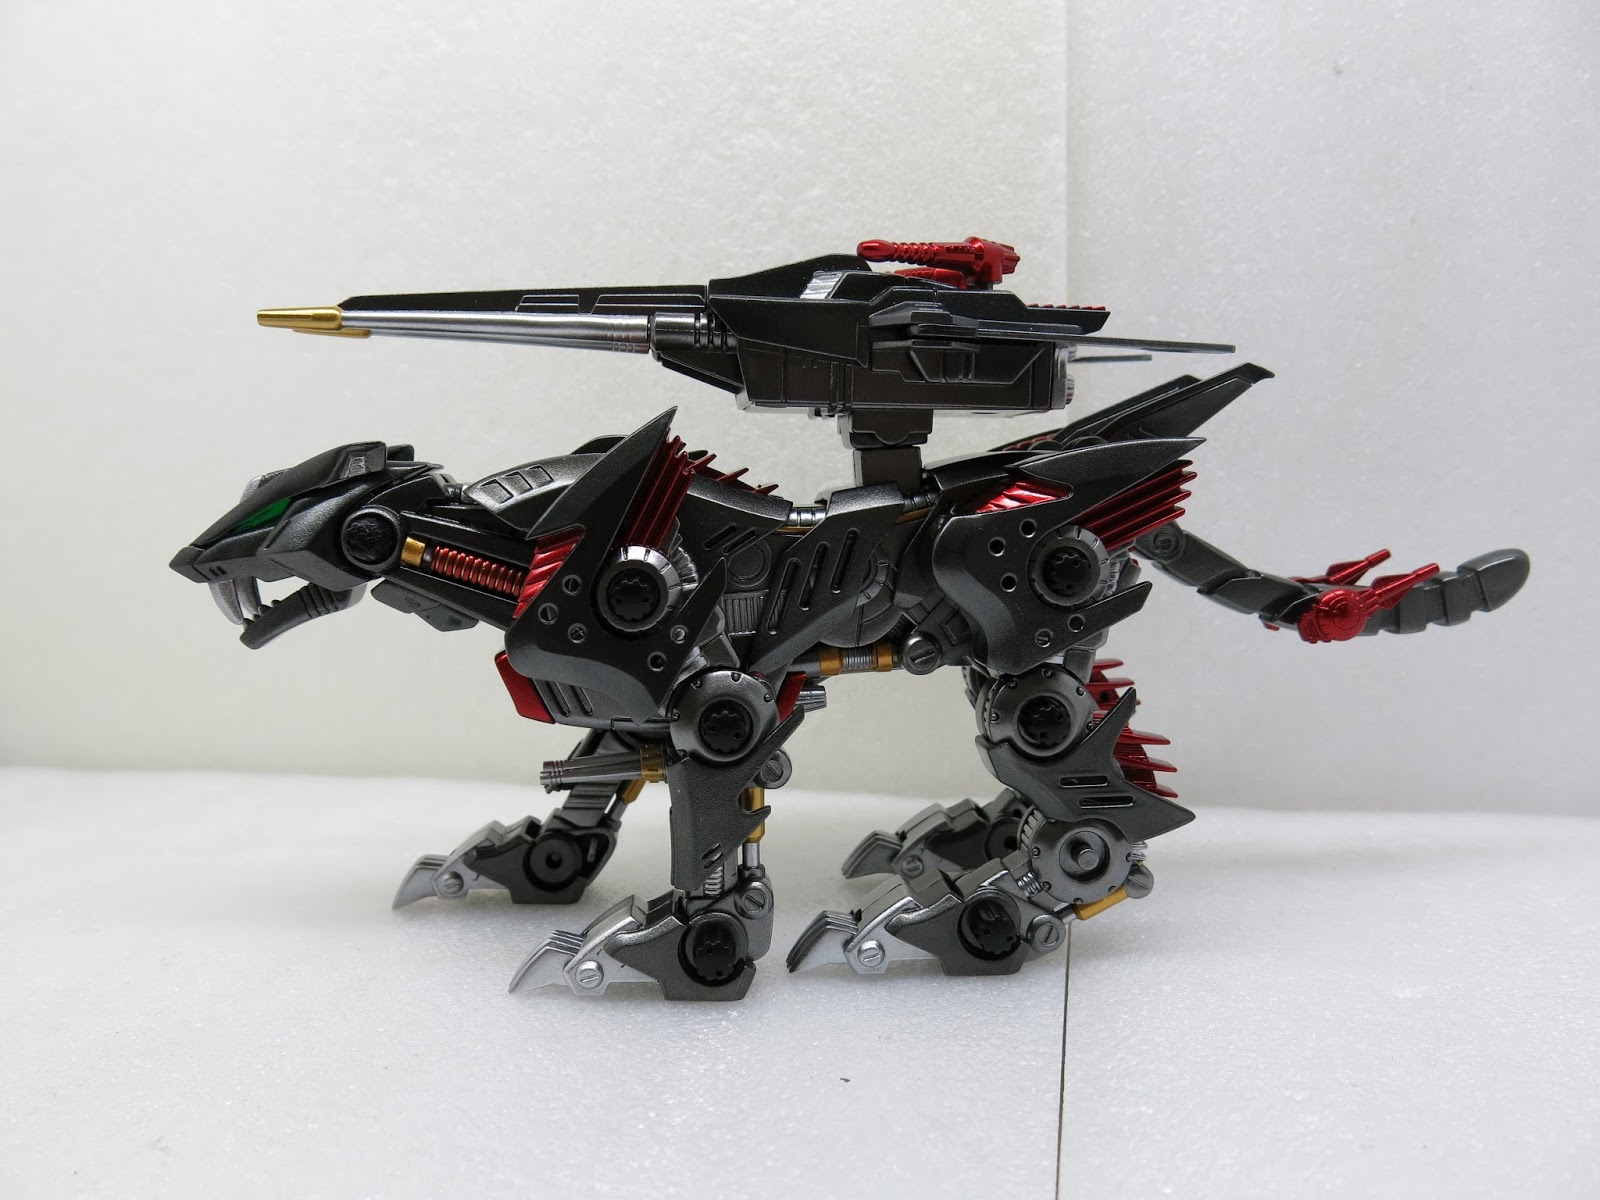
Doesn’t the side profile radiate cheetah-like velocity?
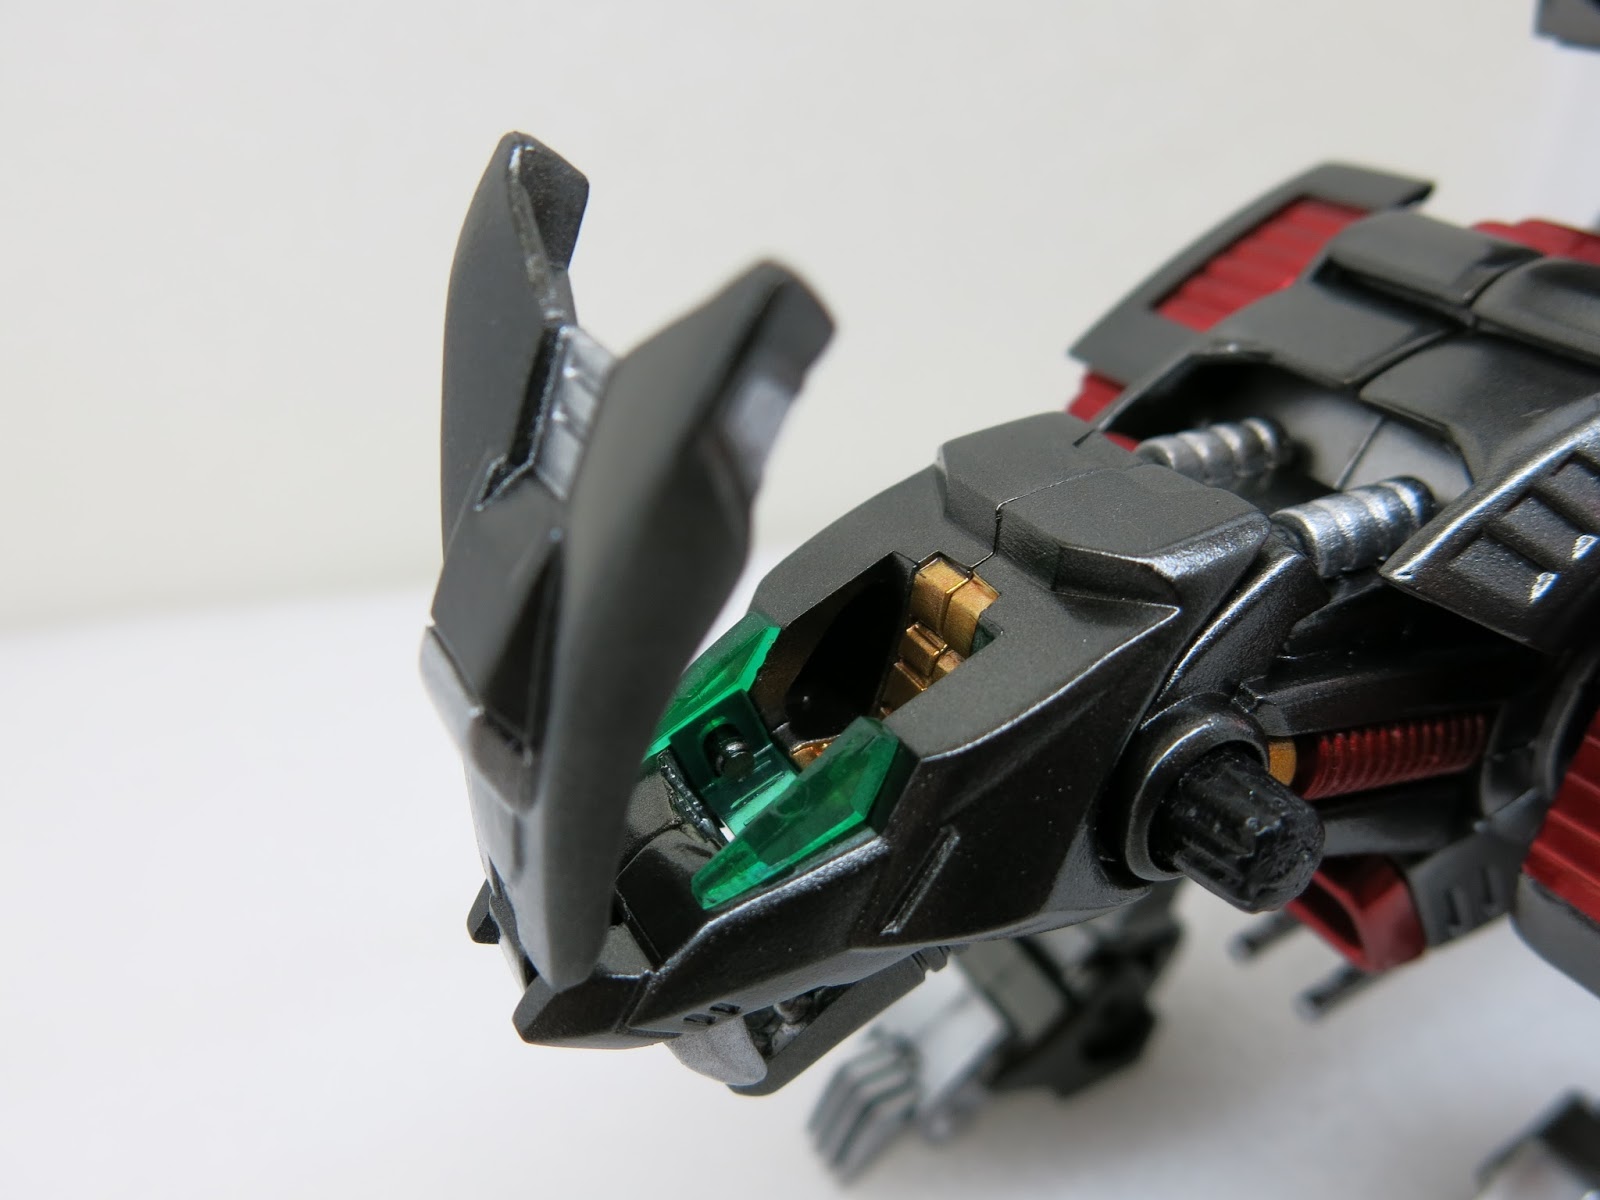
The cockpit finished in gold and clear green looks far more refined.
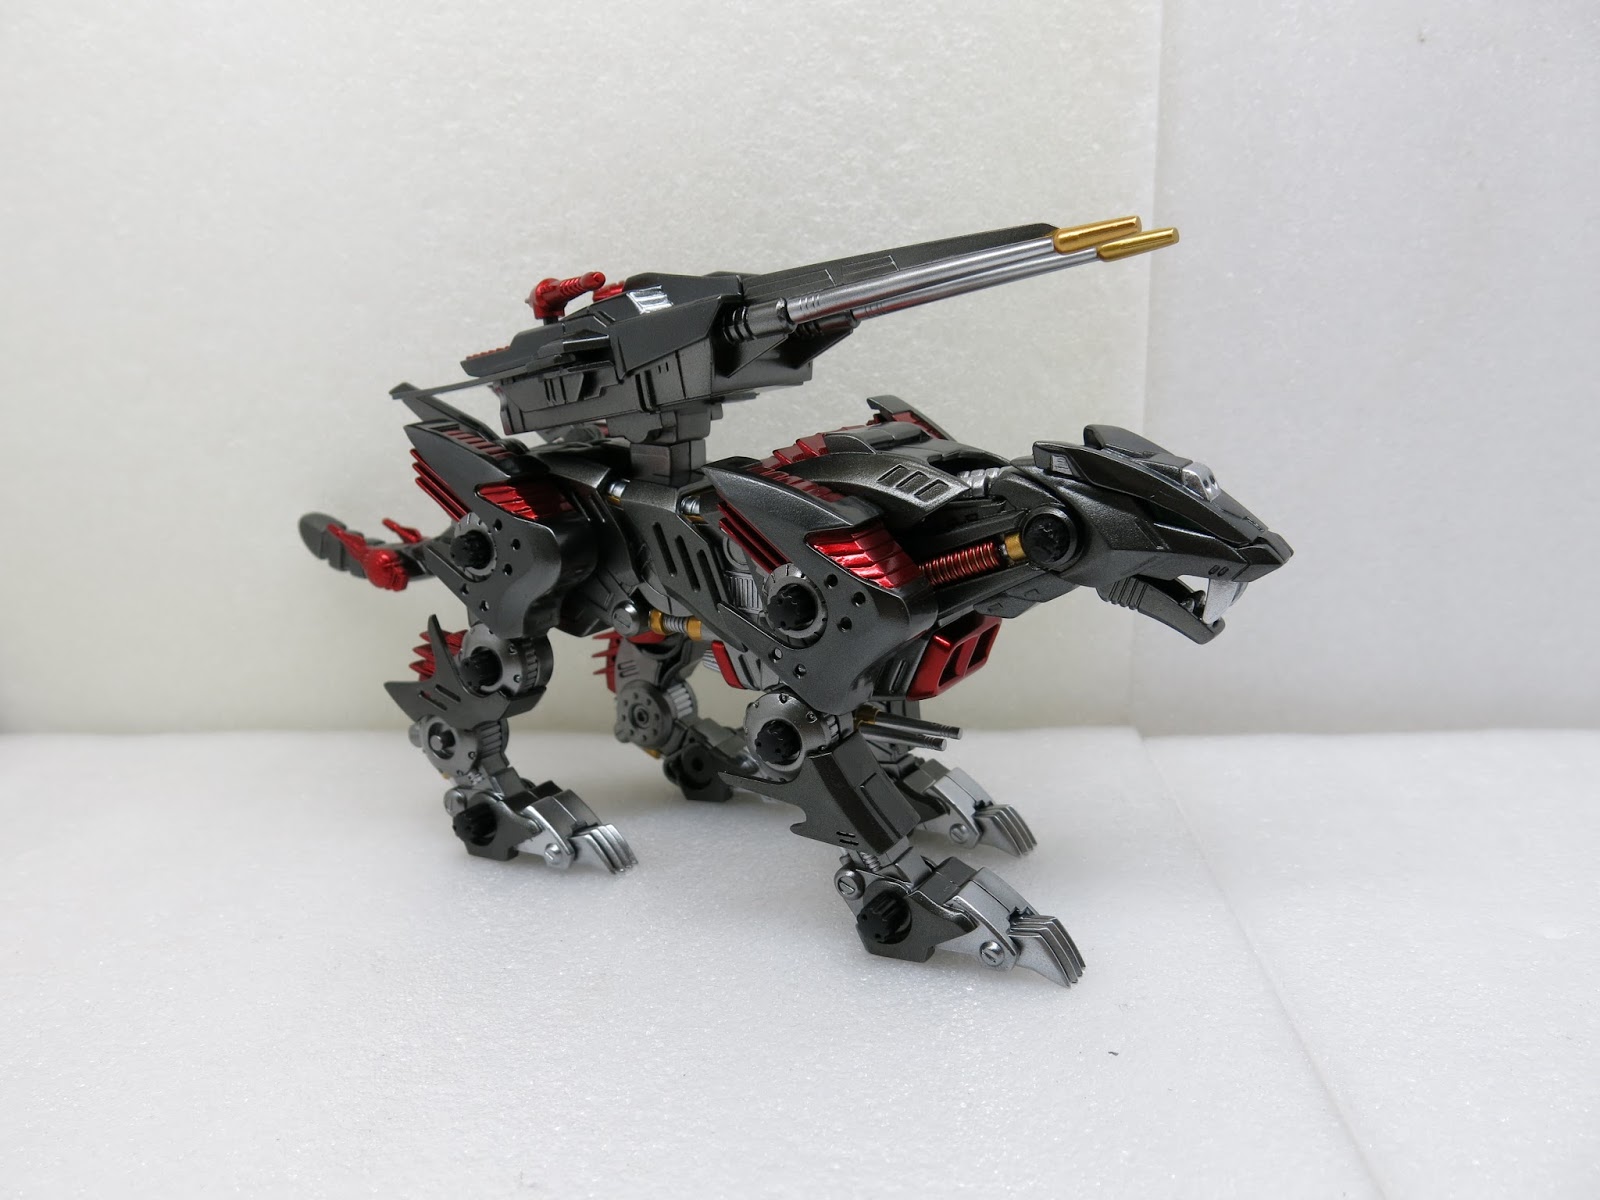
Roar
Color separation on the chest air intake enhances the metallic heft.
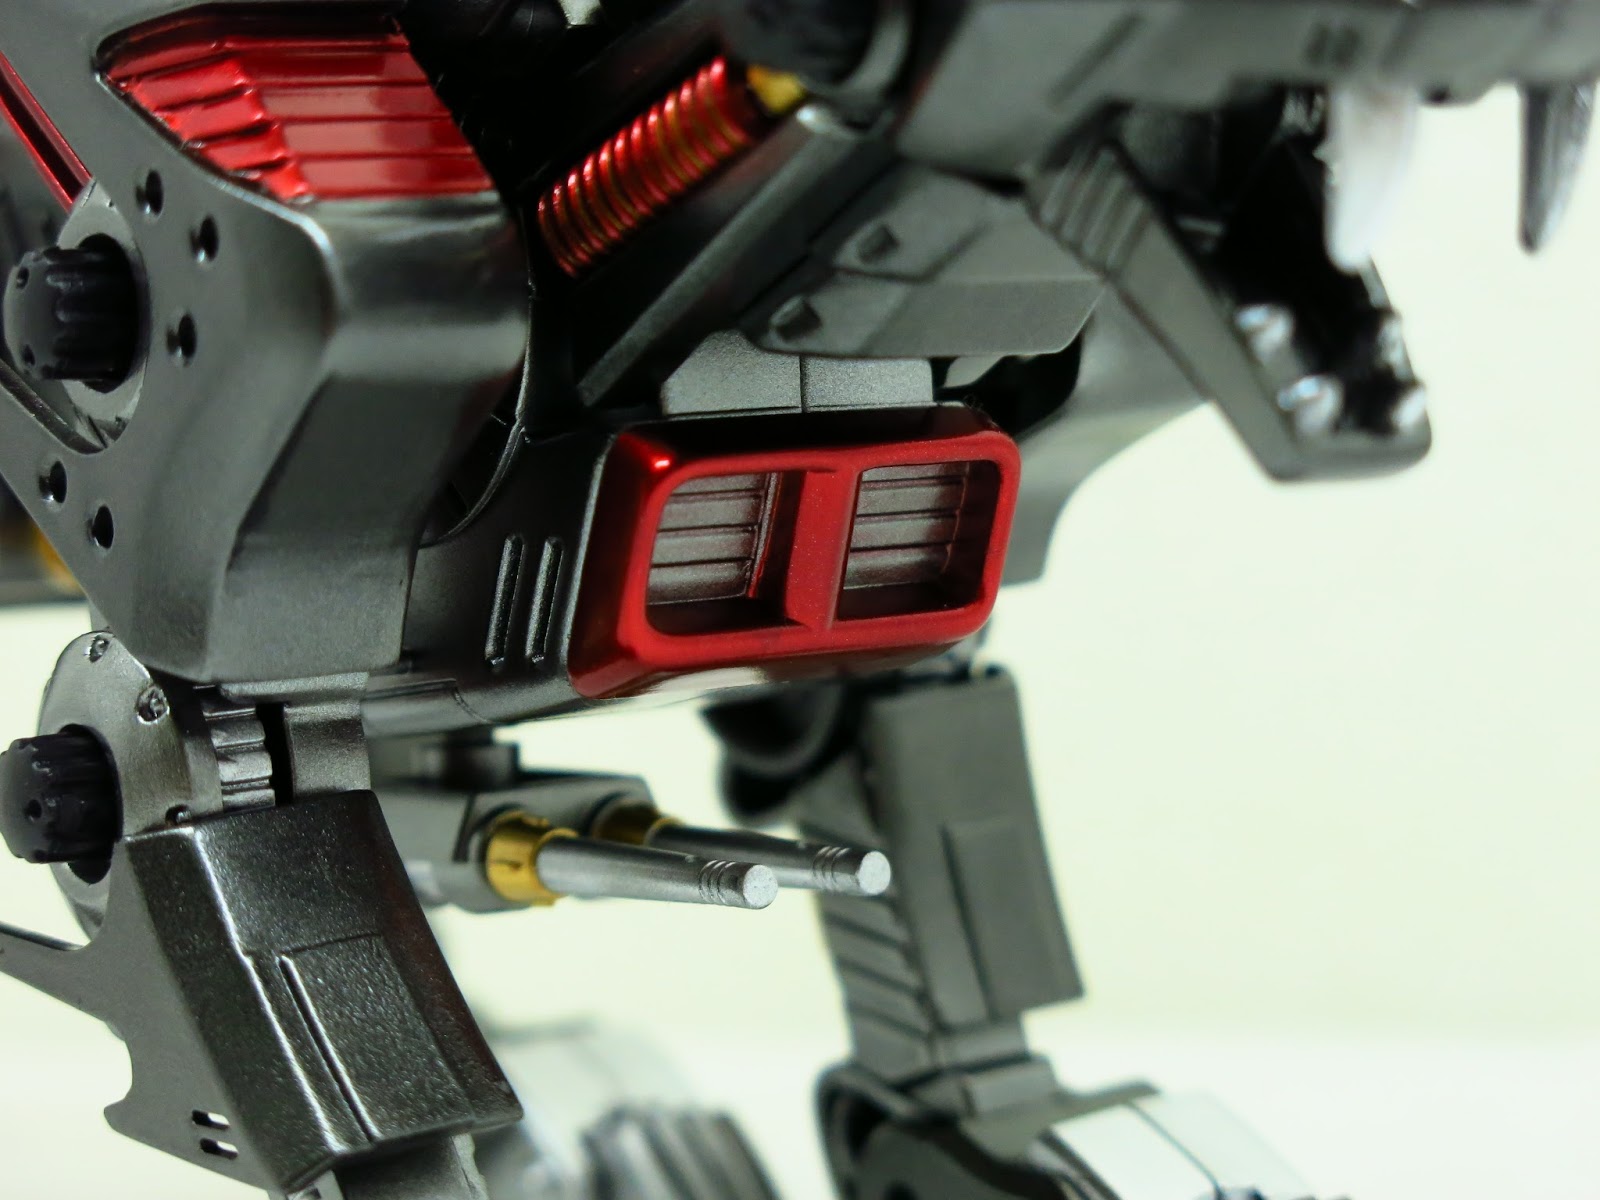
Chest details
The secret to a sleeker silhouette lies in gold accents distributed along the upper and lower fuselage.
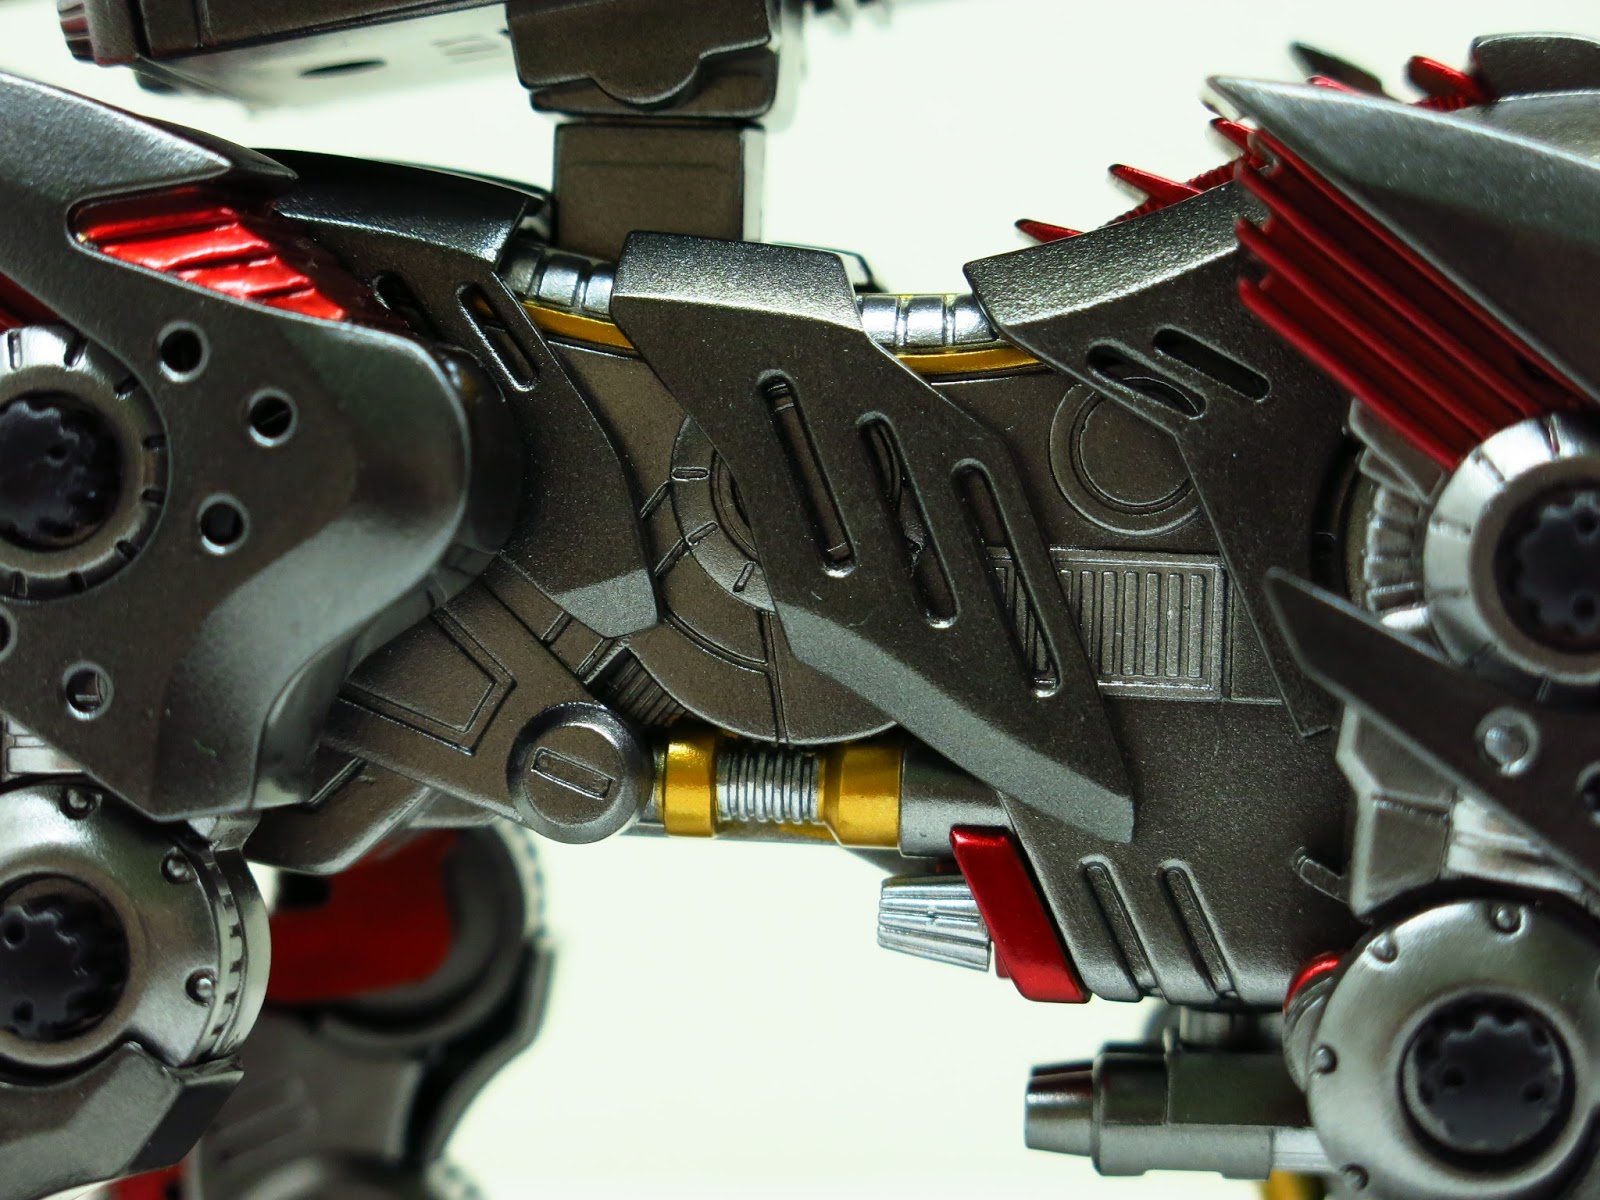
Waist details
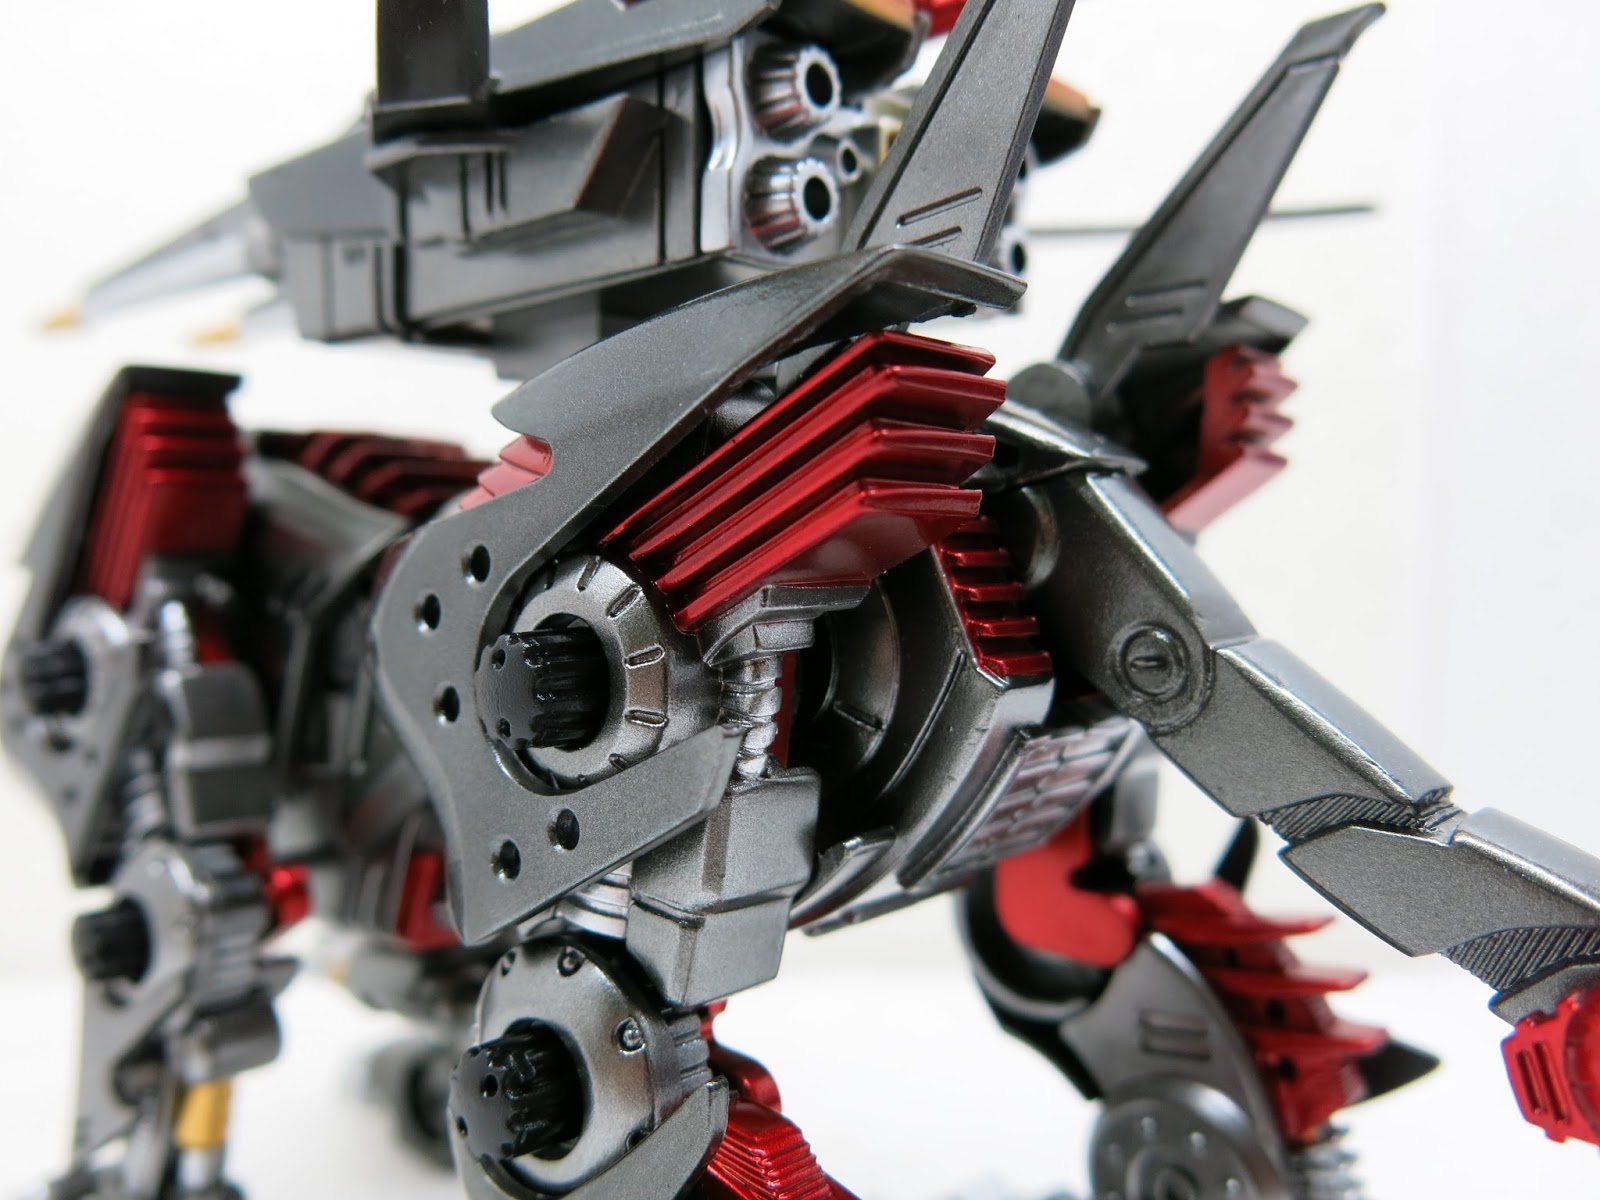
Tail details
That wraps up this Lightning Saix restoration report. I hope fellow modelers enjoyed it! I am off to deliver the finished beast back to the client.
Support Independent Perspectives & In-Depth Insights
Every thoughtful analysis and candid critique comes from our dedication to truth and quality. We choose not to follow sensational algorithms or clickbait headlines.
Sustaining independent research requires reader support. Make a one-time or monthly contribution, securely processed by Google.
Payments secured by Google · Manage or cancel anytime in your Google Account

Comments