
LAMP, a familiar acronym to web developers, stands for the classic stack composed of Linux, Apache, MySQL, and PHP. Having taken on a project requiring WordPress deployment on a VPS server [2], including a full LAMP environment, I compiled this operational guide as reference notes for anyone embarking on a similar server setup.
Another popular variation in the industry is the LEMP (or LNMP) stack. The principal difference lies in swapping the Apache web server for Nginx, which has gained widespread adoption due to its asynchronous event-driven architecture and lower memory footprint under heavy loads (since Nginx is not included by default in CentOS standard yum repos, it requires installing the EPEL repository first via sudo yum install epel-release).
Building a website today typically involves leasing server resources from reliable hosting providers (such as GoDaddy or Bluehost), selecting either a Virtual Private Server (VPS) or a Dedicated Server tailored to your traffic needs. Once the Linux operating system is initialized, deployment can begin.
Among Linux distributions, Debian, Ubuntu, and CentOS are the three most prevalent. Debian is renowned for bedrock stability, rigorous testing, and long release lifecycles.
For application developers, Ubuntu often offers more up-to-date packages, though its rapid release cadence can mean shorter maintenance support for interim releases. Meanwhile, CentOS is the operating system widely leveraged by Bluehost and enterprise hosts, making it a familiar and reliable choice.
Once the base OS is running, you can log in over SSH to install Apache/Nginx, MySQL, and the PHP runtime. Step-by-step instructions are detailed below.
Installing Linux, Apache / Nginx, MySQL, PHP (LAMP / LEMP)
Step 1: Update Linux to the Latest Packages
At the shell prompt (e.g., $), execute:
sudo apt-get update(On CentOS systems, replace apt-get with yum, and apply similarly below).
 Linux shell prompt example.
Tip: Prefixing commands with
sudogrants administrative root privileges required for system package management.
Step 2: Install Apache Web Server [5]
To install Apache, run:
sudo apt-get install apache2Once installation completes, navigating to your server’s IP address in a web browser (like Chrome) will display the default page:
It works!
This is the default web page for this server.
The web server software is running but no content has been added, yet.
The default web root directory for Apache is located at /var/www.
Step 3: Install MySQL Database
Run the installation command:
sudo apt-get install mysql-serverDuring installation, a configuration prompt will appear asking you to set the root database password. Choose a strong, resilient password [2].
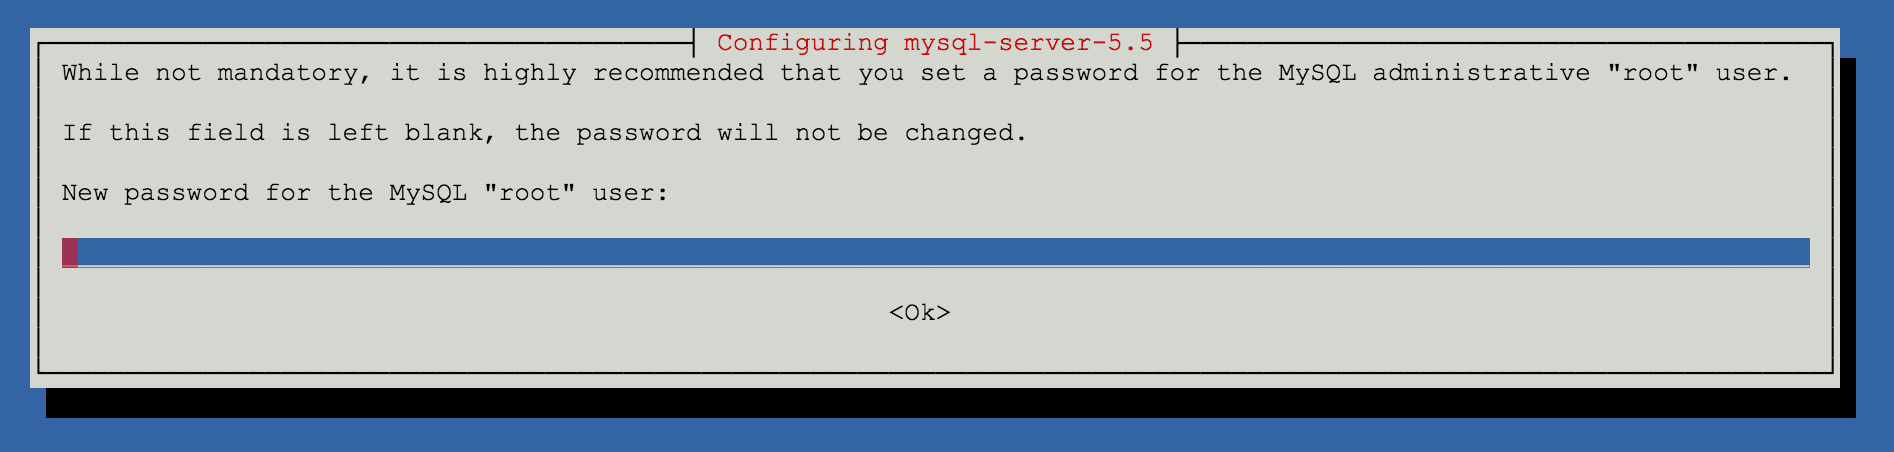 Configuring MySQL setup.
Next, initialize the database tables by running:
sudo mysql_install_dbThen run the secure installation script to tighten database security:
sudo mysql_secure_installationAfter entering your MySQL root password, the script will present several security prompts. Recommended default answers are as follows:
- Change the root password? [n]
- Remove anonymous users? [Y]
- Disallow root login remotely? [Y]
- Remove test database and access to it? [Y]
- Reload privilege tables now? [Y]
Step 4: Install Nginx Web Server on Debian (LEMP Stack Only)
In a traditional LAMP stack, Apache is installed in Step 2. In a LEMP environment, you install Nginx here instead (skipping Step 2).
Install Nginx:
sudo apt-get install nginxStart the Nginx daemon:
sudo service nginx startNavigating to your server’s IP address should now greet you with the default “Welcome to nginx!” splash page.
Unlike Apache’s default path, Nginx’s default root directory is usually located at /usr/share/nginx/www or /var/www/html.
Next, edit the default virtual host configuration:
sudo nano /etc/nginx/sites-available/defaultIn the configuration file:
- Append
index.phpto theindex index.html index.htm;line. - Update
server_name localhost;to reflect your domain name or server IP address. - Locate the FastCGI configuration block
# pass the PHP scripts to FastCGI serverand configure it as follows to route PHP requests:
location ~ \.php$ {
    try_files $uri =404;
    fastcgi_pass unix:/var/run/php5-fpm.sock;
    fastcgi_index index.php;
    fastcgi_param SCRIPT_FILENAME $document_root$fastcgi_script_name;
    include fastcgi_params;
}
Step 5: Install the PHP Runtime
For a LAMP stack, run:
sudo apt-get install php5 php-pear php5-mysql
sudo service apache2 restart
For a LEMP stack, install PHP-FPM:
sudo apt-get install php5-fpm php5-mysqlThen edit /etc/php5/fpm/php.ini:
sudo nano /etc/php5/fpm/php.iniFind the directive cgi.fix_pathinfo=1 and change it to cgi.fix_pathinfo=0 to prevent arbitrary script execution security vulnerabilities.
Restart the PHP-FPM and Nginx services:
sudo service php5-fpm restart
sudo service nginx restart
Step 6: Install phpMyAdmin
While optional, phpMyAdmin provides a convenient web-based graphical management interface for MySQL databases.
Run the following command to install phpMyAdmin:
sudo apt-get install phpmyadminWhen prompted during package configuration, select Apache 2 and press OK.
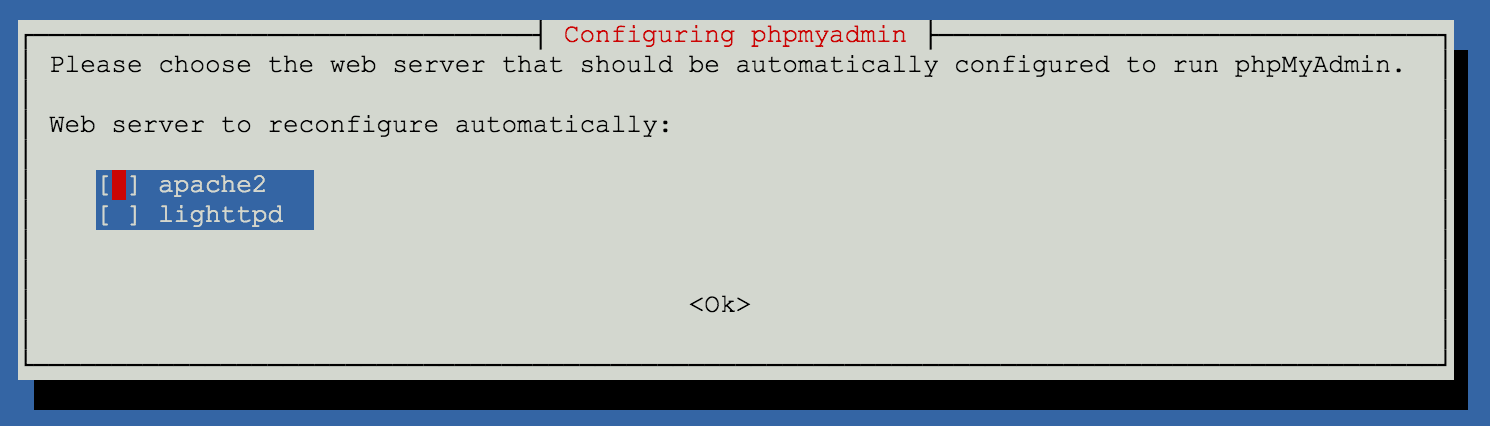 phpMyAdmin setup dialogue.
Select “Yes” when prompted: “Configure the database for phpmyadmin with dbconfig-common”.
When requested, enter your previously created MySQL root administrative password.
To link phpMyAdmin with Apache, open apache2.conf:
sudo nano /etc/apache2/apache2.confAdd the following line to the bottom of the file:
Include /etc/phpmyadmin/apache.confRestart Apache:
sudo service apache2 restartTo access phpMyAdmin, visit http://YourIpAddress/phpmyadmin in your browser. The default administrative username is root, using the password configured in MySQL. Because exposing phpMyAdmin publicly poses security risks, consider restricting access using .htaccess and .htpasswd authentication [4].
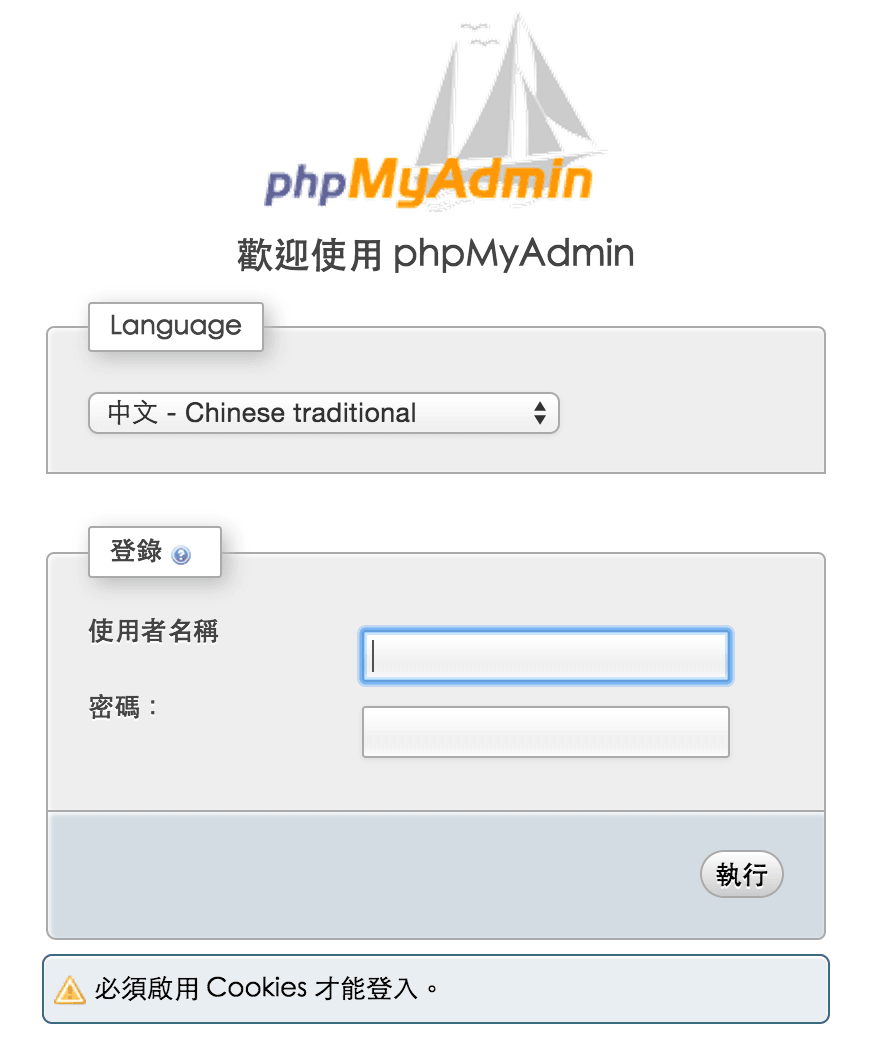 phpMyAdmin login webpage.
Further Reading
- GoDaddy Domain Search & Registration.
- Information Security: Designing Strong Passwords to Protect Online Privacy.
- Complete Guide to Installing WordPress and Troubleshooting VPS Deployments.
- How To Secure phpMyAdmin on Debian.
- Official Apache HTTP Server Documentation.
Support Independent Perspectives & In-Depth Insights
Every thoughtful analysis and candid critique comes from our dedication to truth and quality. We choose not to follow sensational algorithms or clickbait headlines.
Sustaining independent research requires reader support. Make a one-time or monthly contribution, securely processed by Google.
Payments secured by Google · Manage or cancel anytime in your Google Account


Comments