
If you or your company are planning to build a Google page to establish a presence alongside Facebook fan pages, take a look at the quick introduction and tutorial below.
The reason for writing this guide is that when I went to register a new page recently, I found that the signup location had changed and took some digging to locate, so I decided to document the process.
First, a quick clarification: Google currently has three services related to Brand Accounts: “Google+ Pages,” “Google My Business,” and “YouTube Channels.” Google+ and Google My Business conflict with each other in terms of page association, though either can be independently linked to a YouTube channel.
As for having a basic Google account before setting up a brand account, I will skip over that preliminary requirement here.
Steps to Create a Brand Account and Google+ Page
Step 1: Open Google+.
Step 2: Referring to Figure 1 below, select the option “Create your Google+ Brand Account” (it was this inconspicuous gray text string that had me searching around for ages).
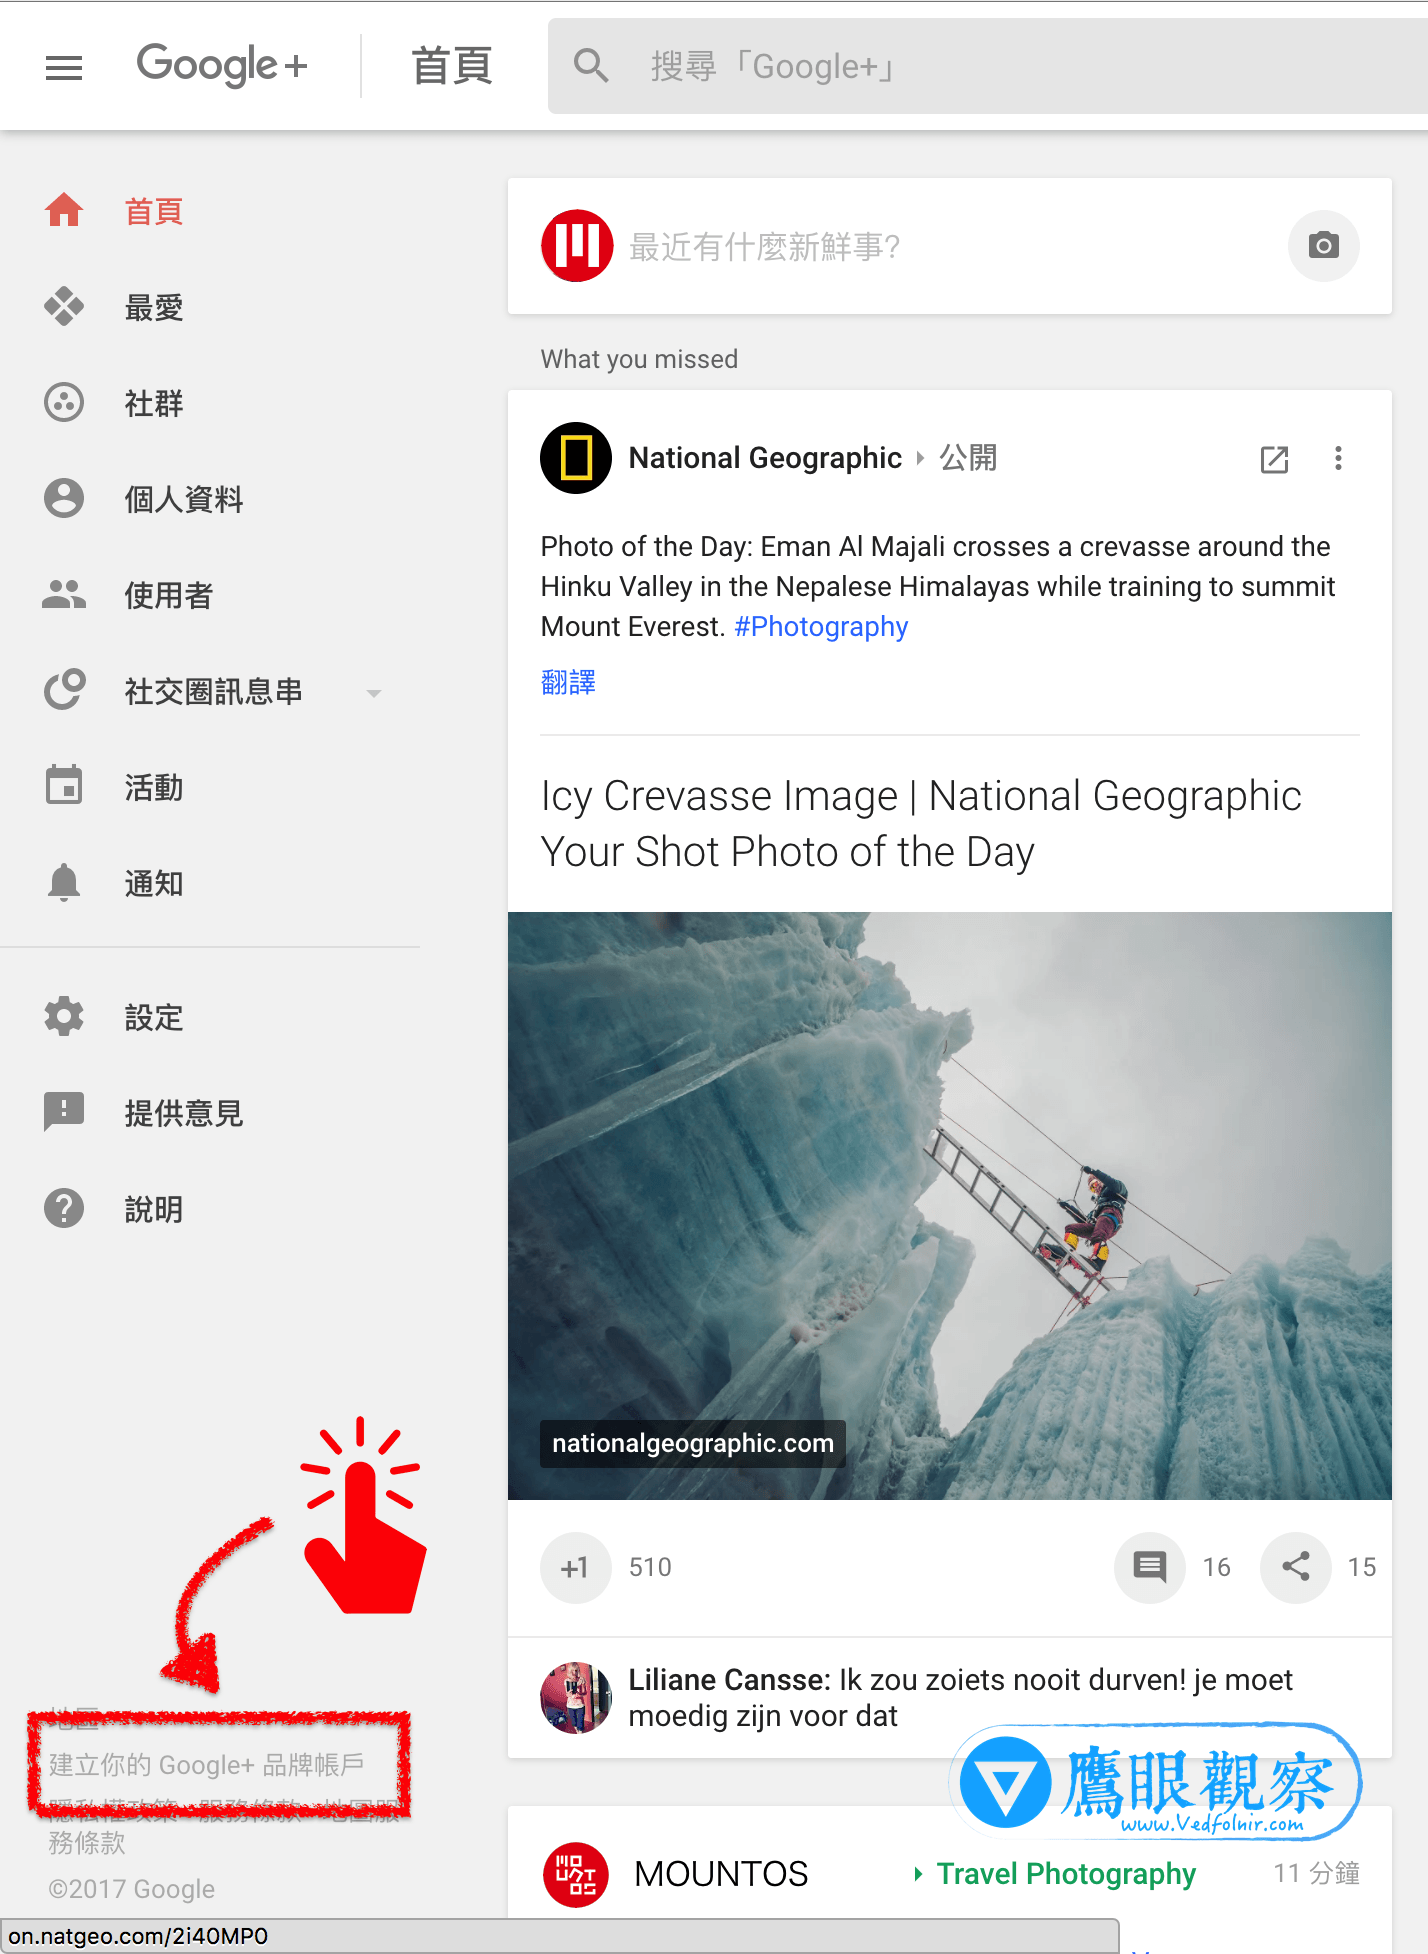 Figure 1: Create your Google+ Brand Account.
Step 3: Click the “Create Google+ Page” button.
Step 4: Referring to Figure 2 below, enter the “Brand account name” to establish a brand account for your new Google+ page.
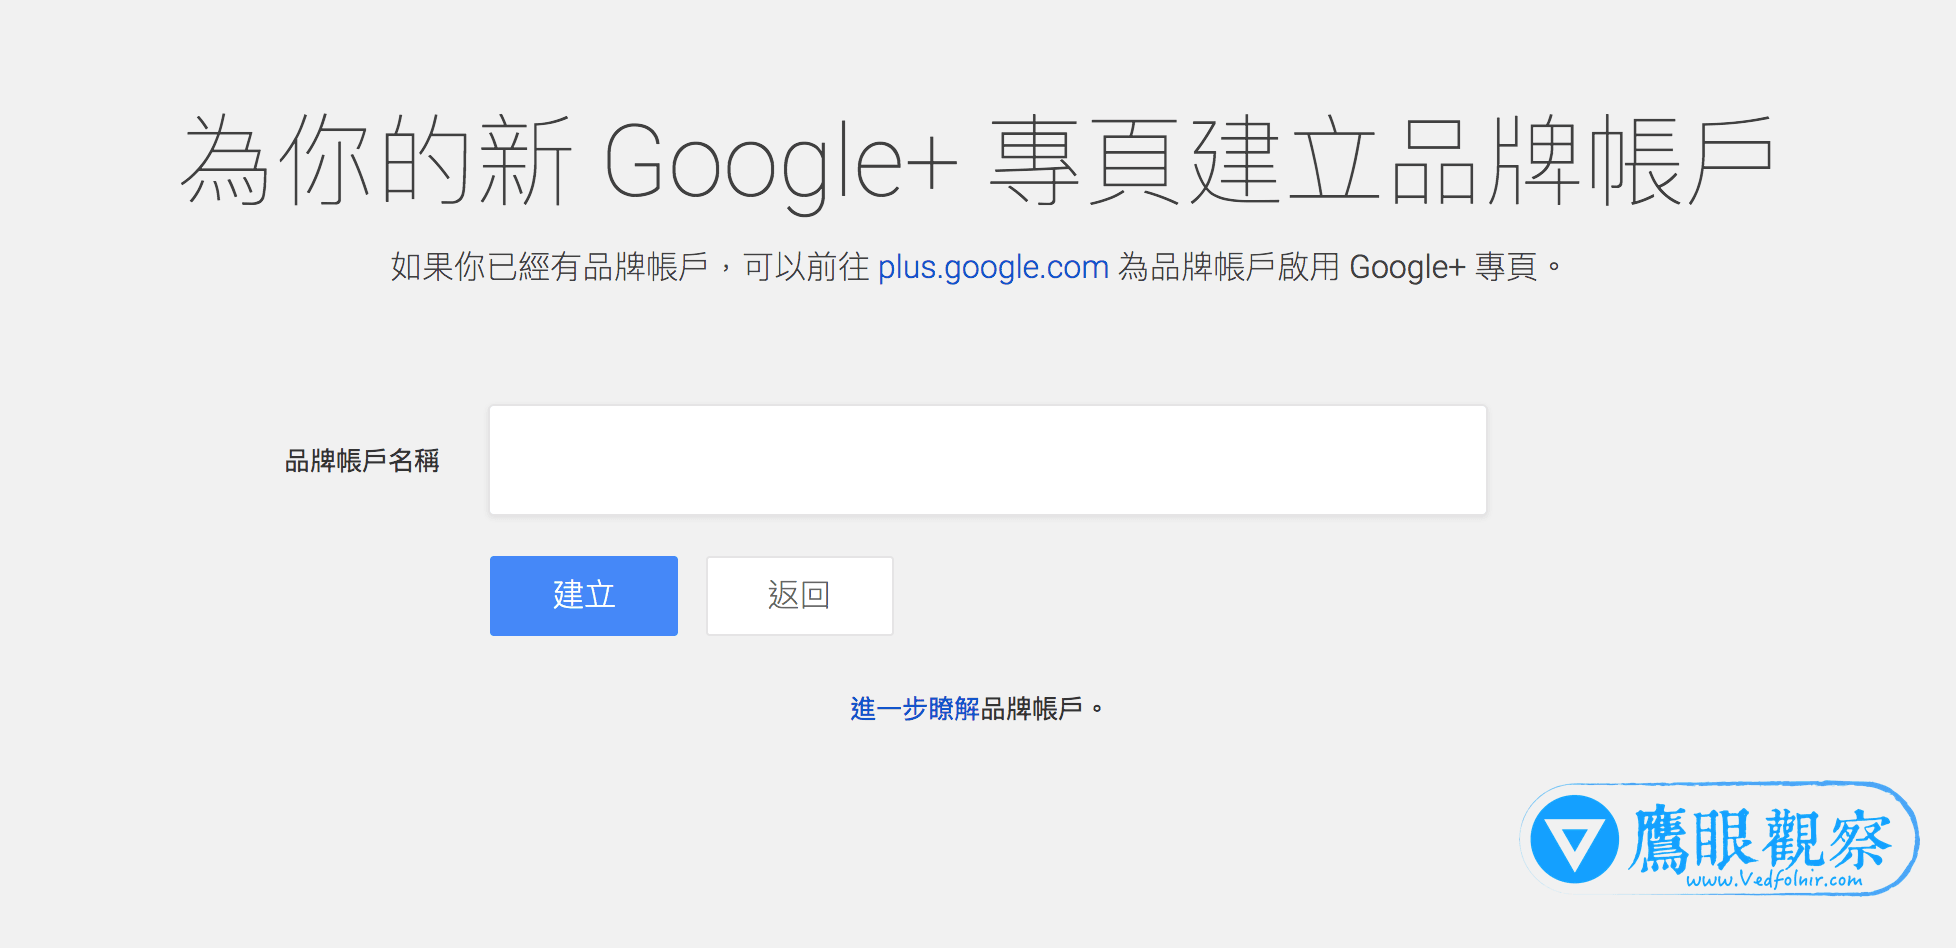 Figure 2: Enter the name for the new brand.
Step 5: Referring to Figure 3 below, activate your Google+ brand page!
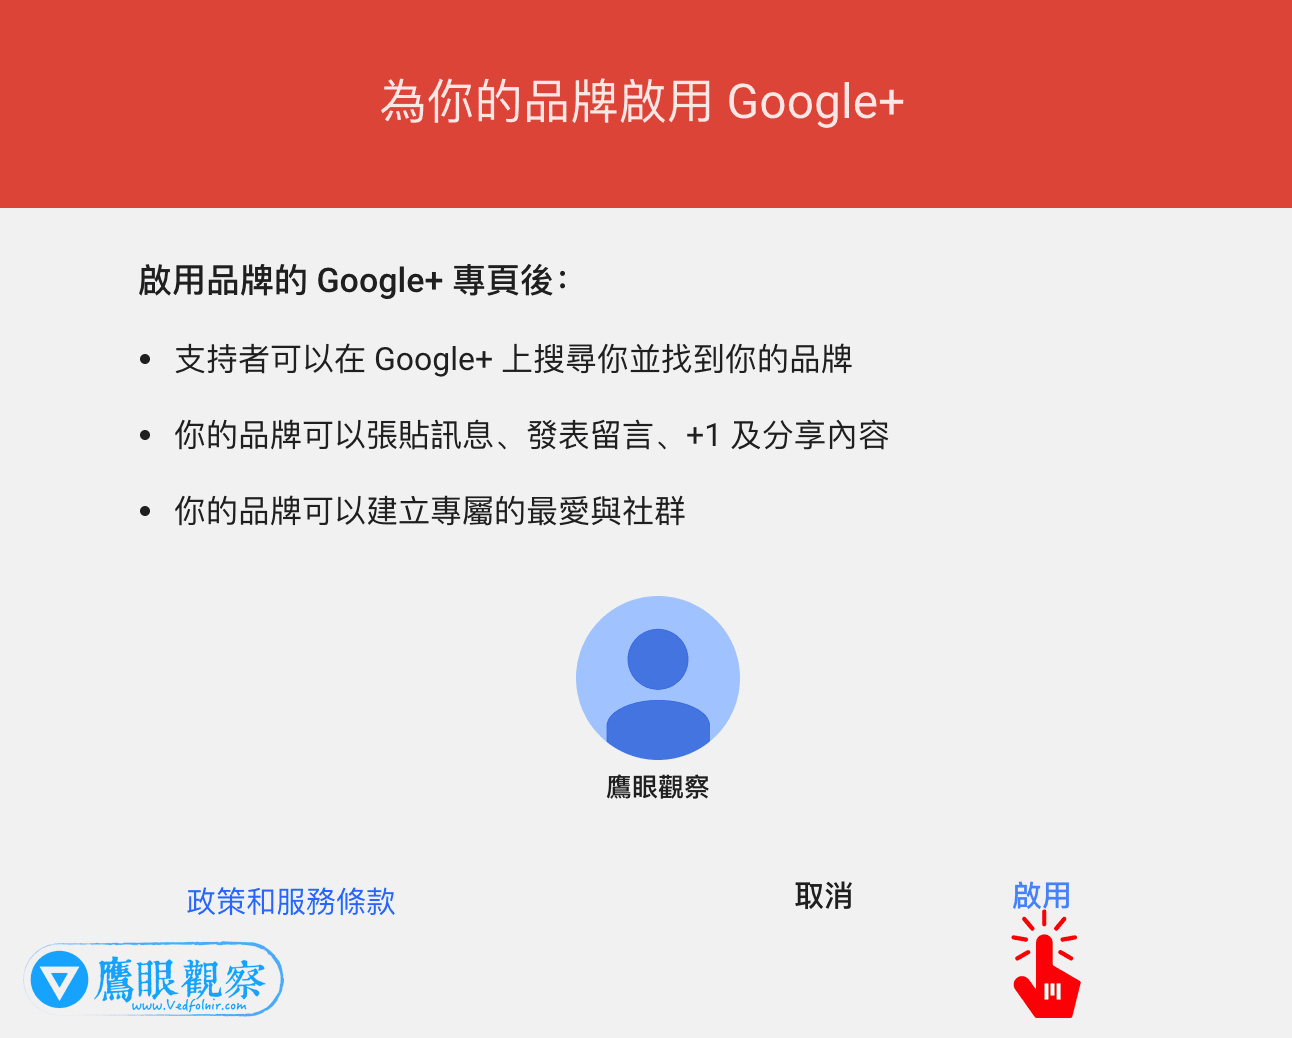 Figure 3: Activate the brand page.
Once the brand page is activated, users can search for the new brand on Google+. You can start posting updates, leaving comments, giving +1s, sharing content, and building dedicated favorites and communities to grow your online following.
That completes the basic setup of a brand page. As for posting updates, creating communities, and so on, a little exploration will quickly get you familiarized. Below, I will cover a few important page settings that require extra attention (including custom page URLs and profile management).
Edit and Manage Google+ Profile Information
Referring to Figure 4 below, setting up a custom URL and editing basic page details is not located under “Settings,” but rather under “Profile” > “Edit profile”; alternatively, you can navigate directly to the Aboutme link to configure your page details.
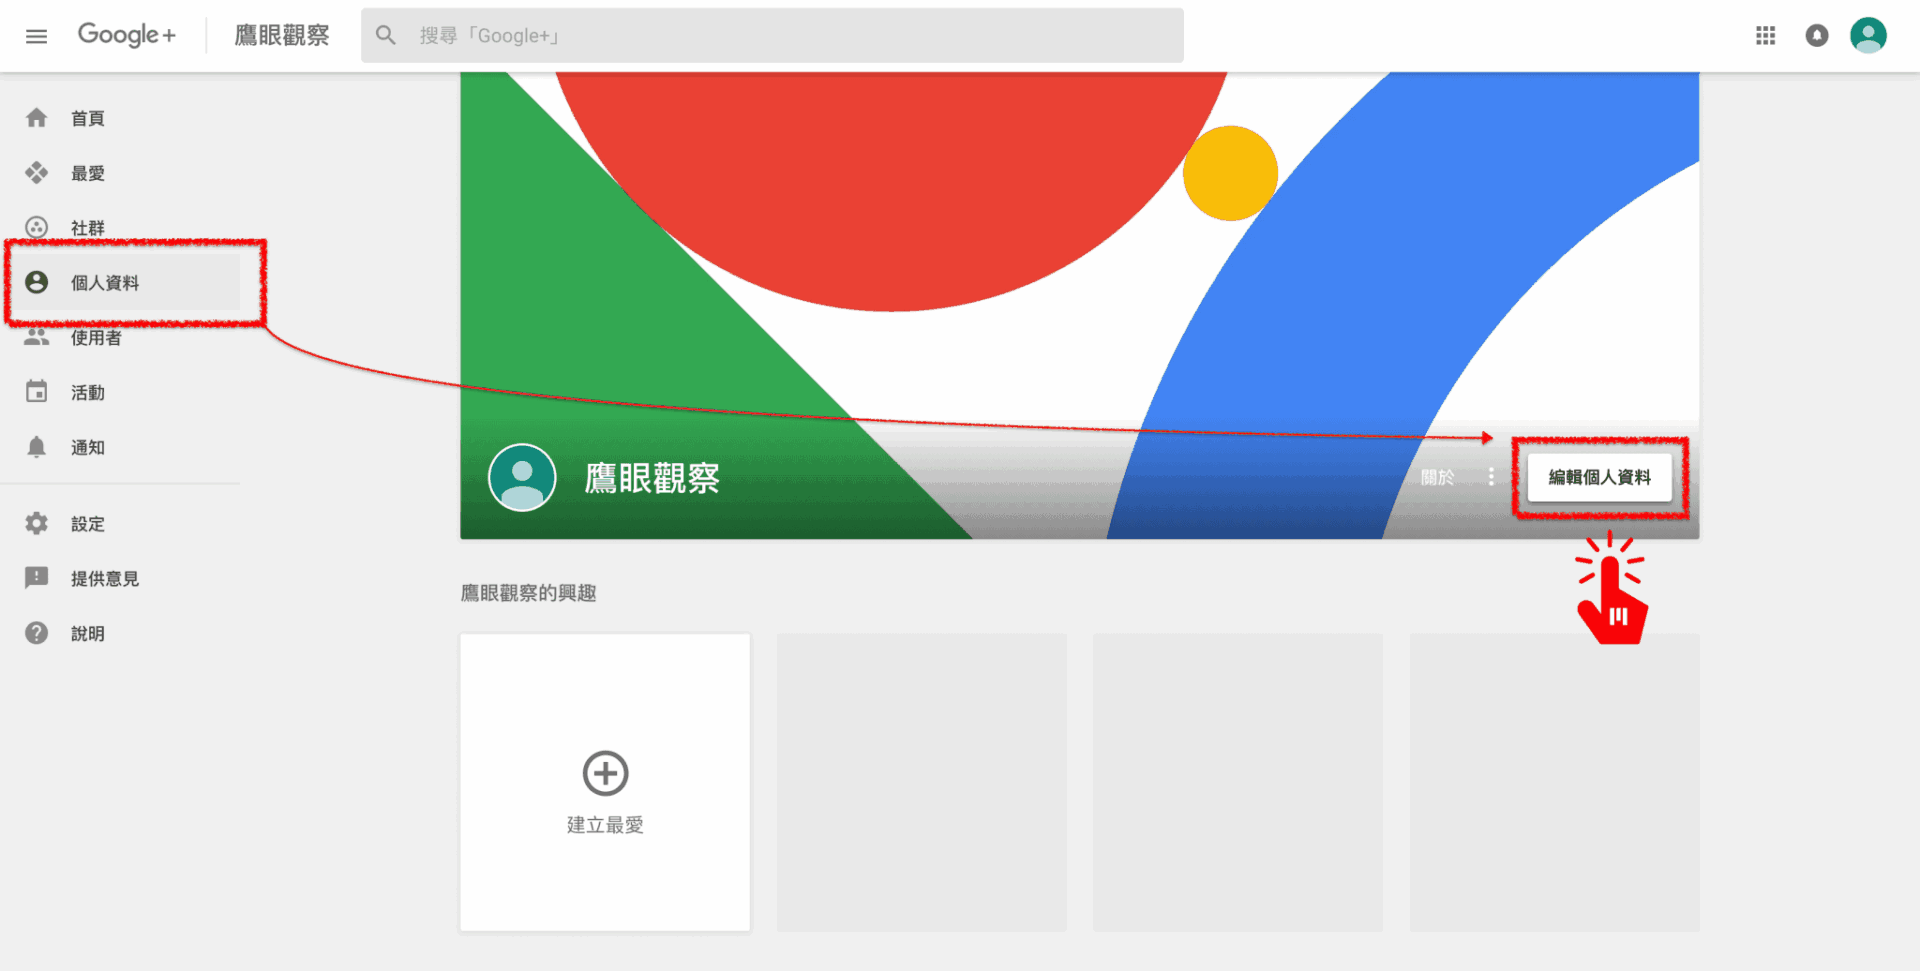 Figure 4: Edit profile information.
If your Google+ page is eligible for a custom URL, the system will automatically display setup prompts beneath your name in your Google+ profile. Following those prompts will complete the custom URL setup.
Additionally, referring to Figure 5 below, we recommend filling out your page details as thoroughly as possible when setting up your Google+ page (you can add fields using the + button).
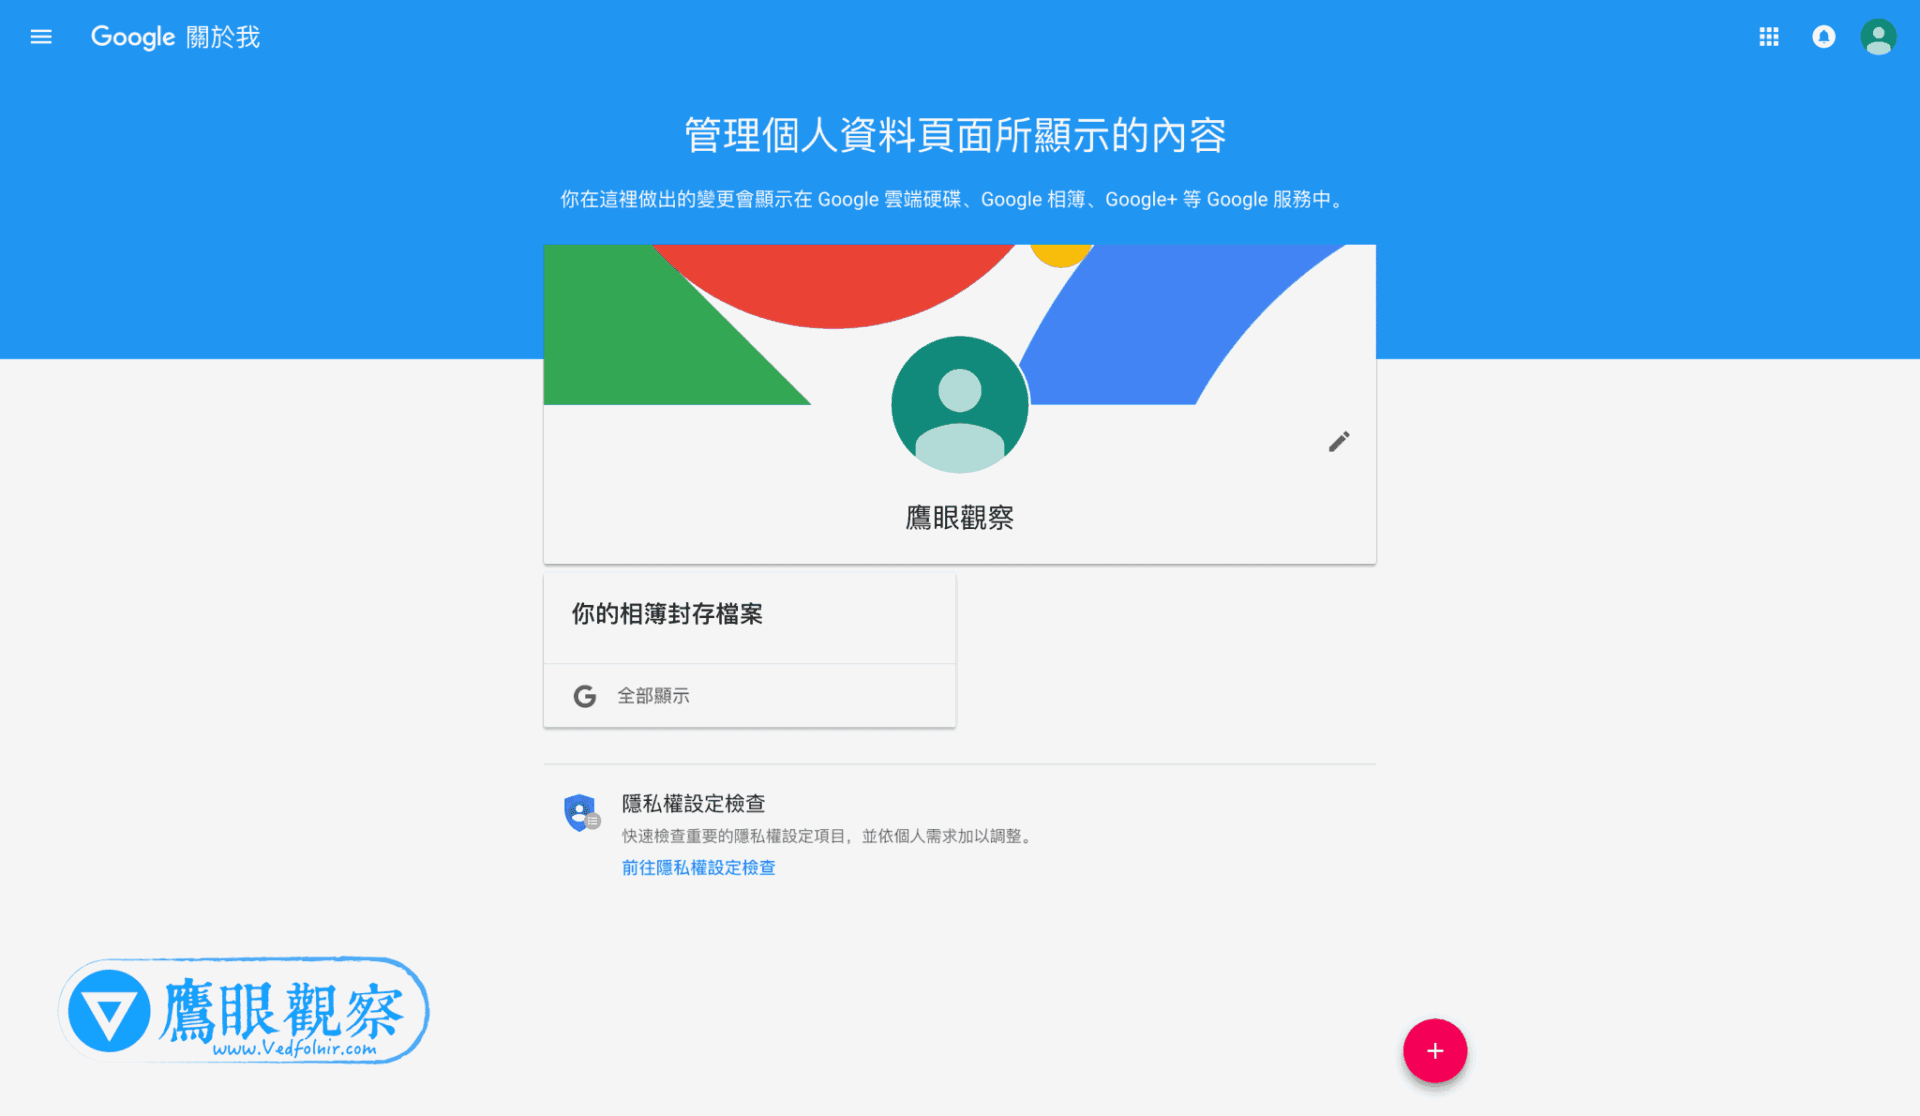 Figure 5: Manage information displayed on the profile page.
Generally speaking, if you have established a page for some time and still do not see system prompts for a custom URL, it is likely because your page does not yet satisfy Google’s baseline criteria. Meeting these criteria may unlock custom URL eligibility:
- 10 or more followers.
- Account created at least 30 days ago.
- Has a profile photo.
- Account in good standing.
Once you have successfully claimed a custom URL, your profile page will display the link information as shown below:
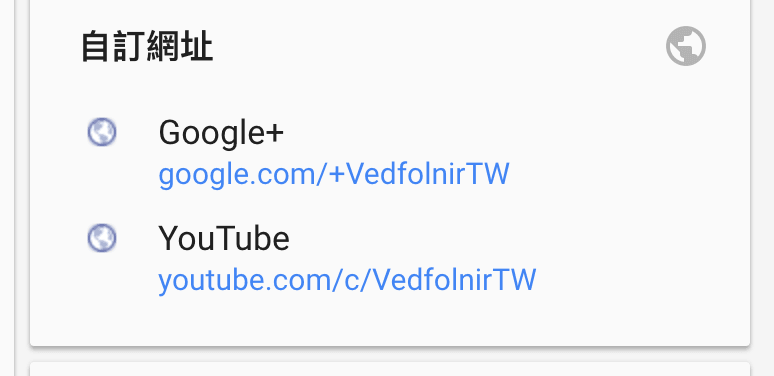 Figure 6: Custom URL display.
Support Independent Perspectives & In-Depth Insights
Every thoughtful analysis and candid critique comes from our dedication to truth and quality. We choose not to follow sensational algorithms or clickbait headlines.
Sustaining independent research requires reader support. Make a one-time or monthly contribution, securely processed by Google.
Payments secured by Google · Manage or cancel anytime in your Google Account


Comments