

Mizuc previously wrote an article titled Make Travel More Fun with Google Maps: Plotting Custom ‘My Maps’ for Hotels, Dining, Transit, and Sightseeing [1].
Afterward, several friends asked the exact same question: “After creating a custom travel map in Google My Maps, why do links inside point descriptions open normally on desktop PCs, laptops, and Android phones, but remain unclickable on Apple iPhone and iPad devices?”
After spending painstaking hours researching attractions, transit routes, and restaurants to compile a custom map, arriving abroad only to find that your custom links and notes won’t open on your phone is an absolute mood killer.
In worse cases, it can disrupt your entire day’s schedule. So we grabbed a good cup of coffee and consulted our engineers to find a working solution.
The Problem: Custom Point Links Cannot Open on iOS Google Maps
As shown in Figure 1 below, when opening Google My Maps [2] inside the official Google Maps app on Apple iOS (iPhone/iPad), URLs saved in the custom attraction description only render as static, unformatted plain text. You cannot select or copy the text, and clicking it does nothing at all.
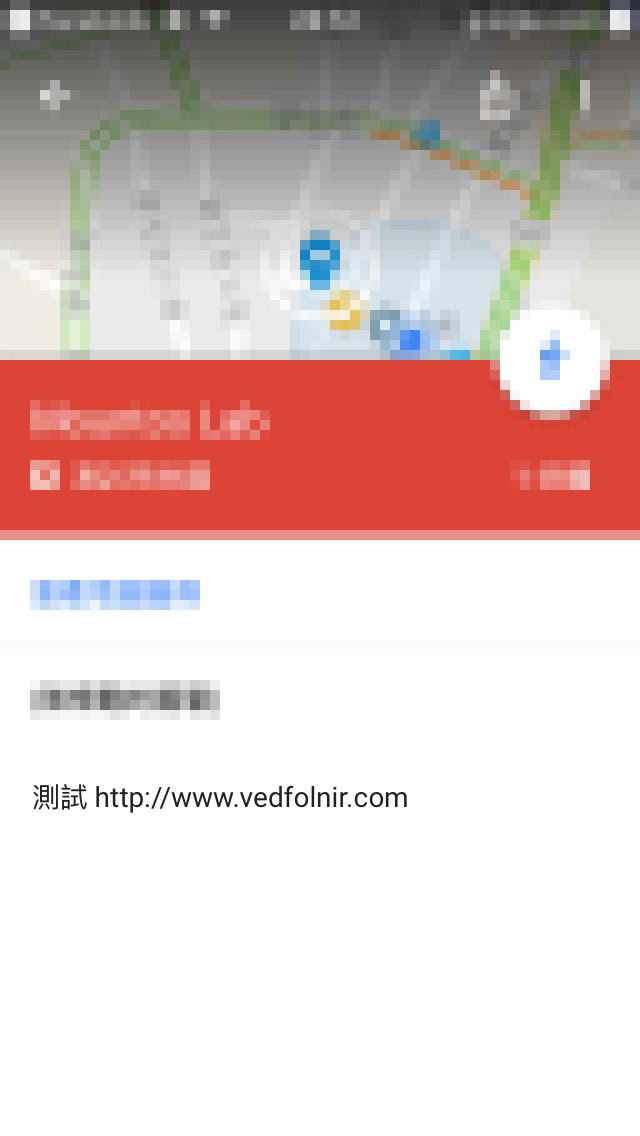 Custom Point on Google My Maps
This immediately traps your meticulously prepared travel notes in an inaccessible sandbox.
If you are like us and avoid printing paper itineraries, finding this out only after landing in another country means spending half your afternoon sitting roadside trying to reconstruct lost information (which happened to us at Nagoya Station!).
Now look at Figure 2 below: if you open the exact same map using the Google Maps app on an Android device, the URL in the custom point information panel is highlighted as an active hyperlink that opens directly with a single tap.
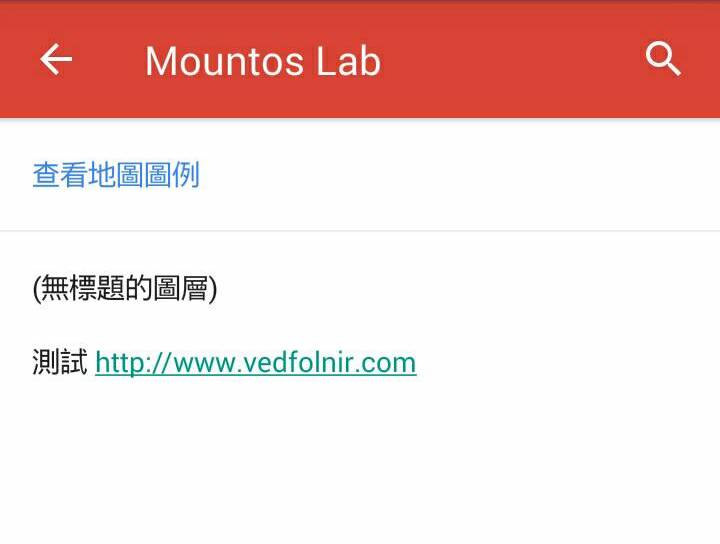 Figure 2: Google Maps on Google Android OS.
Our software engineer noted that this bug on iOS has lingered for a long time. Although reported to Google, no priority fix has been deployed.
Fortunately, after testing several workarounds, we found a reliable solution to bypass this limitation on Apple iPhone and iPad devices.
In short: do not use the native Apple “Google Maps” app to view your custom My Maps layer.
Instead, open the custom map directly inside your mobile browser, such as Apple Safari or Google Chrome.
Here is a simple, intuitive step-by-step setup so you don’t get stuck juggling apps while navigating abroad.
Enable Sharing Links in Google My Maps
As shown in Figure 3 below, the primary objective is to obtain the public or shared URL for your custom map, which can then be pasted into your mobile browser’s address bar to access the My Maps web interface.
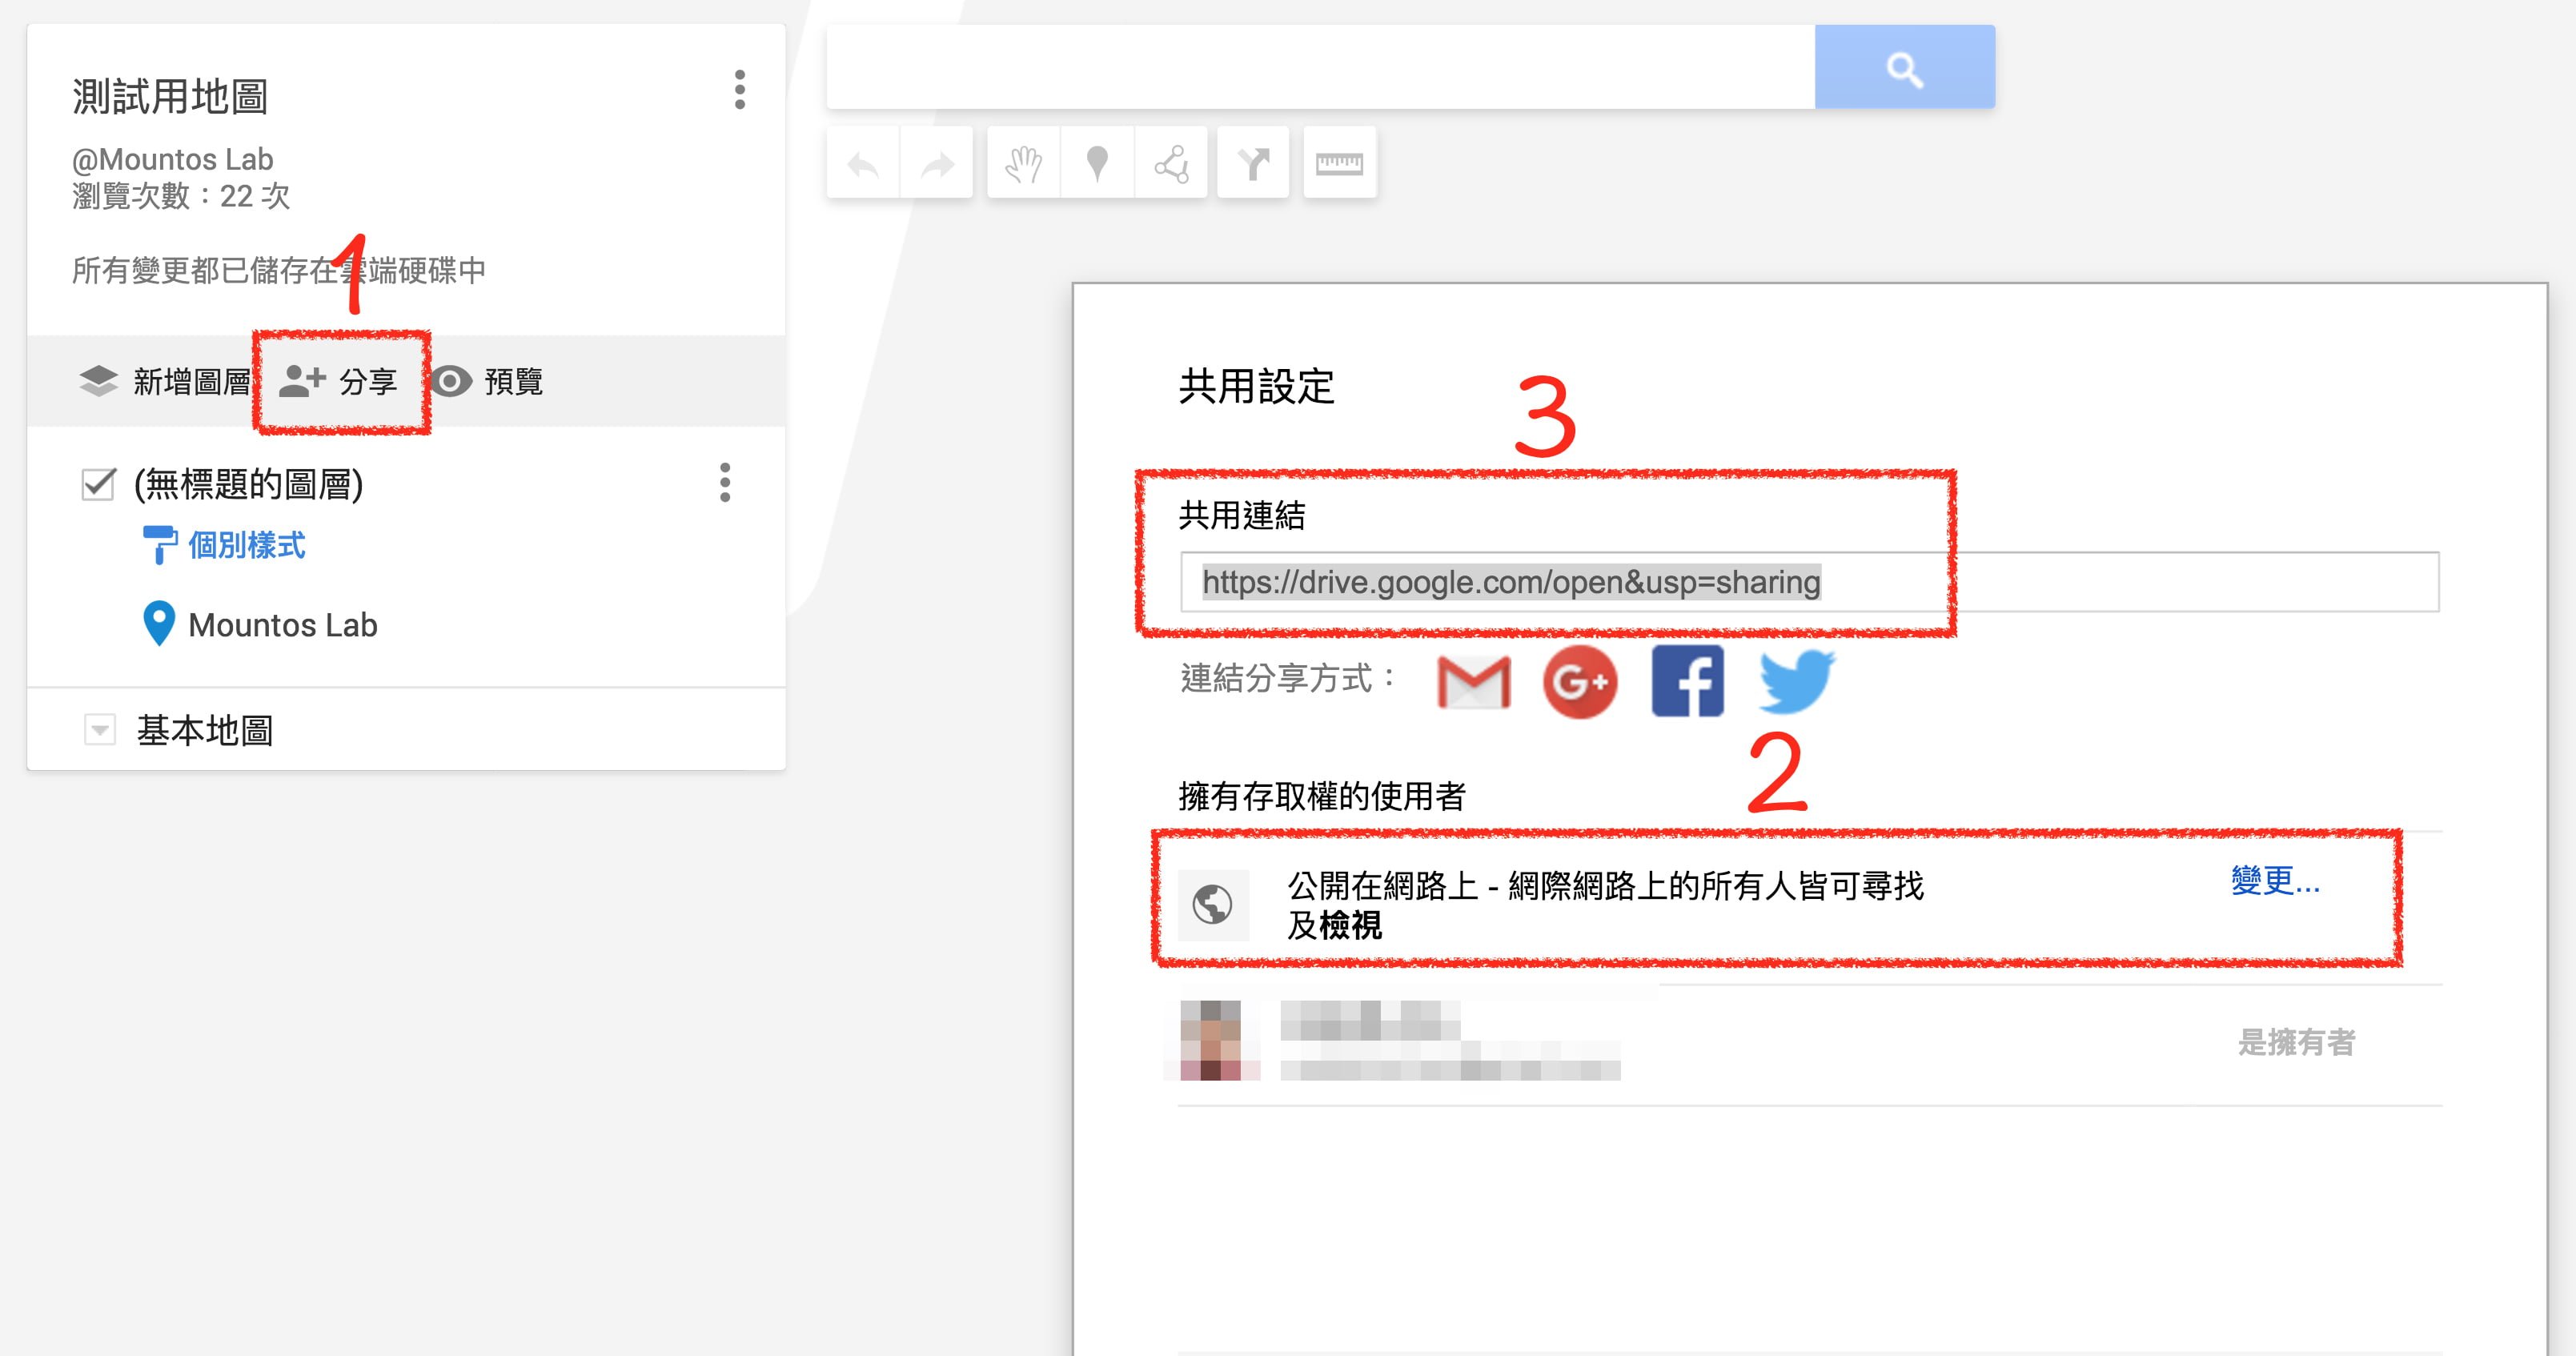 Figure 3: Google My Maps Share Functionality Overview.
You can also save this shareable link into your digital notes app, or send it via LINE, Facebook Messenger, or email to your travel companions—any method that lets you click it easily on the road.
Step 1: Pre-Trip Preparation
Open the Google My Maps web portal on your desktop computer or laptop (works across Chrome, Edge, and Safari): “Google My Maps Official Website”.
Step 2: Enable Sharing for Your Custom Map
As illustrated in Figure 3, when viewing your itinerary in My Maps, look at the left-hand layer management sidebar. Click the “Share” button (marked as item 1 in Figure 3).
Clicking “Share” will open the “Sharing settings” modal dialog shown on the right side of Figure 3.
Step 3: Adjust Map Privacy Settings
By default, newly created maps have their access permission (item 2 in Figure 3) set to “Private - Only you can access.” This means only your logged-in Google account can view or edit the map, or you must manually invite individual Gmail accounts.
While secure, this setup is prone to travel headaches. If your phone malfunctions or you need to borrow a companion’s device or computer, you risk getting locked out.
To make collaboration easy and allow seamless opening on mobile browsers, adjust the access setting to “On”.
Click “Change…” under “Who has access” (item 2 in Figure 3), which opens the “Link sharing” options shown in Figure 4 below.
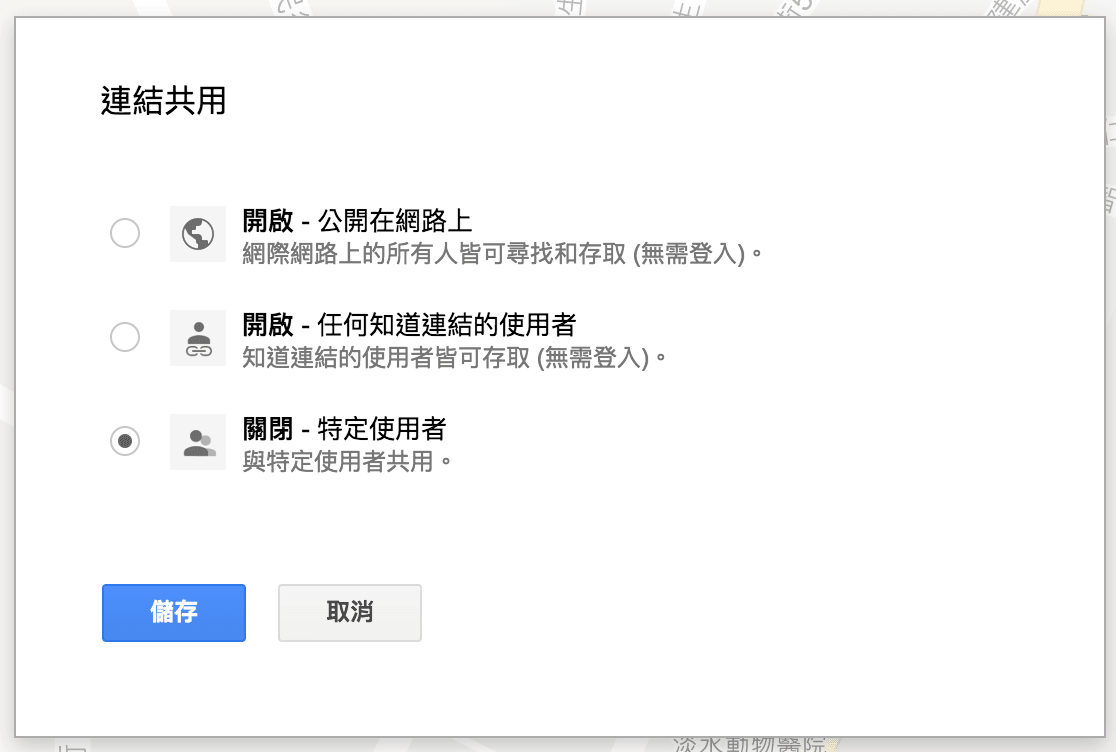 Figure 4: Link Sharing Options.
Under Link Sharing, you have two choices:
- “Public on the web”: Searchable and accessible by anyone on the internet without logging in.
- “Anyone with the link”: Accessible only to people who have the specific link, without requiring search index discovery—making it the ideal balanced choice.
Next, as shown in Figure 5, the Access dropdown allows you to choose whether visitors can edit the map. It defaults to “Can view”. If you want travel companions to collaborate and add pins, set this to “Can edit”.
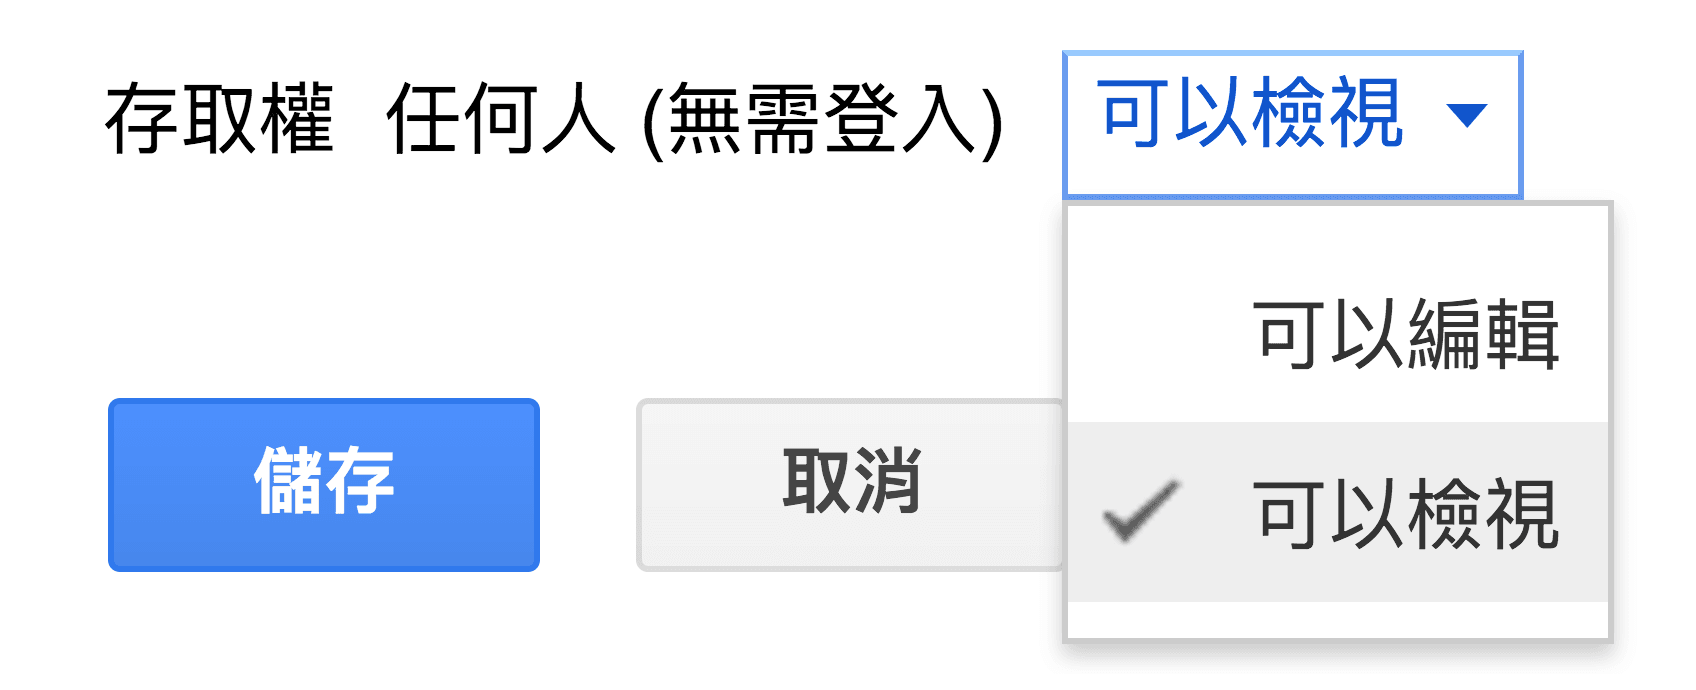 Figure 5: Access Permissions Setting.
Step 4: Copy and Save the Shareable URL
Once saved, locate the link generated in item 3 of Figure 3. Send this link to your travel partners and bookmark it on your iOS device. When you open this URL inside Safari or Chrome on your iPhone or iPad, the web app loads full interactive pins—allowing all hyperlinks inside place descriptions to be clicked directly!
Further Reading
- Make Travel More Fun with Google Maps: Plotting Custom ‘My Maps’ for Hotels, Dining, Transit, and Sightseeing
- Google My Maps Planning.
Support Independent Perspectives & In-Depth Insights
Every thoughtful analysis and candid critique comes from our dedication to truth and quality. We choose not to follow sensational algorithms or clickbait headlines.
Sustaining independent research requires reader support. Make a one-time or monthly contribution, securely processed by Google.
Payments secured by Google · Manage or cancel anytime in your Google Account


Comments