

If you registered a domain name through the registrar “GoDaddy,” if you maintain two GoDaddy user accounts and want to consolidate domains between them, or if you are purchasing a domain name from a third party hosted on GoDaddy, this comprehensive guide on internal domain transfers (“Moving Domain Names” under the same registrar) is exactly what you need.
GoDaddy has long provided a convenient built-in mechanism for moving domains between accounts called “Account Change” (Change of Account). This feature enables seamless internal transfers directly within the GoDaddy platform.
Today, we will walk through the entire end-to-end process of executing an “Account Change.”
As the name implies, “Account Change” moves domain management inward from one account to another under the same registrar.
As a side note, just as there is an internal transfer, there is also an external transfer. The process of migrating a domain outwardly from one registrar to an entirely different registrar is called “Transferring Domain Names.” We will cover that procedure in a future guide.
To successfully complete a domain move via Account Change, the party initiating the "**outgoing transfer**" must have two key pieces of information ready:
- The current account username and password holding the domain to be transferred out.
- The destination account username (or customer number) and its registered email address.
Below, you can follow each screenshot in sequence while logged into the initiating account to complete the outgoing and incoming transfer steps.
Official Website: GoDaddy Domain Search & Registrations
Step-by-Step GoDaddy Transfer Tutorial:
As shown in Figure 1, inside the GoDaddy administrative console, navigate under “My Products” to click on “Domain Manager” (or any available shortcut link to the Domain Manager).
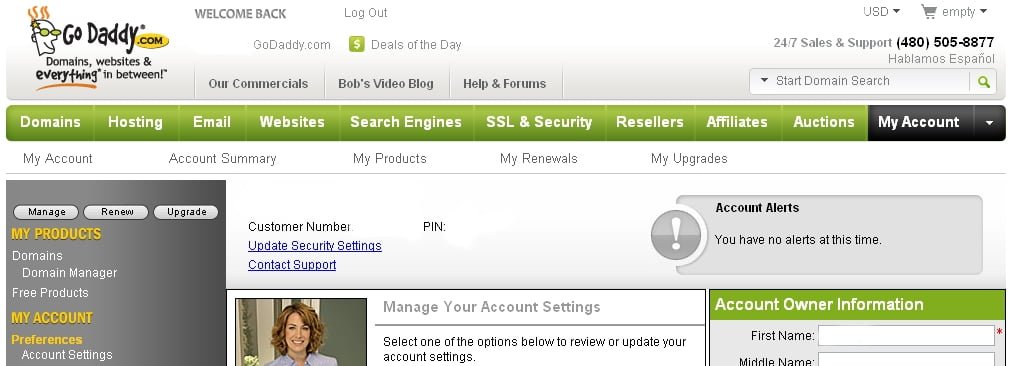 Figure 1: My Account Administrative Interface.
As shown in Figure 2, once inside Domain Manager, locate the domain name you wish to transfer and click on it to enter its management dashboard.
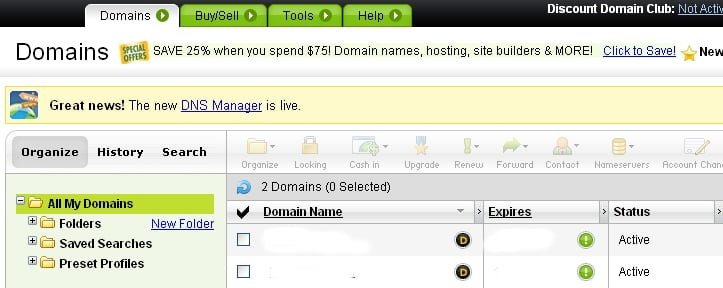 Figure 2: Domain Manager Interface.
As shown in Figure 3, the top toolbar offers multiple management actions (such as Organize, Locking, Cash In, Upgrade, Renew, Forward, Contact, NameServers, and Account Change).
Click on “Account Change.”
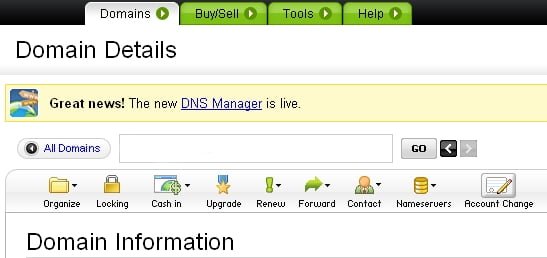 Figure 3: Account Change Option.
After clicking Account Change, a configuration modal will appear as shown in Figure 4, prompting you for details regarding the destination account.
Carefully input the recipient account username (or customer number), email address, and confirmation email address.
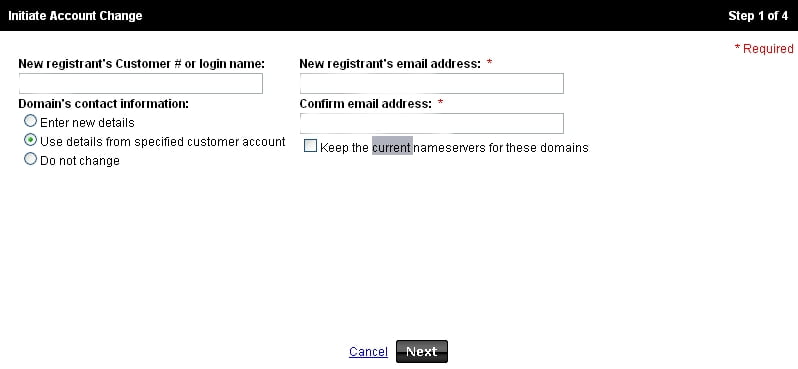 Figure 4: Initiate Account Change Modal.
Additionally, note two important fields in Figure 4: “Domain’s contact information” and “Keep the current nameservers for these domains.”
Under “Domain’s contact information,” you have three options regarding the WHOIS contact details. If unsure, select “Use details from specified customer account” so the incoming account’s registered details take over.
“Keep the current nameservers for these domains” asks whether to preserve the active nameservers. Leaving this unchecked or default is generally recommended unless you have custom DNS configured.
Once all fields are properly filled out, click “Next” to proceed.
The next screen (Figure 5) asks you to accept the Domain Name Change Registrant Agreement. Check all agreements and click Next.
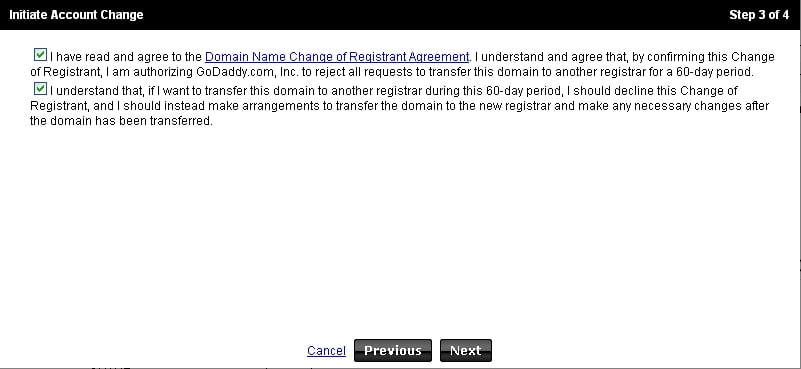 Figure 5: Accept Registrant Agreement.
Figure 6 summarizes features that may be disabled or modified post-transfer. Click “Finish” to complete the outgoing phase.
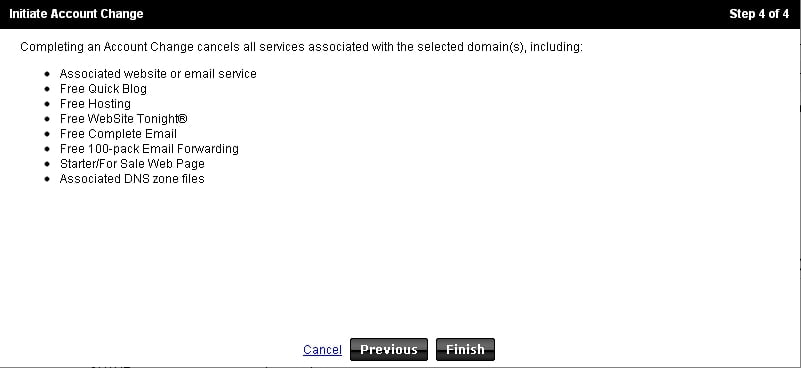 Figure 6: Complete Account Change Initiation.
This concludes the steps for the "**outgoing transfer**". If you are handing off a domain to a third party, your job is complete; the rest is on their end.
However, if you are also the recipient managing the destination account, check the email inbox associated with that incoming GoDaddy account. You will receive a notification email from GoDaddy resembling the following:
Dear Valued GoDaddy.com, Inc. Customer:

The registrant of the following domain name(s) has initiated a process by which you will become the registrant of the domain name(s):

XXXXXXXX.COM

IMPORTANT: You must complete all of the steps below before the domain can become active in your account.

You may be asked to log in to your account. To safely log in:

1. Go to the GoDaddy.com, Inc. home page and log in to your account with your username or account number XXXXXXXX and password.
2. In the My Account section on the left panel, click "Pending Account Changes."
3. Click on "Incoming Account Changes."
4. Check the domains that you agree to change and then click "Quick Accept."
5. Accept the agreements and click "OK." The domains will be processed and should appear in your account shortly.

If the Change of Account is not complete within 10 days, the transaction or Change of Account will expire. If you feel this change is incorrect, please immediately contact [email protected], and provide any information you may have that will assist in reviewing your issue.

Sincerely,

GoDaddy.com, Inc.
This email provides clear instructions on accepting the transfer. Now, log in to the recipient account and follow the steps below:
As shown in Figure 7, under “My Account” > “Preferences,” click on “Pending Account Changes.”
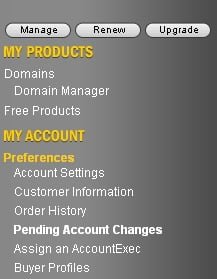 Figure 7: Pending Account Changes in My Account.
As shown in Figure 8, click “Incoming Account Changes” on the left menu, then check the checkbox next to the domain name waiting in the table.
Once verified, click “Quick Accept” to proceed.
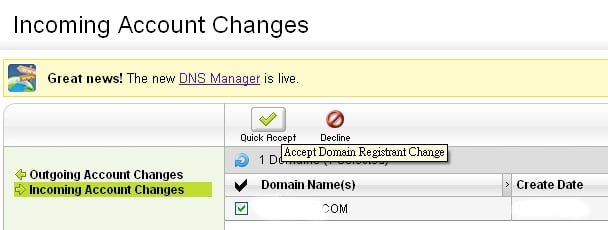 Figure 8: Incoming Account Changes Quick Accept.
As shown in Figure 9, review and accept the transfer terms, then click Next.
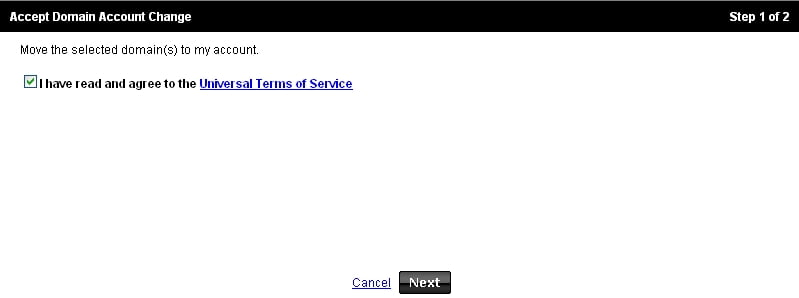 Figure 9: Accept Domain Account Change Terms.
As shown in Figure 10, check the confirmation agreement boxes and click Next.
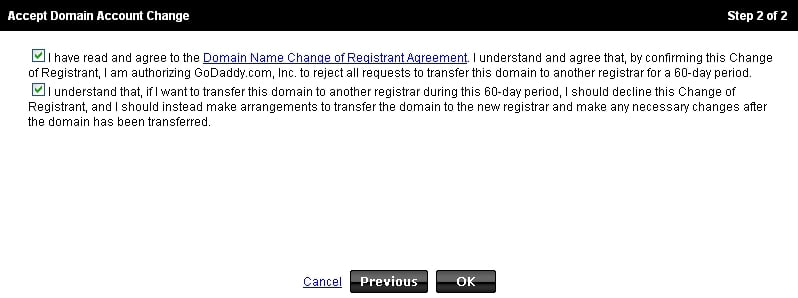 Figure 10: Agreement Confirmation.
As shown in Figure 11, the system will confirm that the domain change of account has completed. Click “OK.”
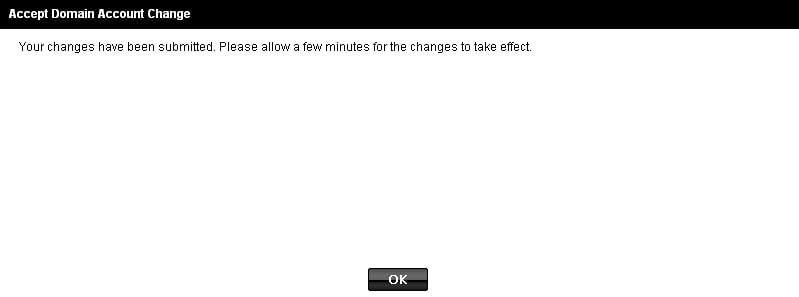 Figure 11: Transfer Completion Confirmation.
Finally, as shown in Figure 12, when you return to the Domain Manager dashboard under “My Domains,” the newly transferred domain will now appear active under your account list.
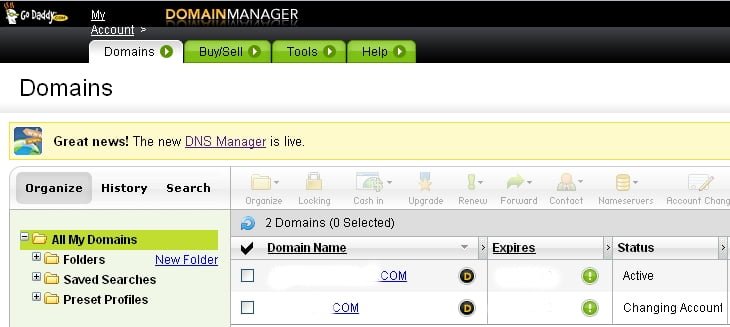 Figure 12: Transferred Domain in Domain Manager List.
Important Notes:
- After initiating an outgoing transfer, the recipient account holder must complete the acceptance confirmation within 10 days, otherwise GoDaddy will automatically cancel the transaction.
- The domain must be in an “Active” status to be transferred. Domains newly registered or previously transferred within the last 60 days may be subject to ICANN locking rules.
Further Reading:
- GoDaddy Domain Search and Discount Reservations.
- GoDaddy Promo Codes and Special Deals.
Support Independent Perspectives & In-Depth Insights
Every thoughtful analysis and candid critique comes from our dedication to truth and quality. We choose not to follow sensational algorithms or clickbait headlines.
Sustaining independent research requires reader support. Make a one-time or monthly contribution, securely processed by Google.
Payments secured by Google · Manage or cancel anytime in your Google Account




Comments