
After Google, the world’s largest search engine, announced last year that it would incorporate website security into its SEO ranking algorithm parameters, many webmasters and bloggers[1] rushed to apply for SSL encrypted security certificates for their sites (a key factor explicitly highlighted by Google).
SSL stands for Secure Sockets Layer. Its purpose is to encrypt inbound and outbound communications on a website using 128-bit or 256-bit cryptographic keys, safeguarding data privacy and security.
How Do You Obtain an SSL Security Certificate?
Of course, before experiencing the benefits (and drawbacks) that SSL brings, you must first register and acquire an SSL security certificate.
There are three primary sources for obtaining an SSL certificate:
- A self-signed certificate (SSL Self-Signed Certificate), issued by yourself to yourself, which is suitable only for internal testing during early development stages;
- Free certificates from Certificate Authorities like StartSSL, where the setup process is slightly cumbersome and requires renewal every few months. This is suitable for small sites or blogs willing to trade convenience and time for money;
- Purchasing a dedicated commercial SSL certificate for a modest fee, which is best for webmasters serious about running their website or blog. Furthermore, if you plan to operate an e-commerce platform, choosing a higher-tier SSL certificate also brings stability, trust, and a better user experience for your customers.
To obtain an SSL security certificate, while mainstream Certificate Authorities include companies like Comodo, RapidSSL, GeoTrust, Symantec, and thawte, purchasing certificates through your domain registrar (such as Namecheap or GoDaddy) is often more convenient[2].
On one hand, centralized management makes binding an SSL certificate to your domain straightforward. On the other hand, if issues arise, you can resolve domain and networking queries through a single provider.
Steps to Purchase an SSL Certificate on Namecheap
When shopping on Namecheap, you can choose from providers like Comodo, RapidSSL, GeoTrust, Symantec, and thawte to find the product that best fits your needs. This is often more convenient and slightly cheaper than buying directly from certificate authorities.
Microsoft and Google are wealthy enough to issue security certificates to themselves.
Among the five certificate providers partnered with Namecheap, Comodo’s PositiveSSL certificate is the most affordable, keeping the annual cost under NT$300 (standard price is $9, which can drop to $1.99 with promo codes[3]). GeoTrust is slightly more expensive and remains a top choice in many professional tech sectors; for example, Namecheap itself uses GeoTrust-issued certificates (2016 update: switched to Symantec).
As for the well-known Symantec, after acquiring VeriSign, it became the world’s leading SSL provider—but they are very expensive! Their prices start at five to ten times that of GeoTrust.
For example, Apple Inc. relies on their SSL security certificates, and among domestic e-commerce platforms, Yahoo Shopping has utilized Symantec-tier SSL certificates.
Please refer to Figure 1 below. When browsing SSL certificates on Namecheap, three main categories appear: “Single”, “WildCard”, and “Multiple Domains”. As the names suggest, these cater to sites of different scales. Generally, if you manage fewer than three websites and they are not large-scale e-commerce or commercial portals, Vedfolnir recommends purchasing a Single Domain certificate for each individual website.
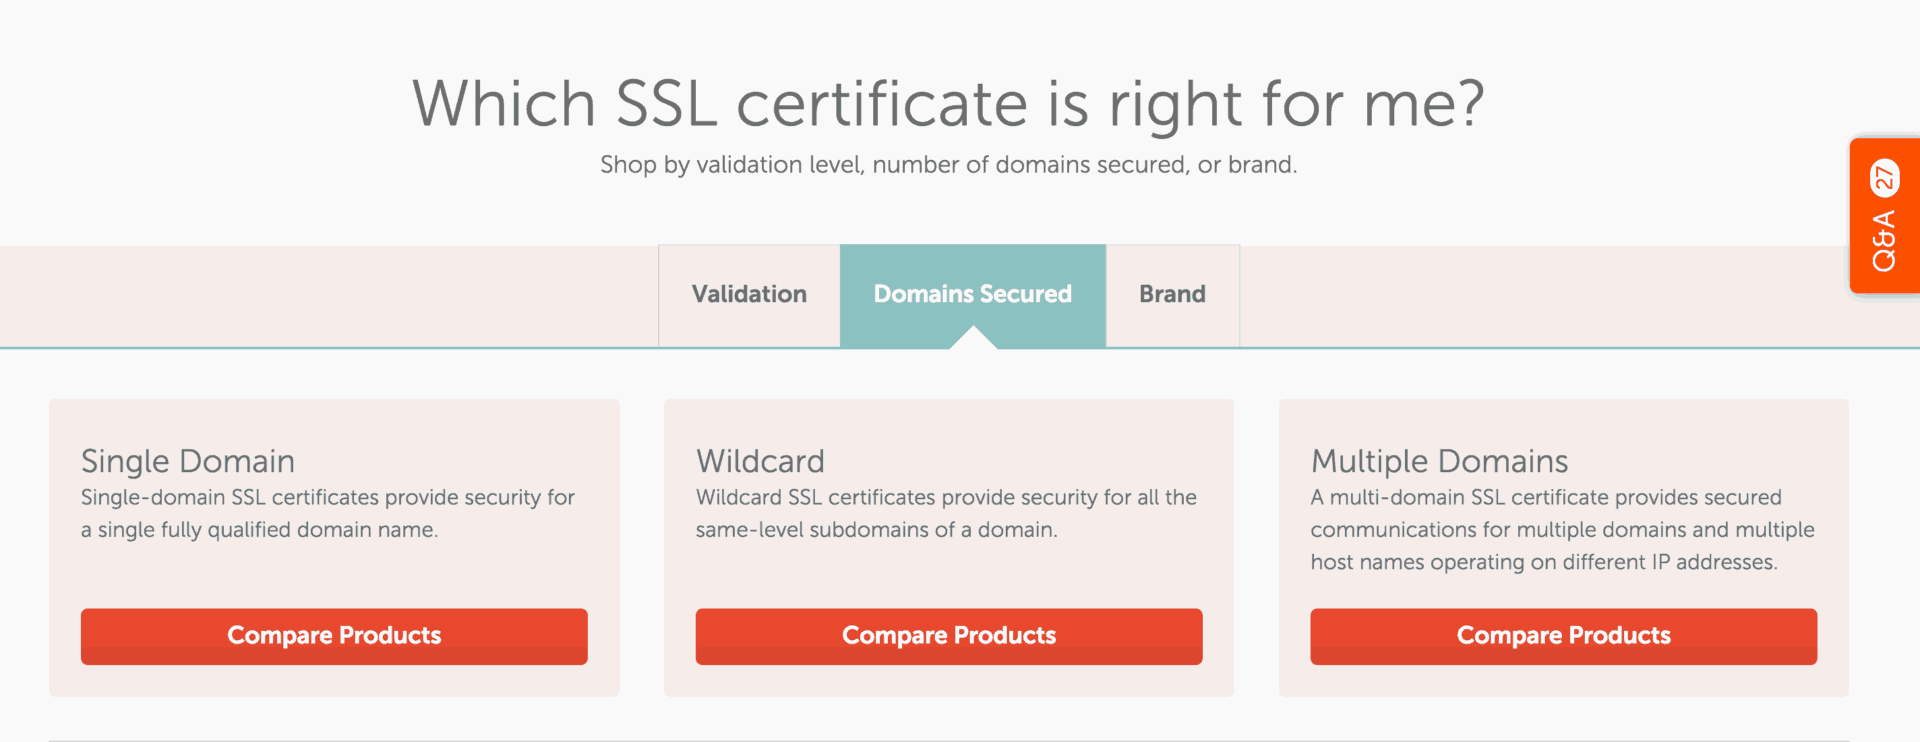 Figure 1: Choosing an SSL security certificate type.
Choosing Between Three Comodo SSL Certificates
If you plan to pick an affordable and reliable option like Vedfolnir did, Comodo is fully sufficient for modern computers and mobile devices. Among single-domain certificates, there are three entry-level (affordable) options: “Positive SSL”, “Essential SSL”, and “Instant SSL” (commercial sites can opt for EV tier to get their own green address bar badge).
Instant SSL is suitable for companies and organizations, requiring manual verification after submitting business documentation. While Essential SSL costs three times as much as Positive SSL, the cryptographic strength is identical; unless you specifically want the Comodo site seal displayed in the browser bar, the economical Positive SSL is more than enough.
After selecting your desired SSL certificate and completing payment, the system will direct you to the certificate configuration and activation page.
Referring to Figure 2 below, you must first input a “CSR Code”, which stands for Certificate Signing Request. Enter the CSR generated by your server in the “Enter CSR” field. Any hosting provider or web hosting control panel (CP) can generate a CSR[4]. Please consult your hosting provider or generate it through your control panel.
After entering the CSR code, select your web server type (such as Apache) under the “Server Type” dropdown to proceed to the next step.
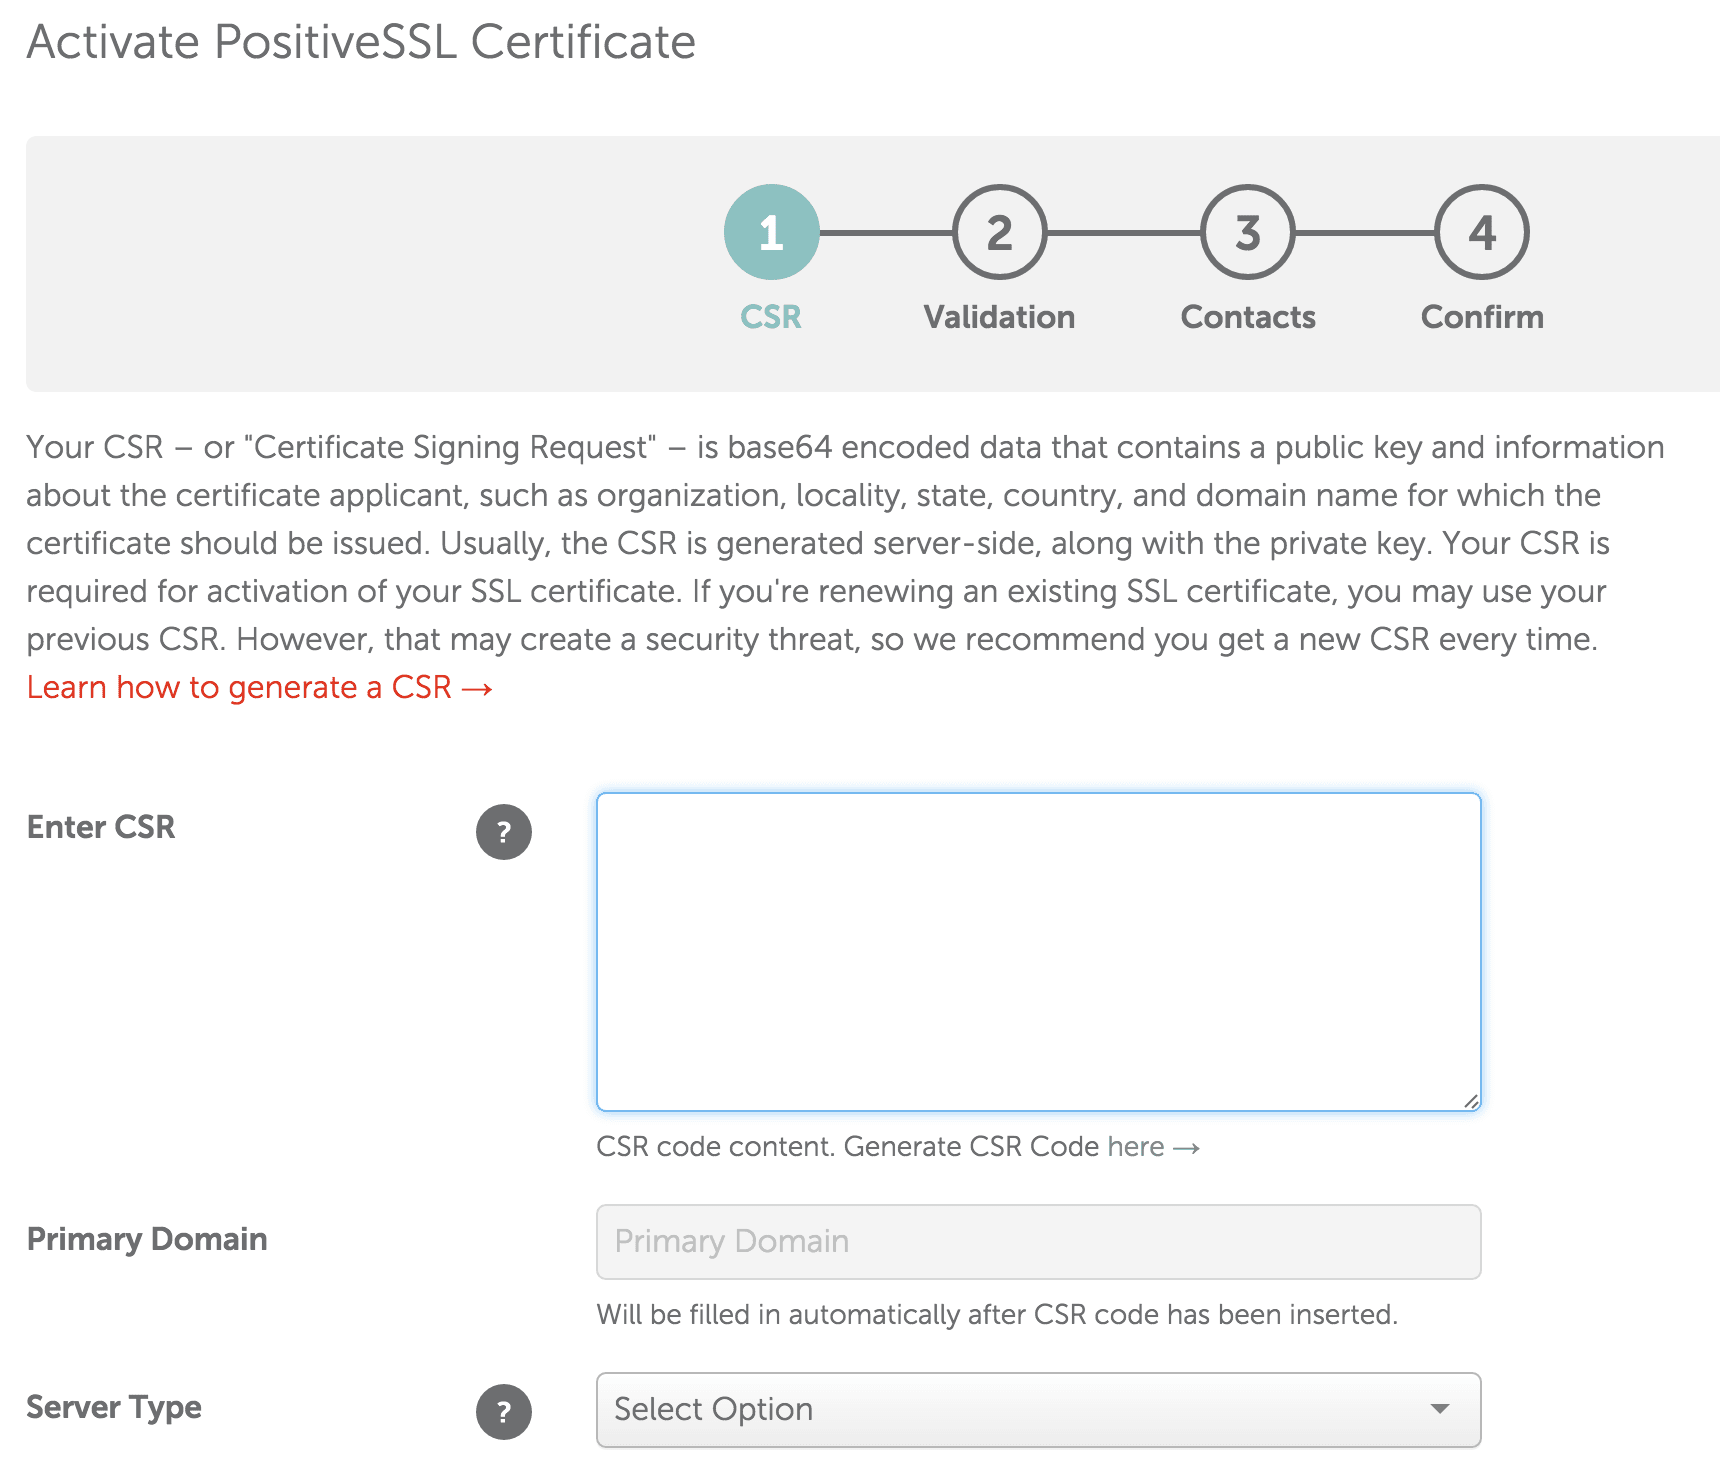 Figure 2: Certificate Signing Request.
After inputting the CSR Code, you need to verify domain ownership and confirm the accuracy of the CSR details.
There are three verification methods (as shown in Figure 3 below): “Email validation”, “HTTP-based validation”, and “DNS-based validation”. Choose the method most convenient for you (email validation is typically the fastest).
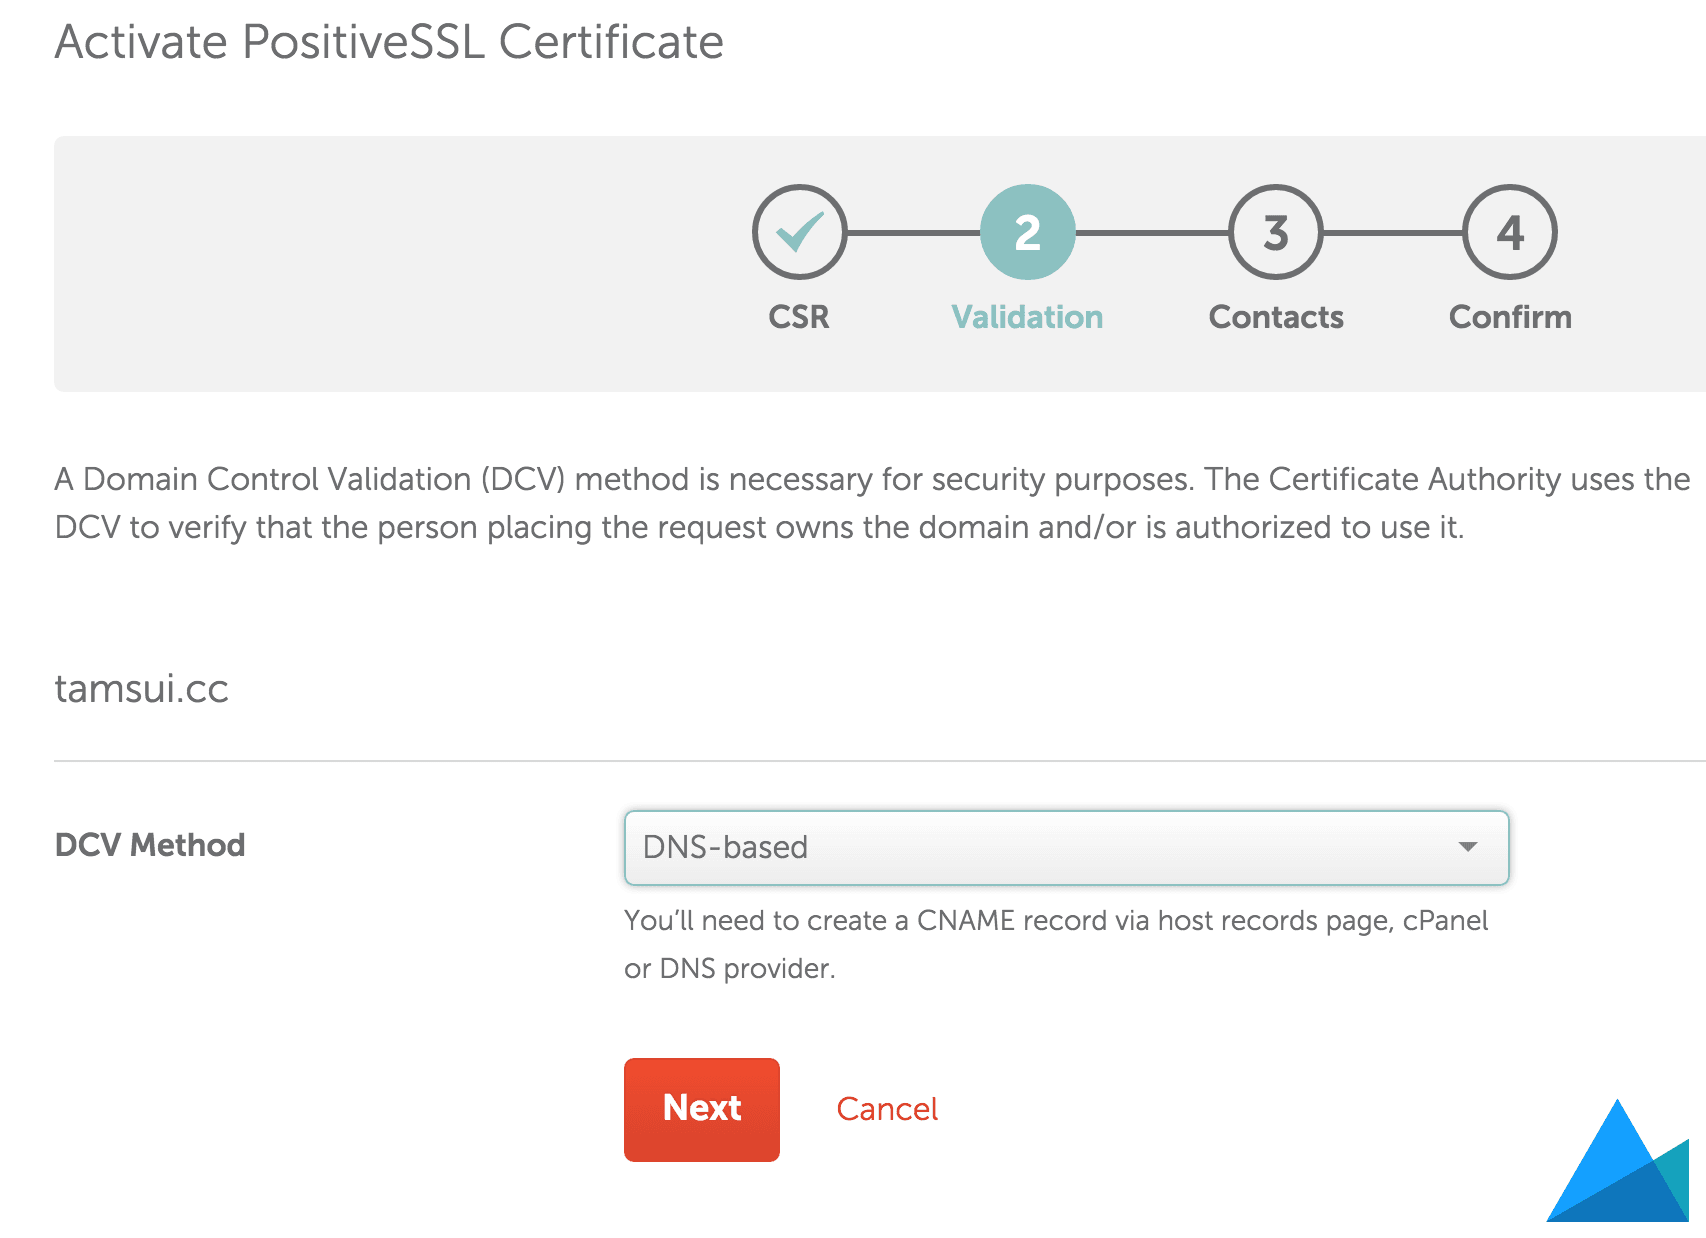 Figure 3: Domain ownership verification.
After completing the four steps above, wait for Namecheap and the CA to verify the details. While official guidelines say verification takes only 10 to 15 minutes, weekend processing can be noticeably slower, so it is best to submit applications or modifications on weekday evenings.
Looking at Figure 4, after purchasing an SSL security certificate, it will appear as an unassigned product in the “Product List” in Namecheap’s management dashboard, independent and not yet bound to any domain.
Click the “Activate” button next to the product to start the verification steps mentioned above. Once the SSL certificate is bound to a domain, it will move from the Product List to the “Domain List”, attached under your domain name.
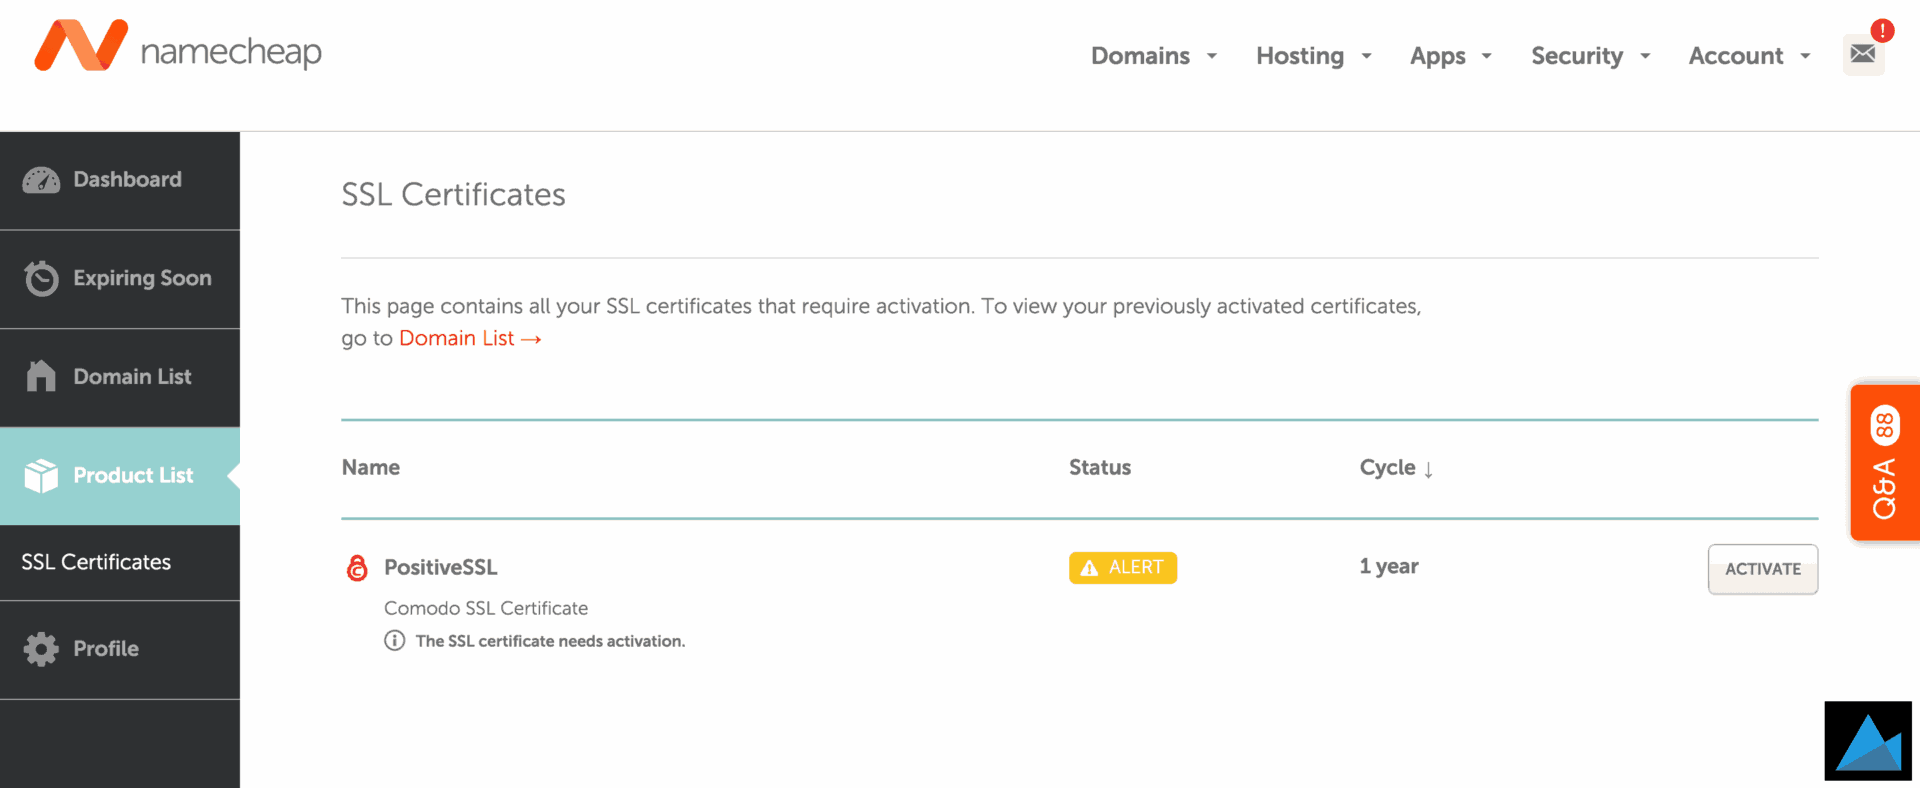 Figure 4: Namecheap product management dashboard.
Finally, once Namecheap completes domain validation, a confirmation email containing a ZIP archive named after your domain will arrive in your inbox. The archive contains two files: “DOMAIN_NAME.crt” and “DOMAIN_NAME.ca-bundle”. Opening these files in a text editor reveals the keys needed for your server’s “SSL Certificate” and “SSL Certificate Authority / Intermediate” fields. Keep in mind that different hosting providers or custom control panels (such as Vesta) have different locations for certificate keys; please consult your host or CP documentation for exact instructions.
References
- WordPress Tutorial: Enabling SSL HTTPS Security Certificates.
- Namecheap domain transfer promotions: “Namecheap Transfer”.
- Namecheap $1.99 SSL Certificate.
- How Do I Generate a CSR Code.
Support Independent Perspectives & In-Depth Insights
Every thoughtful analysis and candid critique comes from our dedication to truth and quality. We choose not to follow sensational algorithms or clickbait headlines.
Sustaining independent research requires reader support. Make a one-time or monthly contribution, securely processed by Google.
Payments secured by Google · Manage or cancel anytime in your Google Account


Comments