
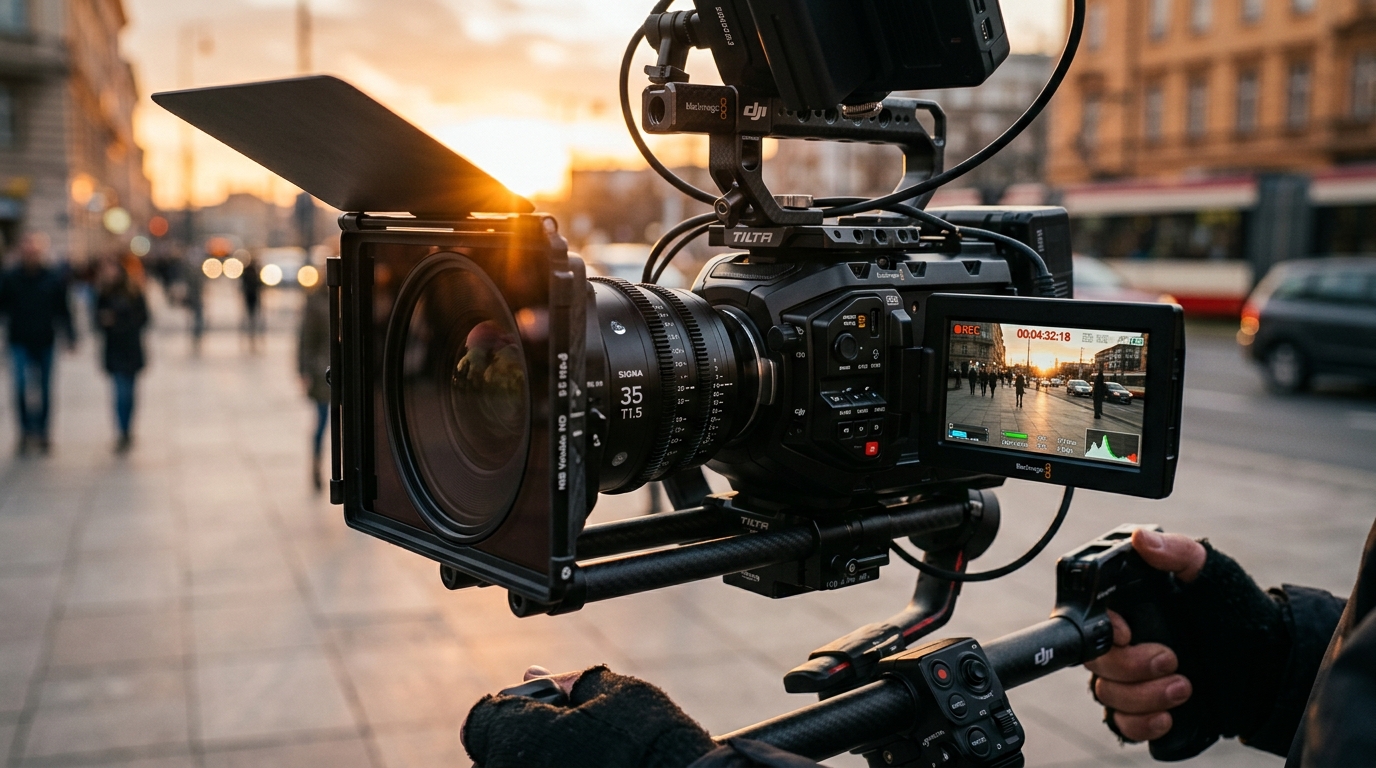
In the world of photography and videography, shutter speed plays a completely different key role.
For still photographers, shutter speed is usually just one part of the exposure triangle (aperture, shutter, ISO), mainly used to freeze high-speed moments (such as freezing a running athlete at 1/2000 second) or to create long-exposure silky water; but in the realm of video recording, shutter speed not only determines the amount of light let in, but also directly governs the naturalness of the entire video’s motion blur, its visual smoothness, and the immersive viewing experience.
Many photography enthusiasts who have just crossed over from stills to video often wonder: “Why does the motion footage I shoot with a top-tier 4K camera always look stiff, stuttering, and jarringly harsh, completely lacking that silky, elegant quality you see in a movie theater?”
The answer often lies in an incorrectly set shutter speed. This article will guide you through the golden standard of motion videography—the 180-Degree Shutter Rule—and analyze special situations, solutions for harsh outdoor light, and practical settings for high-quality video grabs!
1. What Is Video Shutter Speed? Why Is It Completely Different from Photography?
Shutter speed refers to the length of time the image sensor (CMOS) is exposed to light.
For still photos, shutter speed mostly only affects the sharpness and brightness of a single still image; but the essence of motion video is a continuous image assembled in the brain from dozens of still frames played back per second (Frames Per Second, FPS) through the human eye’s “persistence of vision” effect.
If every frame were as razor-sharp as a still photo, with no edge motion blur at all, then when these frames are played back at 24 or 30 per second, the human brain would perceive “broken gaps” in the movement of objects, producing an eerie jumping sensation and visual fatigue.
Therefore, the shutter speed setting for video must be precisely linked to the video’s frame rate (FPS).
2. What Is the 180-Degree Shutter Rule?
The 180-Degree Shutter Rule has been the recognized recording standard and aesthetic benchmark of the global film and television industry for over a century.
1. Historical Origin: The Rotating Semicircular Shutter Blade
In early mechanical film movie cameras, the exposure mechanism was driven by a rotary disc shutter. When the motor advanced the film at 24 frames per second (24 fps), the shutter disc made exactly one full rotation (360 degrees).
Hollywood pioneers discovered that if the shutter disc was made into a half-open semicircle (i.e., an opening angle of 180 degrees), then during one rotation:
- First 180 degrees: Light passes through the opening onto the film for exposure, and the exposure time is exactly half of the operating cycle (i.e.,
1/24 × 180/360 = 1/48 second); - Last 180 degrees: The metal blade blocks the light, and the camera’s internal mechanical claw takes the opportunity to pull the next new frame of film into position.
After countless projection tests, filmmakers found that this rhythm of “half the time exposing, half the time moving in darkness” produced a degree of motion blur closest to the smooth sensation of the human eye observing moving objects in nature—neither dragging nor harshly torn.
2. The Calculation Formula for Modern Digital Photography
In the era of mirrorless cameras and digital cinema cameras, although the physical rotating blade has been replaced by the electronic shutter, the visual physics principle remains unchanged. The modern formula is very simple:
$$\text{Shutter Speed} = \frac{1}{\text{Frame Rate (FPS)} \times 2}$$
In other words: the denominator of the shutter speed should always be “twice” the current frame rate!
3. A Reference Table of Common Frame Rates and Video Shutter Speeds
According to the 180-Degree Shutter Rule, when setting the corresponding frame rate for different shooting situations, the shutter speed should be set as follows:
| Frame Rate (FPS) | Standard Shutter Speed | Practical Setting Option | Visual Feel and Main Application Scenarios |
|---|---|---|---|
| 24 fps | 1/48 sec | 1/50 sec | Classic cinematic feel: The top choice for feature films, short films, narrative drama, and music videos (MV). Closest to the natural human field of view. |
| 30 fps | 1/60 sec | 1/60 sec | TV broadcast feel: TV news, talk shows, YouTube vlogs, online tutorials, and social media livestreams. |
| 60 fps | 1/120 sec | 1/125 sec | Smooth motion feel / 2.5x slow motion: Sports events, handheld tracking shots; can be slowed to 24fps in post for smooth slow motion. |
| 120 fps | 1/240 sec | 1/250 sec | Cinema-grade 5x super slow motion: Extreme sports, splashing water droplets, exploding fireworks, close-ups of running details. |
4. Why Are Shutter Speeds That Are Too Fast or Too Slow Both Undesirable?
What happens to the image if you don’t follow the 180-Degree Shutter Rule?
1. Shutter Speed Too Fast (e.g., 1/500 sec at 24 fps)
- Soap Opera Effect and nervous stutter: Because the exposure time of each frame is too short, the moving subject completely loses “motion blur.” When a person waves a hand, a car drives by, or the camera pans, the edges and contours are over-sharpened and torn apart, and the image takes on the soap opera effect of a cheap, low-budget TV drama.
- Exception for a special style: In a few war or thriller films, the director deliberately breaks the rule and raises the shutter. For example, in the famous Normandy landing scene of Saving Private Ryan, Steven Spielberg deliberately used a 90-degree or 45-degree shutter (up to 1/200 sec or higher) to intentionally create the harsh, jarring, grainy tearing of flying sand and running soldiers, conveying an immersive sense of panic and chaos.
2. Shutter Speed Too Slow (e.g., 1/15 sec at 24 fps)
- Excessive blur and trailing ghosts: If the shutter speed is slower than the frame interval, moving objects drag long ghost trails (smearing), and the image looks like a drunken perspective or a dream flashback; handheld shooting will also blur the background along with everything else.
- Dropped frames: In extreme cases, if the shutter exposure time is longer than the playback interval of each frame, the camera cannot reach the preset FPS value, causing substantial stuttering and dropped frames in the video.
5. The Biggest Exposure Deadlock in Video: How to Solve Harsh Outdoor Light?
When we lock the shutter speed firmly at 1/50 sec (24 fps), we immediately face the most common nightmare of motion videography: severe overexposure in bright outdoor sunlight!
In bright outdoor sunlight, if you want to maintain a wide aperture (such as f/1.4, f/1.8, or f/2.8) to get a dreamy background bokeh, even if you push the camera ISO down to its lowest native limit (ISO 100), the light will still exceed the limit by 4 to 6 stops or more, causing the entire image to blow out to pure white.
At this point we have three solutions:
1. Stop Down the Aperture (f/8 ~ f/16)
- Drawback: Stopping the aperture down too much eliminates the shallow depth-of-field bokeh effect; and when the aperture is smaller than f/11, the optical diffraction effect significantly degrades the overall image quality and resolution, and also makes the tiny dust particles on the sensor impossible to hide.
2. Lower the ISO to an Extended Value (e.g., ISO 50)
- Drawback: Extended low ISO usually greatly sacrifices the sensor’s dynamic range, making highlights more prone to blowing out to white.
3. The Ultimate Solution: Attach an ND (Neutral Density) Filter
- Best practice: An ND filter is the lens’s dedicated pair of sunglasses!
- An ND filter evenly blocks the light entering the lens without affecting the image’s color balance.
- For outdoor motion videography, it is strongly recommended to get a high-quality variable ND filter (VND, commonly ND2-ND32 or ND8-ND128). Just gently rotate the outer ring to precisely control the amount of light like turning a volume knob, letting you shoot top-tier cinematic quality at f/1.4 wide aperture + 1/50 sec shutter even under the midday sun!
6. Shutter Settings for Special Situations and Anti-Flicker Techniques
Although the 180-degree shutter is the general rule, you need to adapt flexibly in specific environments:
- Anti-flicker under indoor artificial lighting:
When recording under fluorescent lights, LED tubes, or display screens, if the shutter speed does not match the local AC mains frequency, the image will show annoying rolling horizontal dark bands or high-frequency flicker (banding).
- Taiwan, the US, western Japan (60 Hz regions): It is recommended to fix the shutter at 1/60 sec or 1/120 sec.
- Europe, mainland China, eastern Japan (50 Hz regions): It is recommended to fix the shutter at 1/50 sec or 1/100 sec.
- Night scenes and extremely dark low-light environments: When the aperture is already wide open and raising the ISO would produce severe noise, if the subject is not moving much (such as a seated interview or a night-time building), you can try breaking the rule and slightly relaxing the 24 fps shutter to 1/25 sec to gain a full stop of light, but be sure to use a tripod to keep the camera absolutely stable.
7. If You’re Shooting for “Video Grabs,” How Should You Set the Shutter?
In recent years, more and more self-media creators, wedding photographers, and children’s/pet photographers have chosen the workflow of “recording at high specifications and then extracting single-frame photos.”
If your core goal is to pick out razor-sharp still photos from video, the setting strategy must be completely overturned! At this point, the priority of “image sharpness” far outweighs “motion blur”:
1. Raise the Shutter Speed to 4 to 8 Times the Frame Rate
To freeze the moment of a leap, a run, or a micro-expression, every frame must be like an independent freeze-frame photo:
- 24 fps: Raise the shutter to 1/100 sec to 1/200 sec.
- 30 fps: Raise the shutter to 1/120 sec to 1/250 sec.
- 60 fps: Raise the shutter to 1/250 sec to 1/500 sec.
2. Enable High Frame Rates and Maximum Resolution
- Push the frame rate to 60 fps or 120 fps: The higher the frame rate, the more moments you can choose from per second—60 to 120 frames—greatly increasing the success rate of capturing a blink, a smile, or the peak of a jump.
- Lock the recording specification to 4K or 6K/8K: A single-frame grab from 4K video is about 8.3 megapixels (3840×2160), enough to print an A4 photo or post a high-quality large image on social media; if it’s only 1080p, a grab is only about 2.07 megapixels, and details easily become blurry and grainy.
3. Use Professional Editing Software to Export Single Frames Natively
- Never press the “screenshot key” (PrtScn or phone screenshot) directly on a phone or computer player, as this compresses the screen’s color space.
- The correct approach is to import the video into Adobe Premiere Pro (press the camera icon to “Export Frame”) or DaVinci Resolve (grab a still frame from the color page and export as TIFF/PNG), which fully preserves the uncompressed 10-bit color depth and dynamic range.
8. The Four-Step Best Practice Workflow for Setting Video Shutter Speed
The next time you pick up your camera to record, follow this standard operating mindset:
- 🎯 Step 1: Decide the frame rate (FPS) first
Choose24 fpsfor a cinematic narrative atmosphere;30 fpsfor daily life and social media;60 fps / 120 fpsfor slow motion or dynamic tracking shots. - ⏱️ Step 2: Lock the shutter speed according to the 180-degree rule
Lock the shutter speed dial at twice the frame rate (e.g., 24fps with1/50 sec; 60fps with1/125 sec), and in principle, do not change it arbitrarily during recording! - 🎛️ Step 3: Set the aperture and ISO to determine depth of field and image quality
Set the desired depth-of-field aperture value (such as f/2.8), and set the ISO to the camera’s native base sensitivity (such as ISO 100 or the base ISO in Log mode). - 🕶️ Step 4: Use an ND filter to adjust the final exposure
If the image is overexposed at this point, rotate or attach an ND filter to control the light intake; if the indoor light is insufficient, moderately increase the fill light brightness or raise the ISO within a safe range.
Conclusion
Shutter speed is the first watershed that takes motion videography from “amateur and raw” to “professional and cinematic.”
Following the 180-Degree Shutter Rule injects into your video the natural dynamic rhythm most comfortable to the human eye; while flexibly using a high shutter and higher frame rates gives you the upper hand in motion capture and video grabs.
Today, equip your camera with an excellent ND filter, put standard shutter settings into practice, and experience firsthand the surprise of a dramatic leap in your video’s visual quality!
Support Independent Perspectives & In-Depth Insights
Every thoughtful analysis and candid critique comes from our dedication to truth and quality. We choose not to follow sensational algorithms or clickbait headlines.
Sustaining independent research requires reader support. Make a one-time or monthly contribution, securely processed by Google.
Payments secured by Google · Manage or cancel anytime in your Google Account



Comments