
Most recent smartphones have made built-in anti-blue light features a major selling point—such as ASUS’s Bluelight Filter or the Night Shift mode featured on Apple iPhone series—both engineered to reduce the volume of blue light emitted by display screens.
In particular, macular degeneration has trended younger in recent years, and medical researchers suspect that excess absorption of high-energy blue light by the retinal macula is partly responsible. From early trends in anti-blue light glasses to modern smartphones integrating software-level blue light filters, the goal is always protecting users’ eyes. Given current medical costs where specialized ocular injection therapy can easily cost tens of thousands out of pocket, adopting preventive daily eye-care habits is by far the smarter choice.
Furthermore, when Apple introduced iOS 9.3, they heavily advertised their new Night Shift feature, noting: "**Many studies have shown that evening exposure to bright blue light can disrupt your circadian rhythms and make it harder to fall asleep.**" Night Shift determines local sunset times via the device’s location and automatically shifts display colors toward warmer hues, reducing blue light output.
Whether for preventing excessive blue light absorption or improving overall sleep quality, any feature that truly preserves our well-being is worthwhile. Naturally, the same principle can be applied to desktop monitors and laptops. Below, we demonstrate how to manually configure display color profiles on an Apple MacBook Pro to achieve a similar blue light-reducing effect. Other operating systems (such as Microsoft Windows or Linux) provide analogous control options, which you can easily explore.
Adjusting Apple MacBook Pro Display Settings to Guard Against Blue Light
As shown in Figure 1 below, first open "**System Preferences**" in macOS and select the "**Displays**" pane.
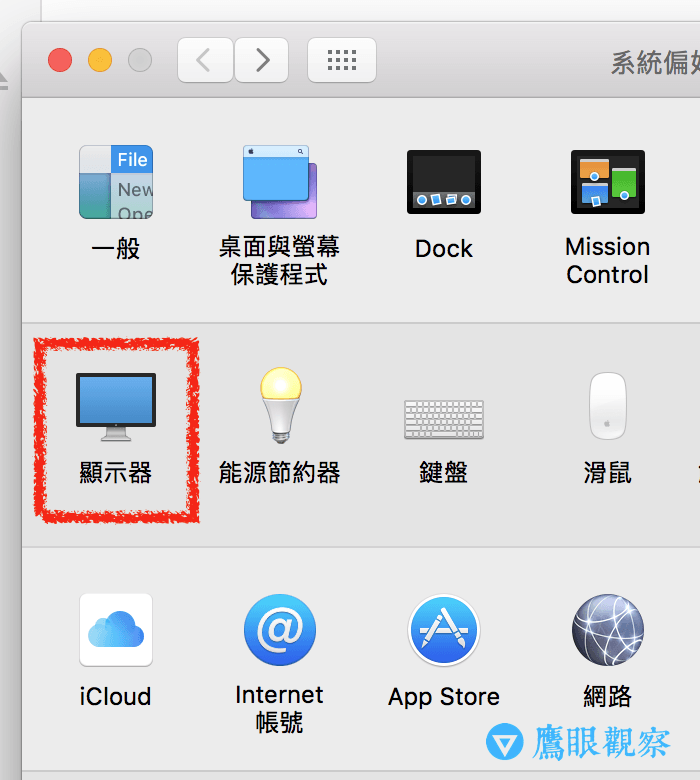
Figure 1: macOS System Preferences.
Next, as illustrated in Figure 2 below, under the "**Built-in Retina Display**" window, switch to the "**Color**" tab. In the "**Display profile**" list, select "**Color LCD Night**". You will immediately notice the screen brightness and colors shifting into a softer, warmer tone.
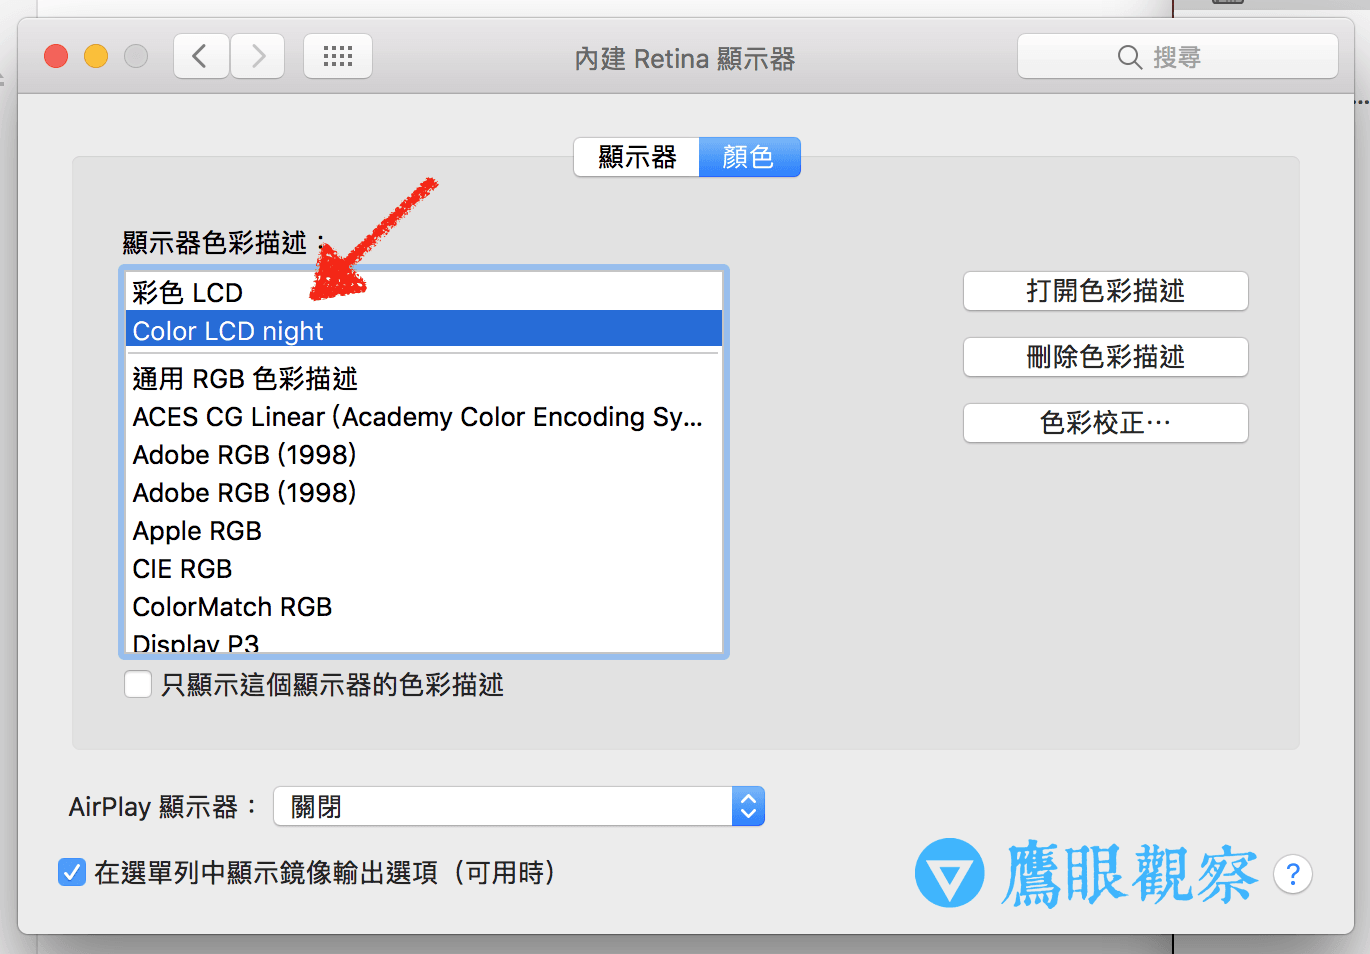
Figure 2: Display Color Profiles.
From the profile name alone, it is clear that "**Color LCD Night**" serves a purpose similar to "**Night Shift**" on iPhone, reducing blue light output by altering the display’s color temperature.
Finally, keep in mind that while switching display color profiles is a quick and straightforward way to reduce blue light exposure, you must remember to switch back to your standard color profile whenever you work on photo editing, video grading, or any color-critical tasks! Otherwise, editing imagery under a warm profile will produce drastically distorted results on normal displays.
Although Apple’s default color profile is "**Color LCD**", across actual testing I often prefer "**Generic RGB Profile**" and "**Apple RGB**". You can test this by opening an image with balanced contrast and rich colors (or an RGB calibration chart) and switching between profiles to find the rendering you prefer (though the gold standard for creative work remains using a hardware monitor calibrator).
Further Reading / Appendix
- Reference for anti-blue light eyewear products.
- Reference for display screen hardware calibrators.
- The primary source of blue light in displays comes from white pixels. To understand the underlying technology, look up the history of blue LEDs.
Support Independent Perspectives & In-Depth Insights
Every thoughtful analysis and candid critique comes from our dedication to truth and quality. We choose not to follow sensational algorithms or clickbait headlines.
Sustaining independent research requires reader support. Make a one-time or monthly contribution, securely processed by Google.
Payments secured by Google · Manage or cancel anytime in your Google Account


Comments